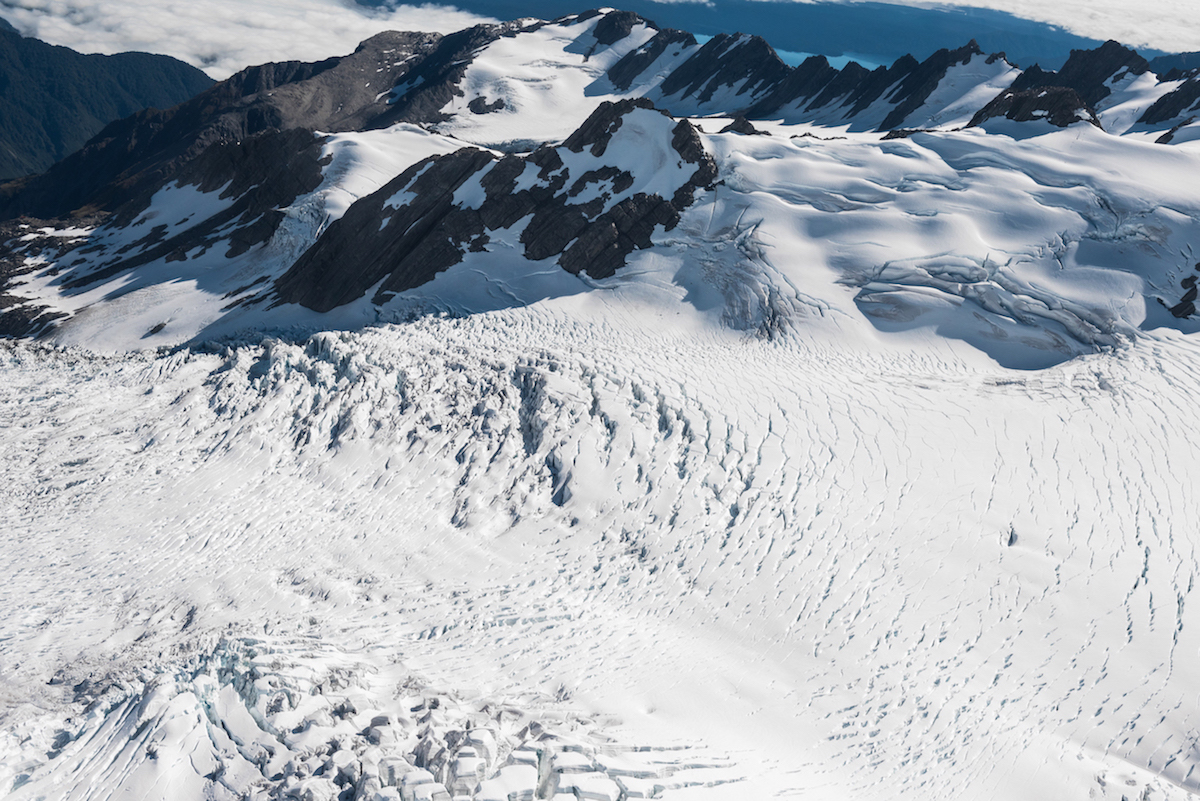
During our New Zealand trip, there was one activity that caught our eye: a helicopter ride through Mount Cook and landing atop the Tasman Glacier. We’ve never flown in a helicopter so experiencing a ride through New Zealand’s tallest peak sounded enticing! For our flight, we booked the “Tasman Experience” with INFLITE Experiences. The 35-minute helicopter ride includes a scenic flight through the Tasman Valley, up through the Hochstetter Icefall, and a landing on the Tasman Glacier.
But first, we need to graciously thank INFLITE Experiences for its amazing customer service! We almost didn’t get to do the helicopter ride due to my scheduling gaffe. We were staying in Wanaka for a day and a half and I thought it was ok to stretch our visit one more day. That extra day, however, was supposed to be the date of our helicopter flight; I had completely forgotten and only realized it upon checking our booking. When we called INFLITE Experience and told them what happened, they just told us to come back the next day and they would accommodate us. Not only were we able to catch our ride but the weather was perfect compared to the poor conditions the day prior. We were very lucky thanks to the generosity of the company and left a hefty tip for the company.
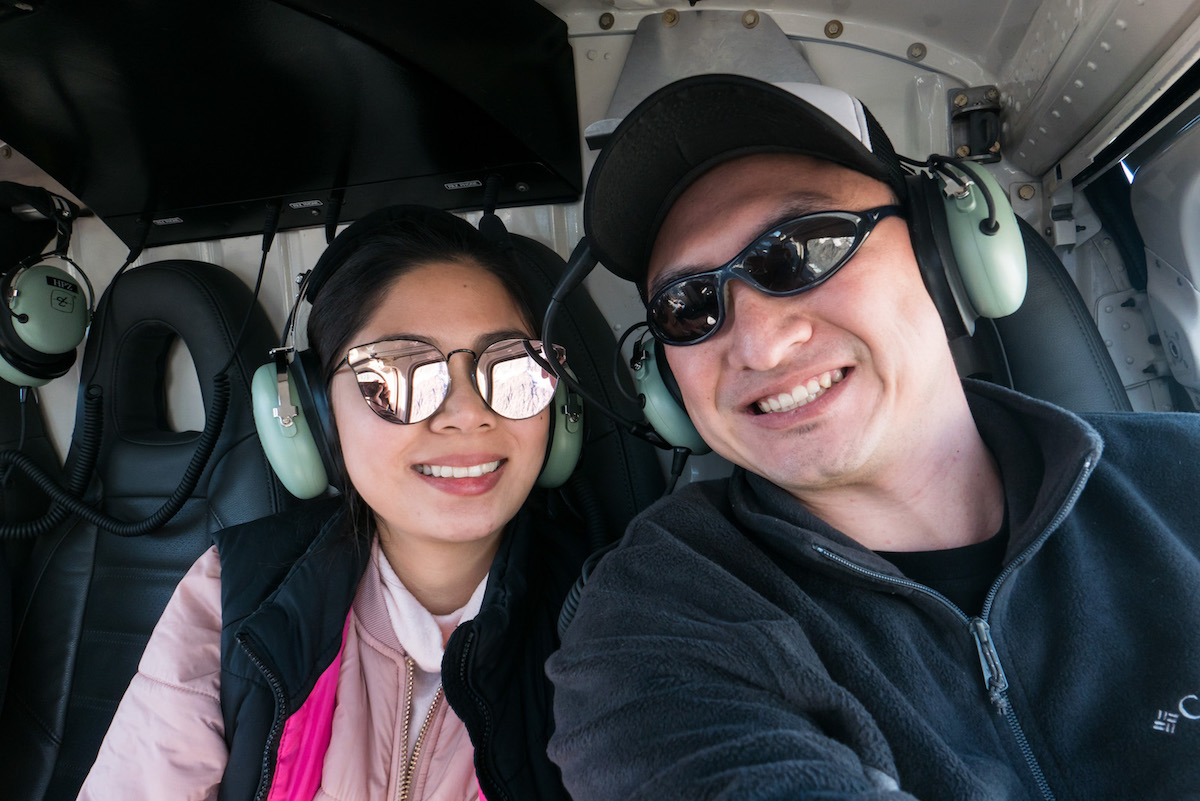
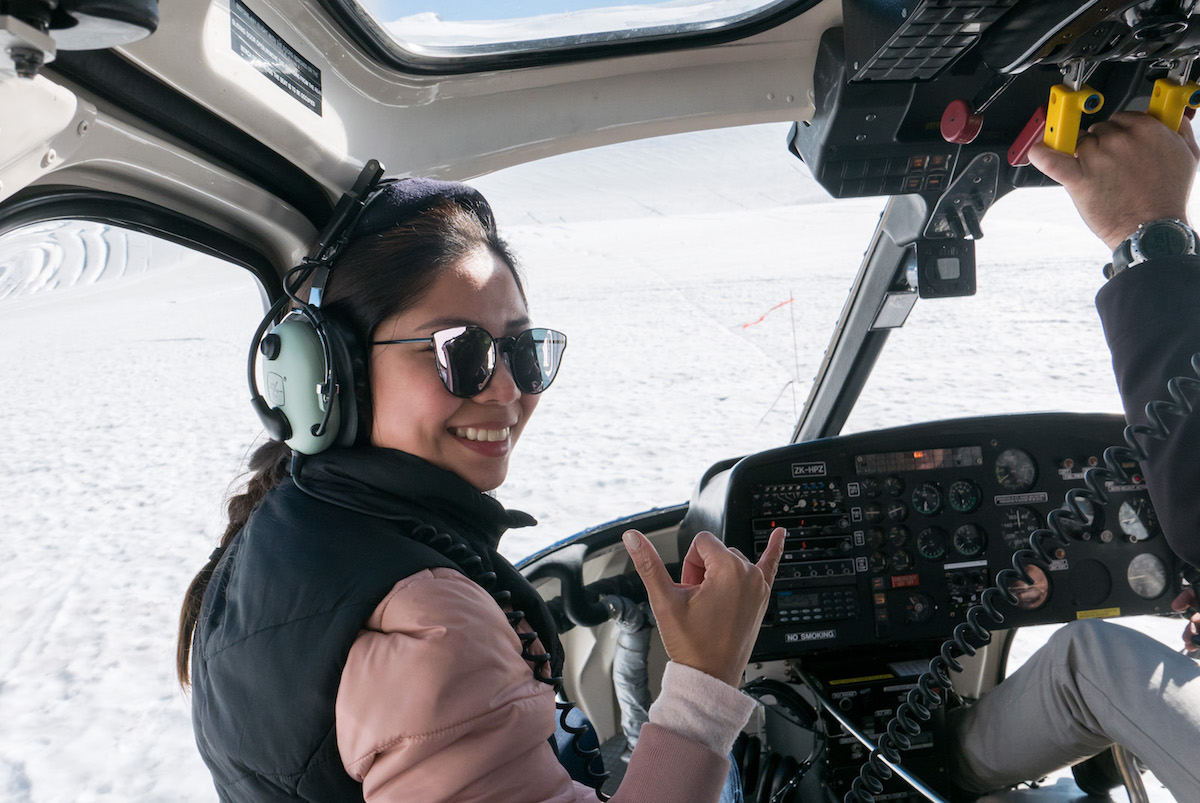
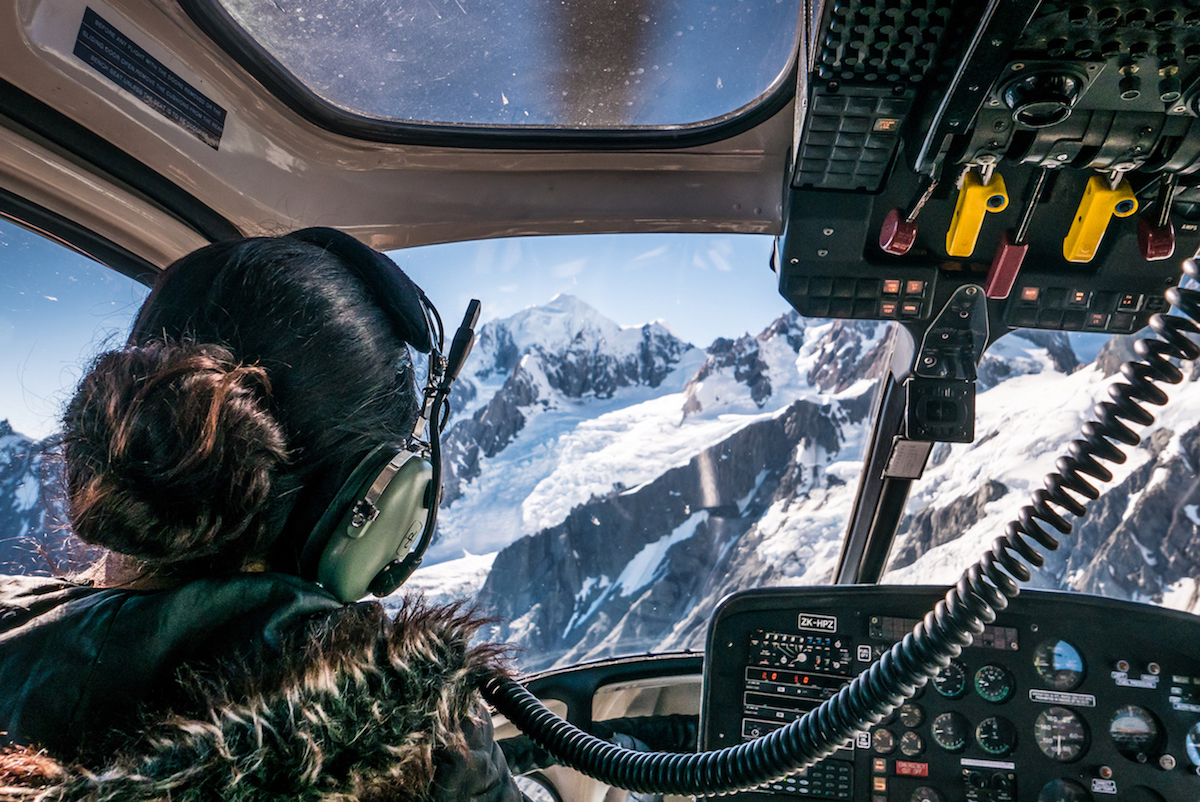
We were rescheduled for a morning flight with only two other passengers. They also had never ridden a helicopter, so within the group, there was collective excitement and slight nervousness. When the helicopter arrived, it made more sense why only four passengers were scheduled; the chopper was only big enough to fit 6 passengers, including the pilot. At least we already did the charter plane flight in Milford Sound and figured it might be a similar ride.
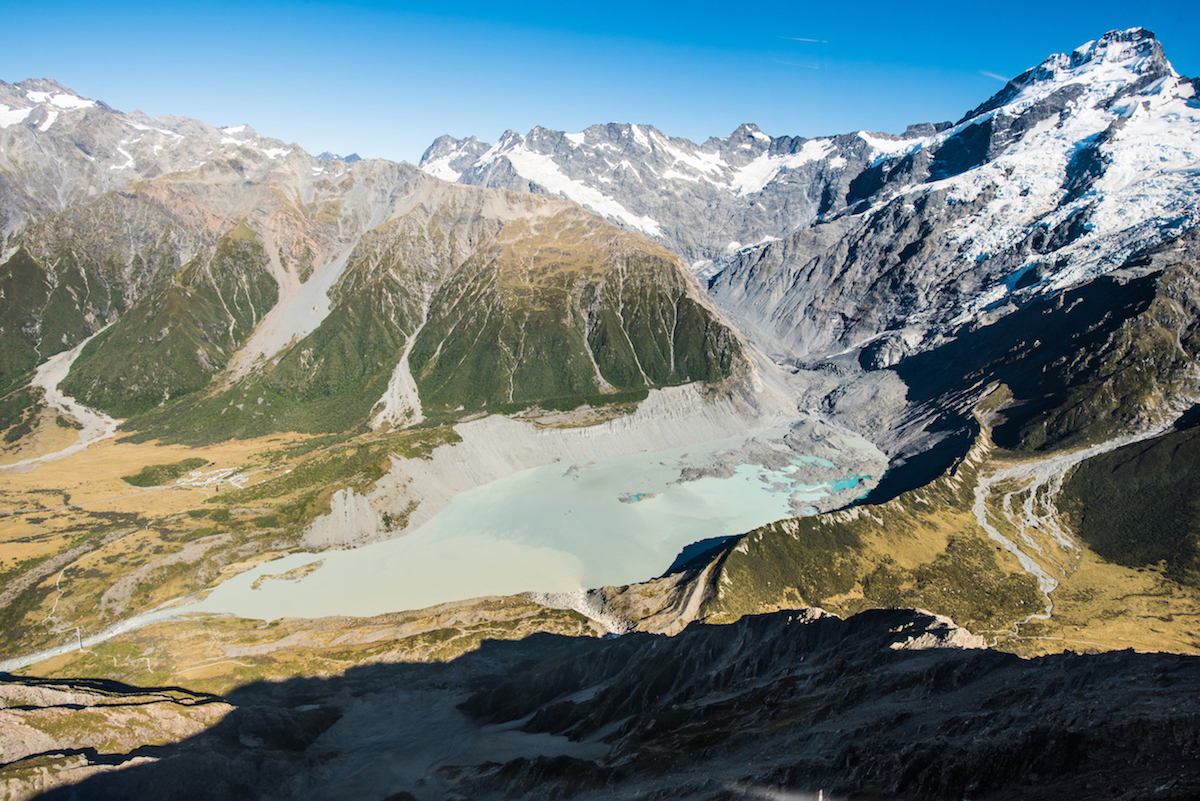
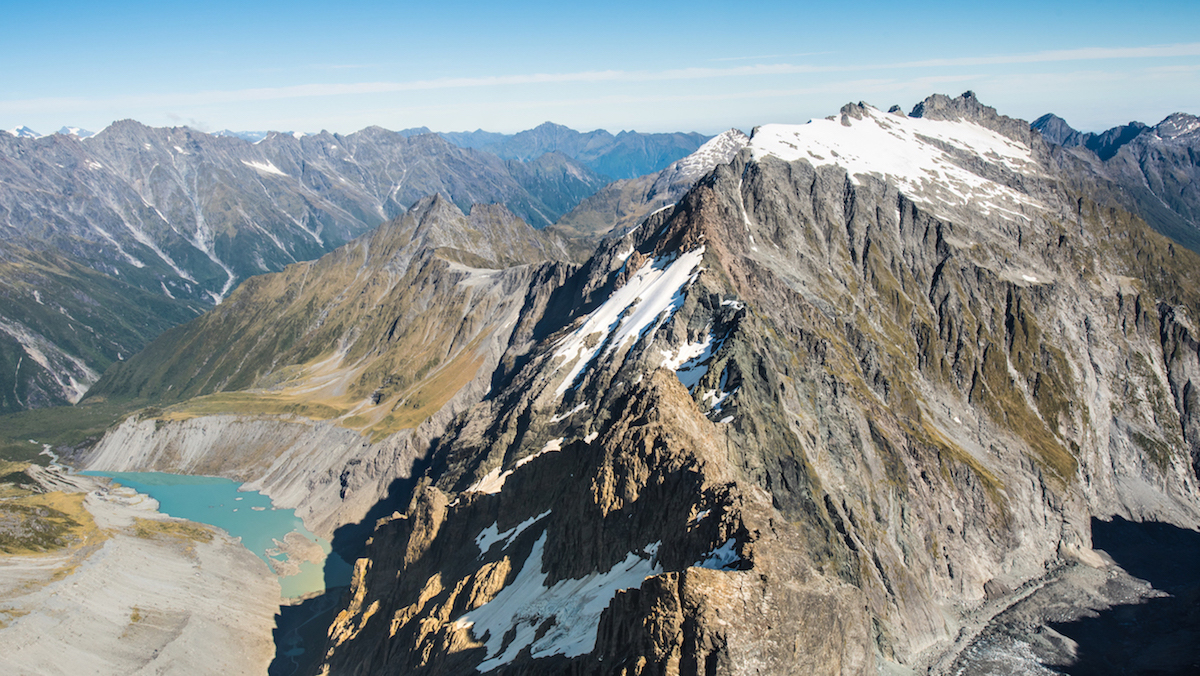
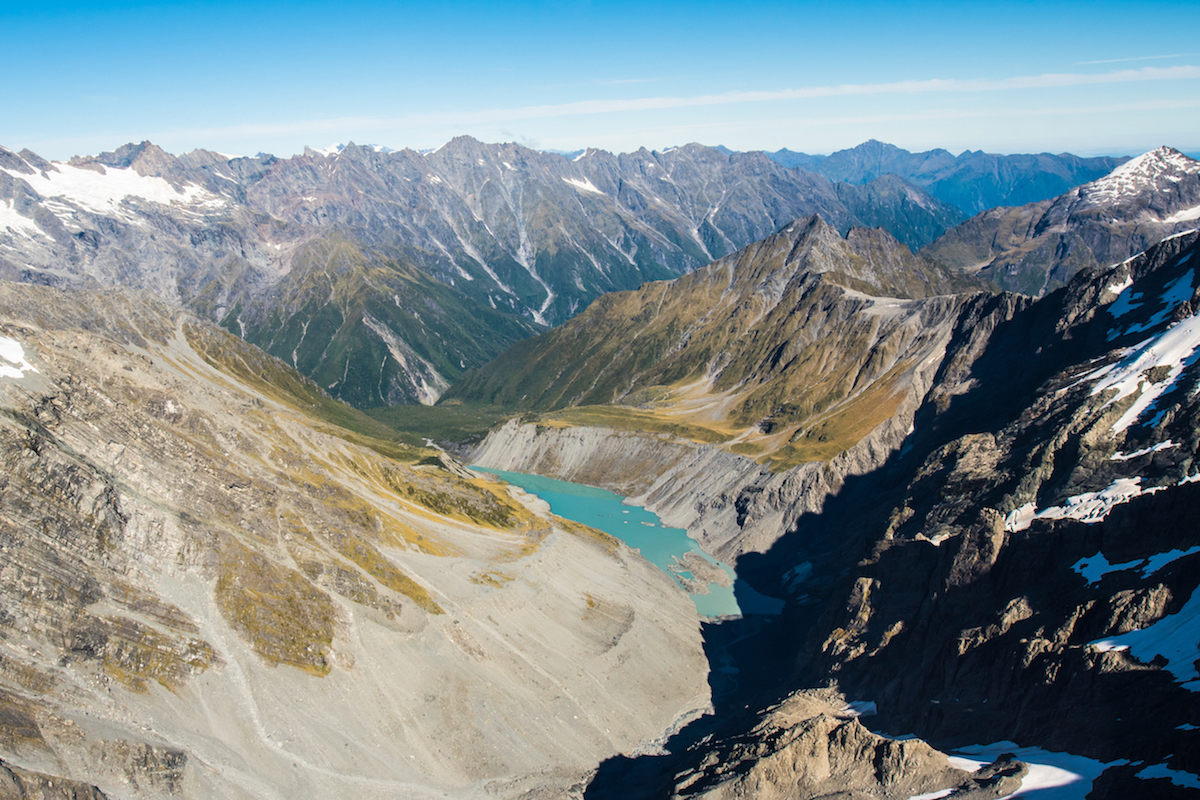
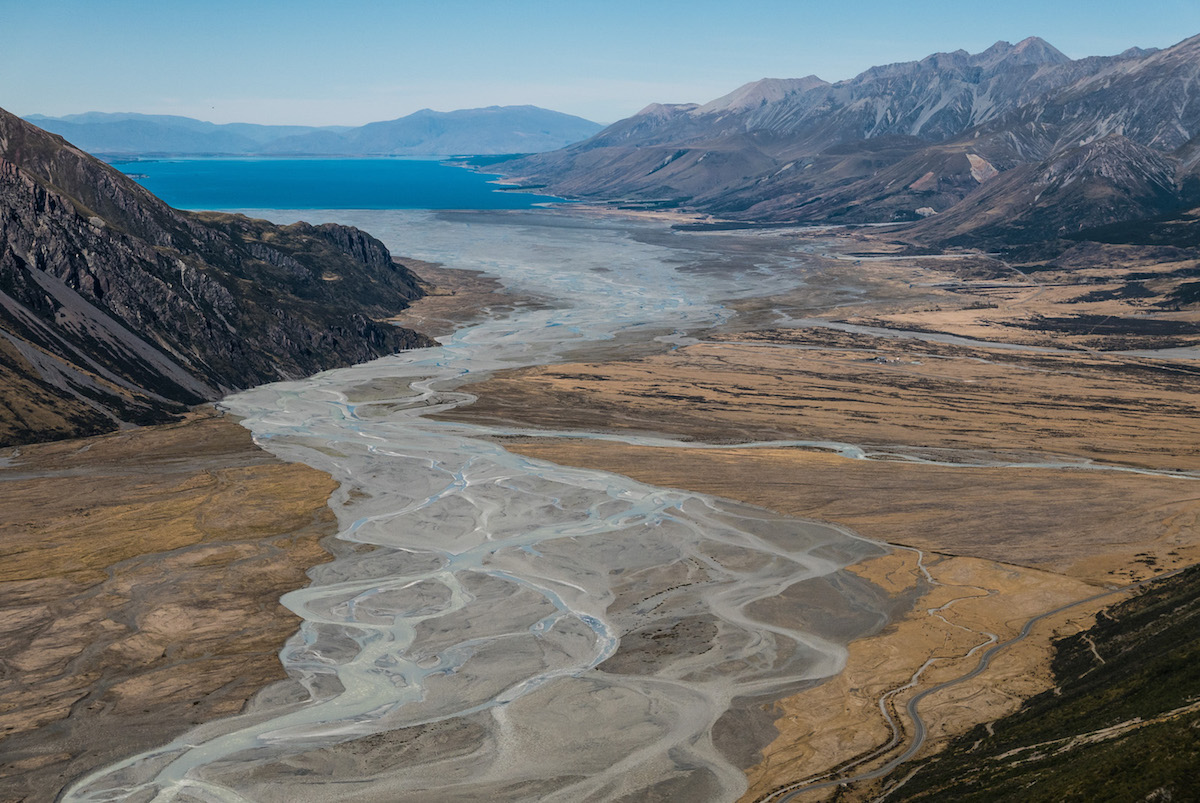
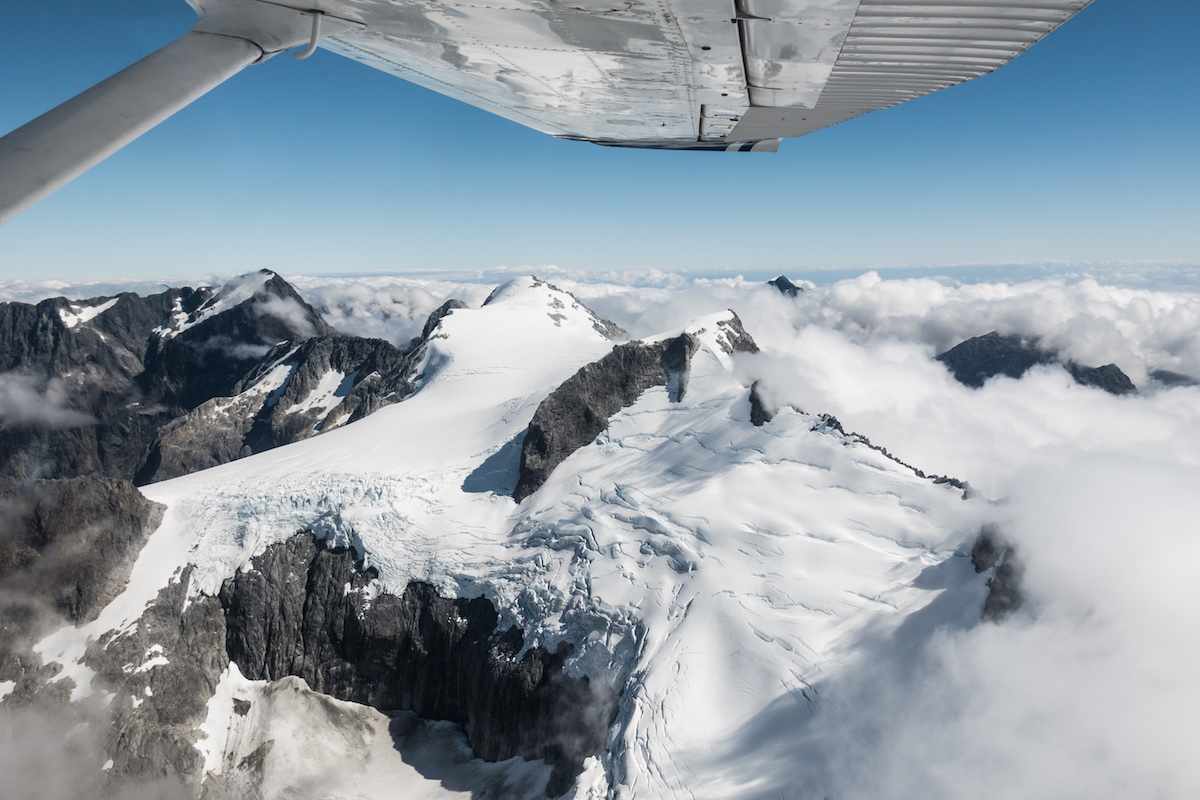
But the helicopter ride was not at all similar to the charter plane. Instead of moderately turbulent movement, the helicopter felt like a smooth yet powerful machine that effortlessly cut through the air. Within seconds of takeoff, we were already hundreds of feet above the ground and flying high over Tasman Lake.
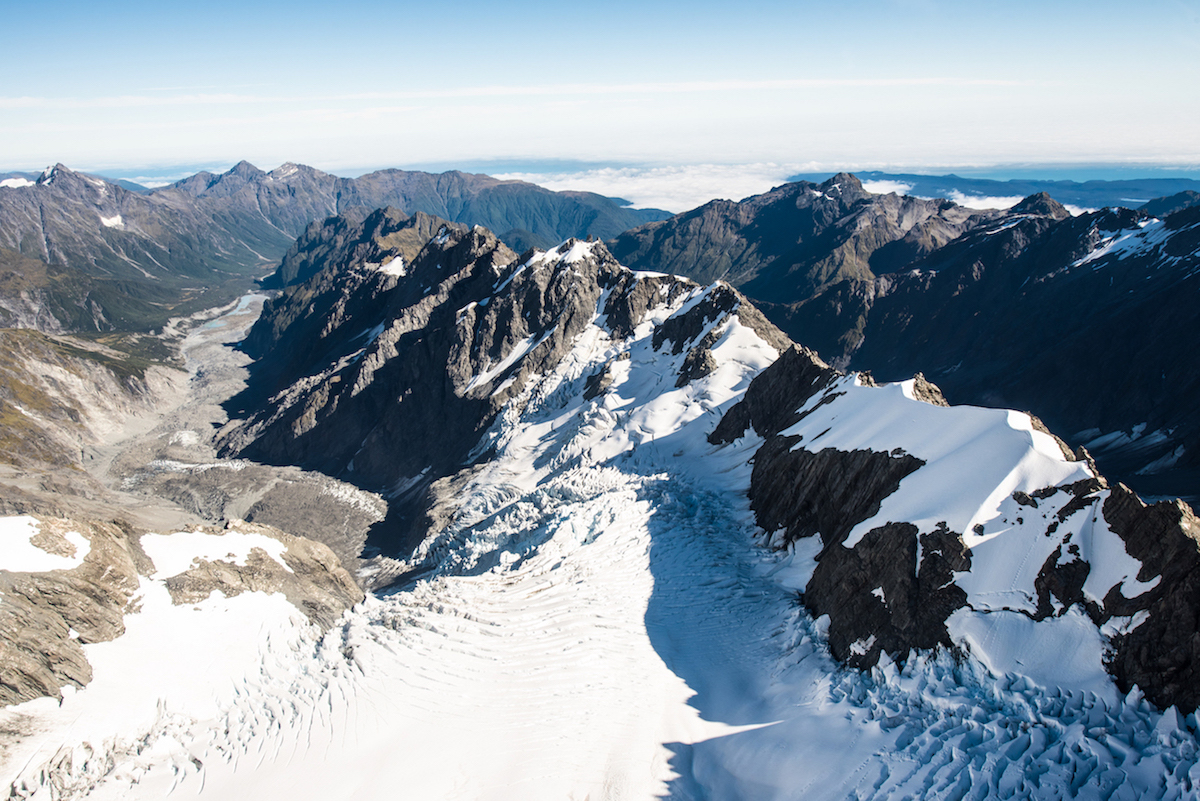
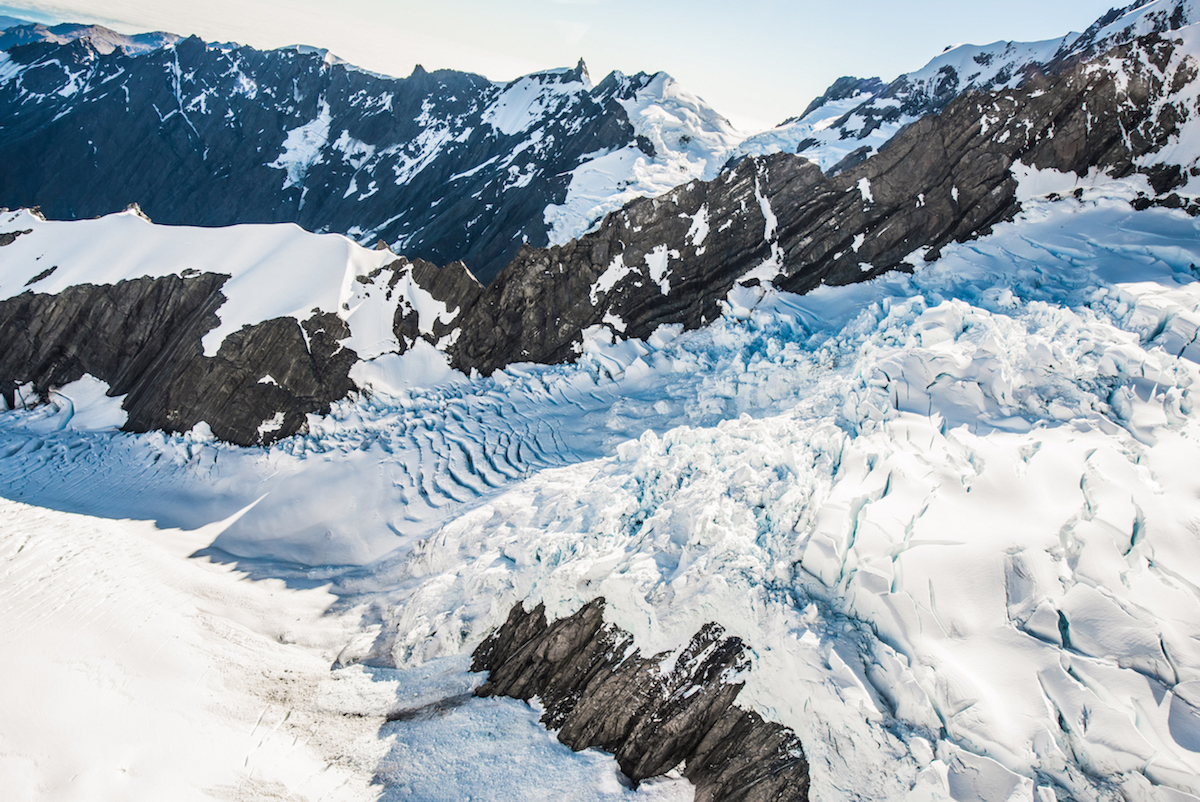
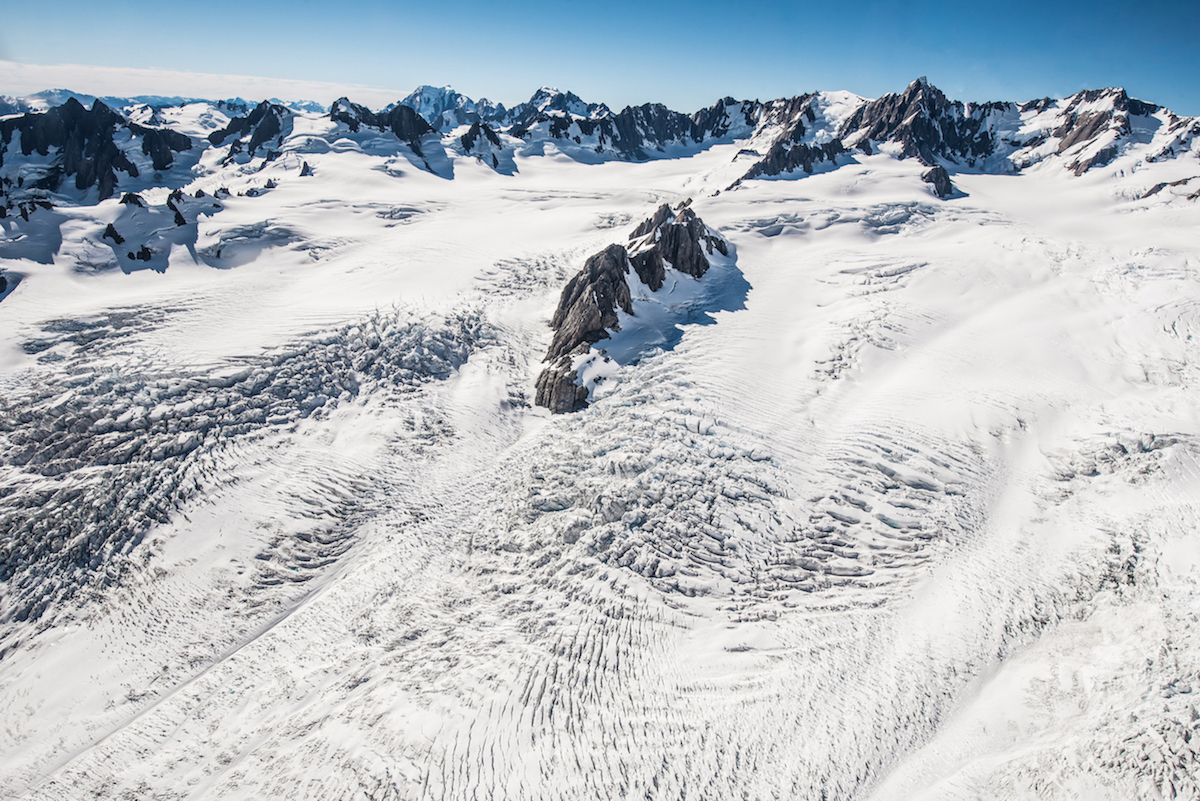
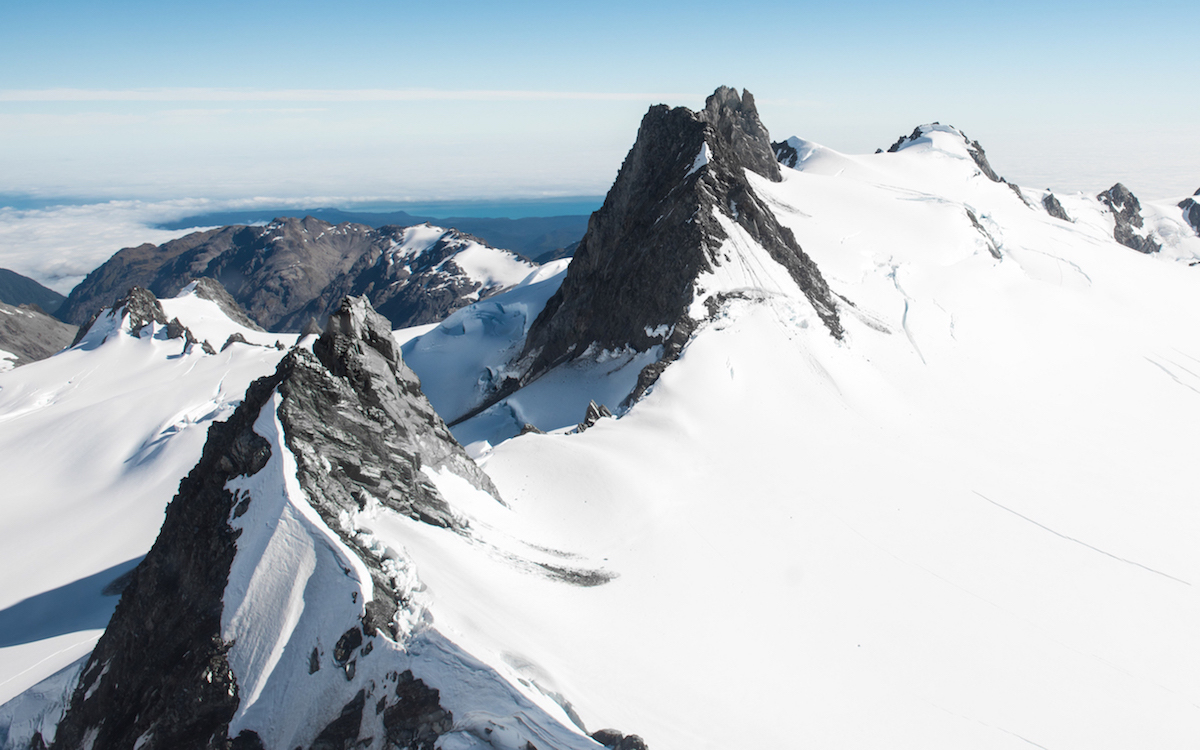
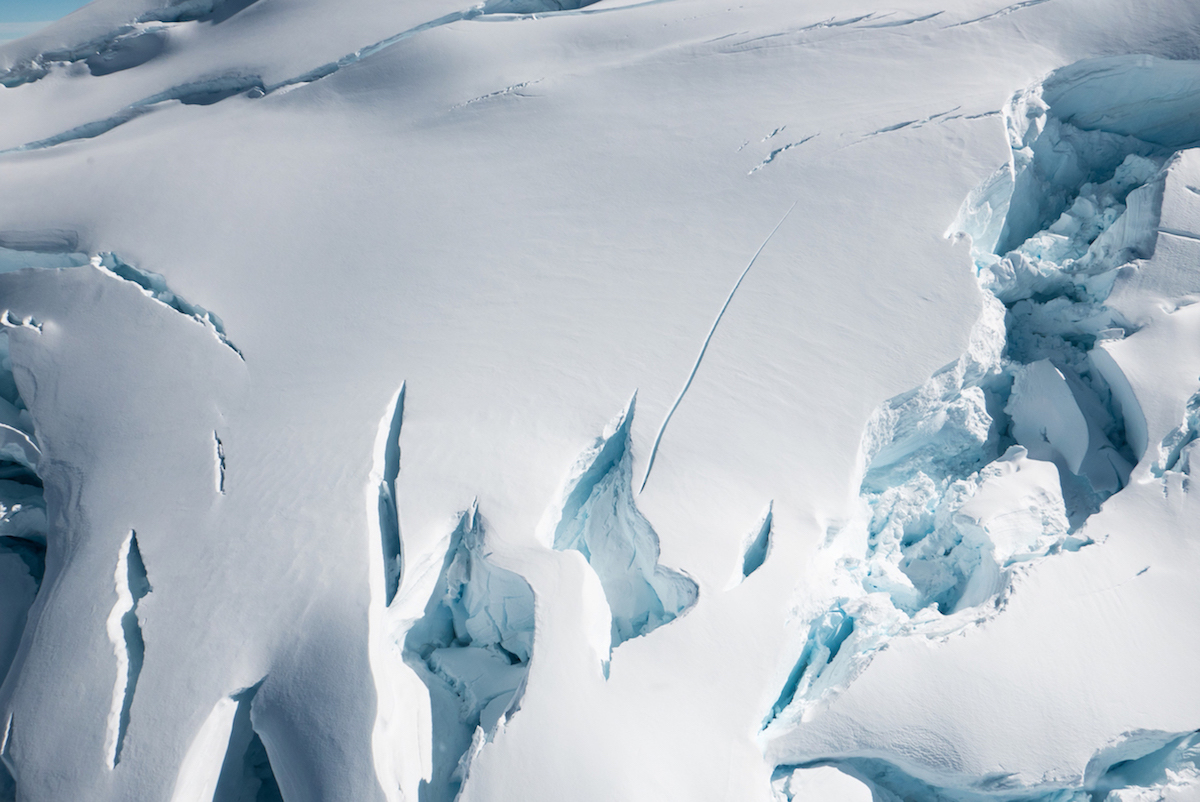
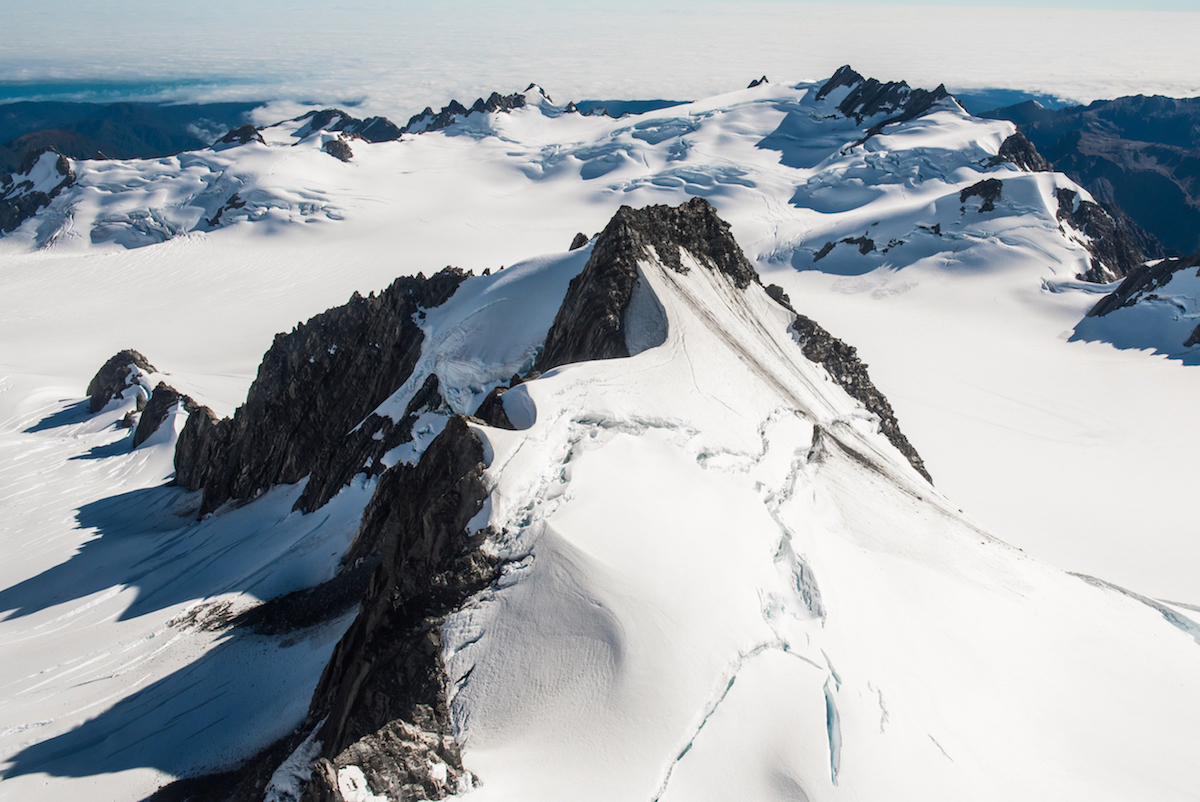
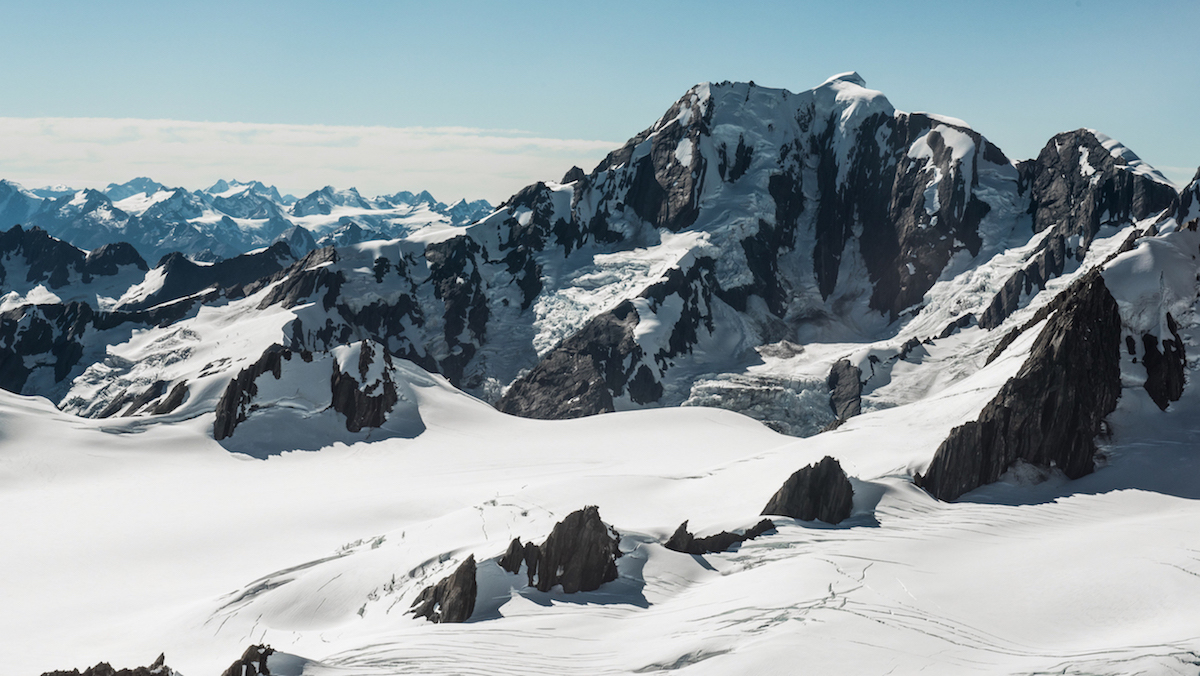
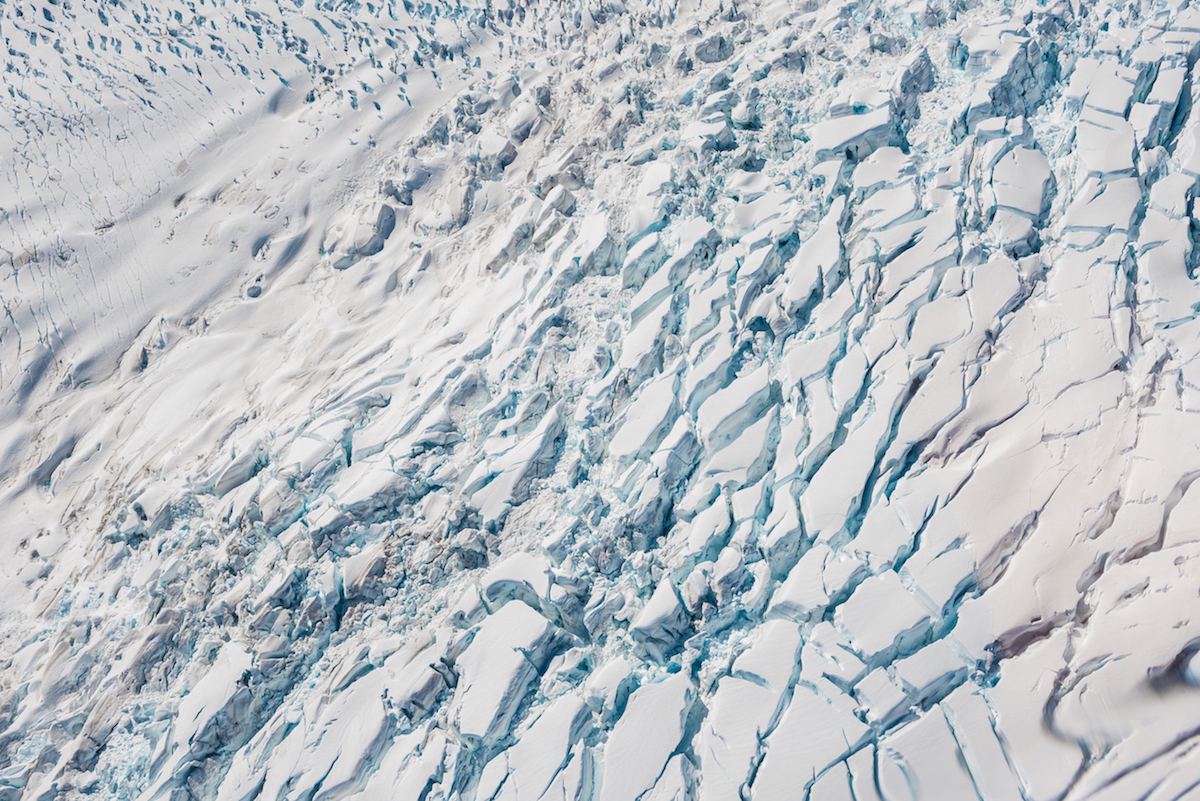
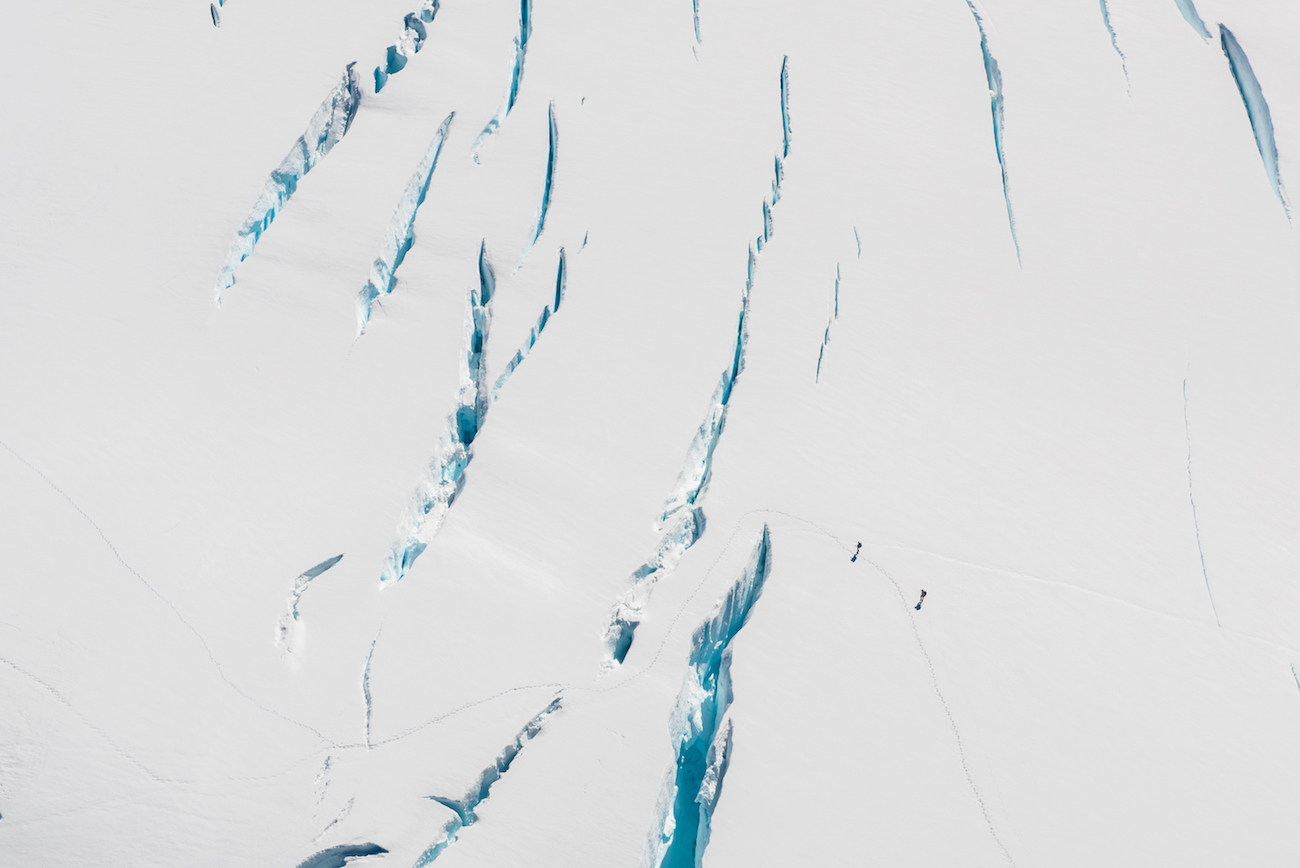
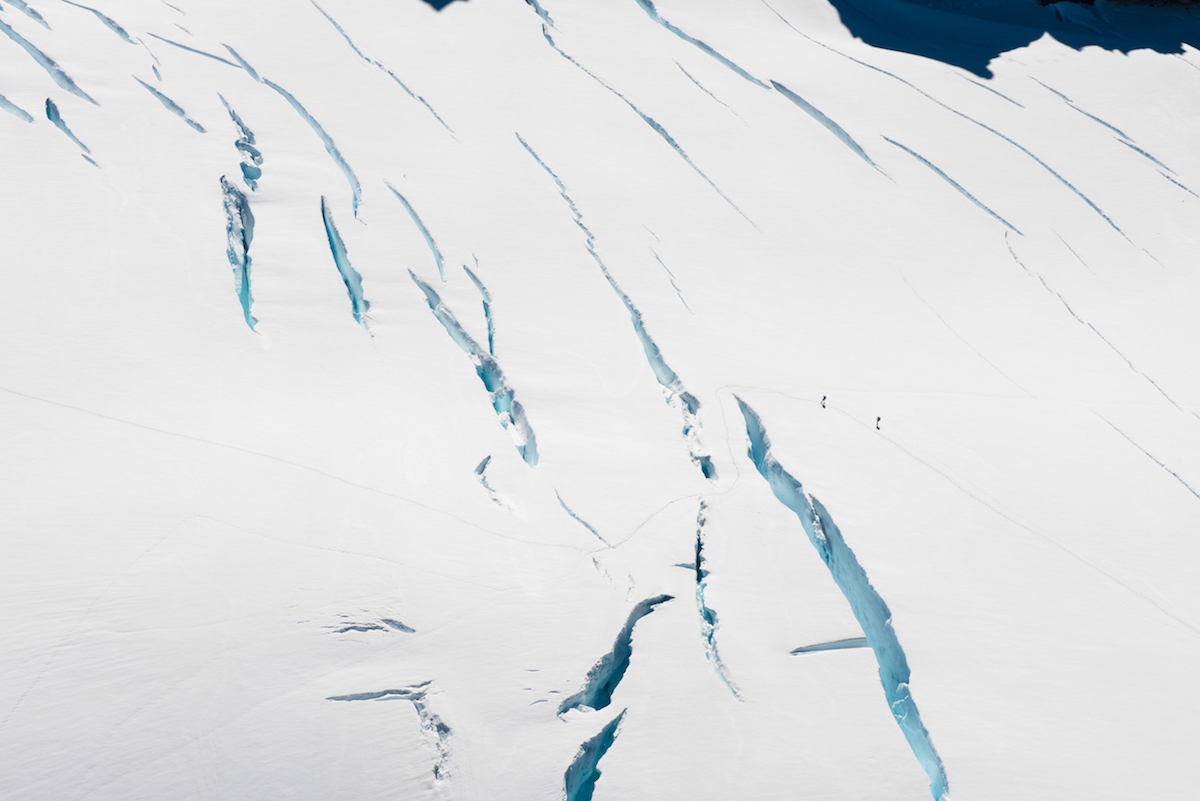
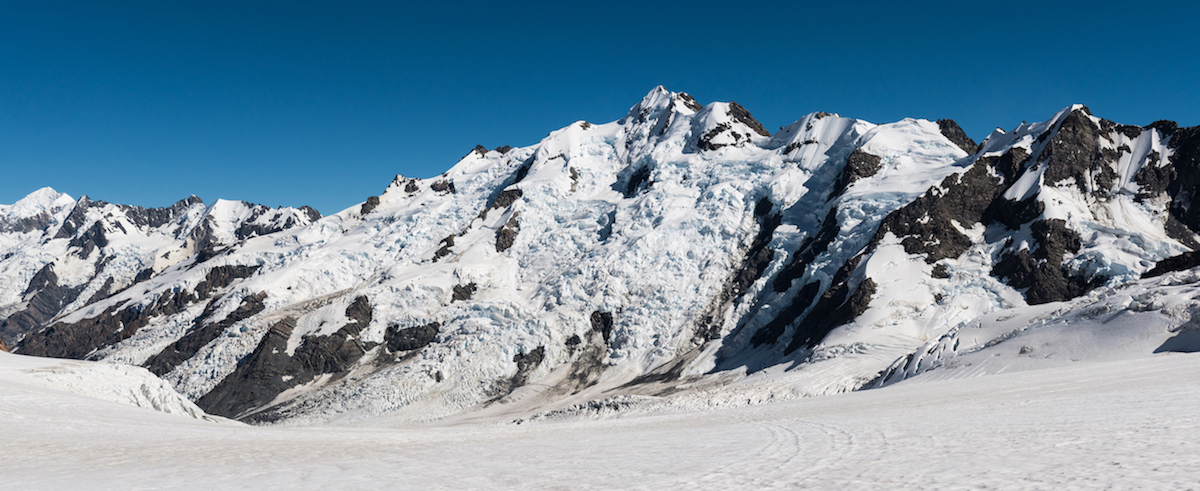
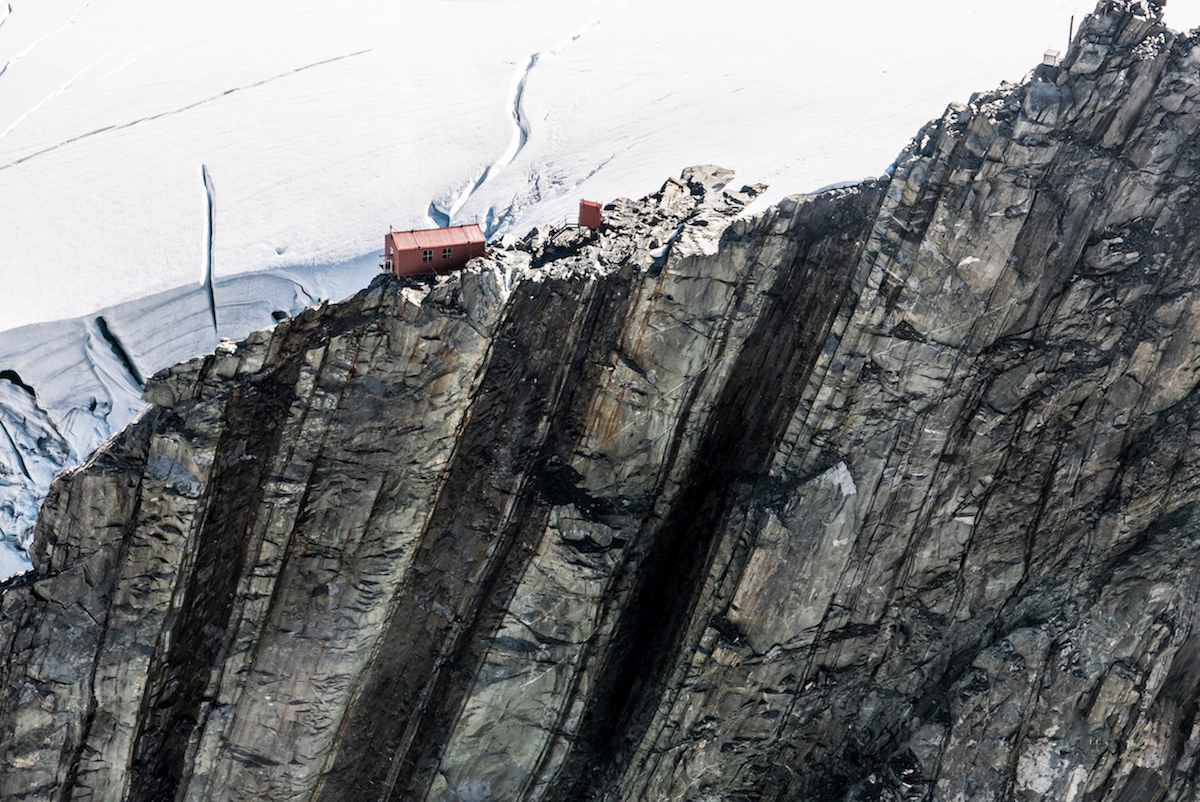
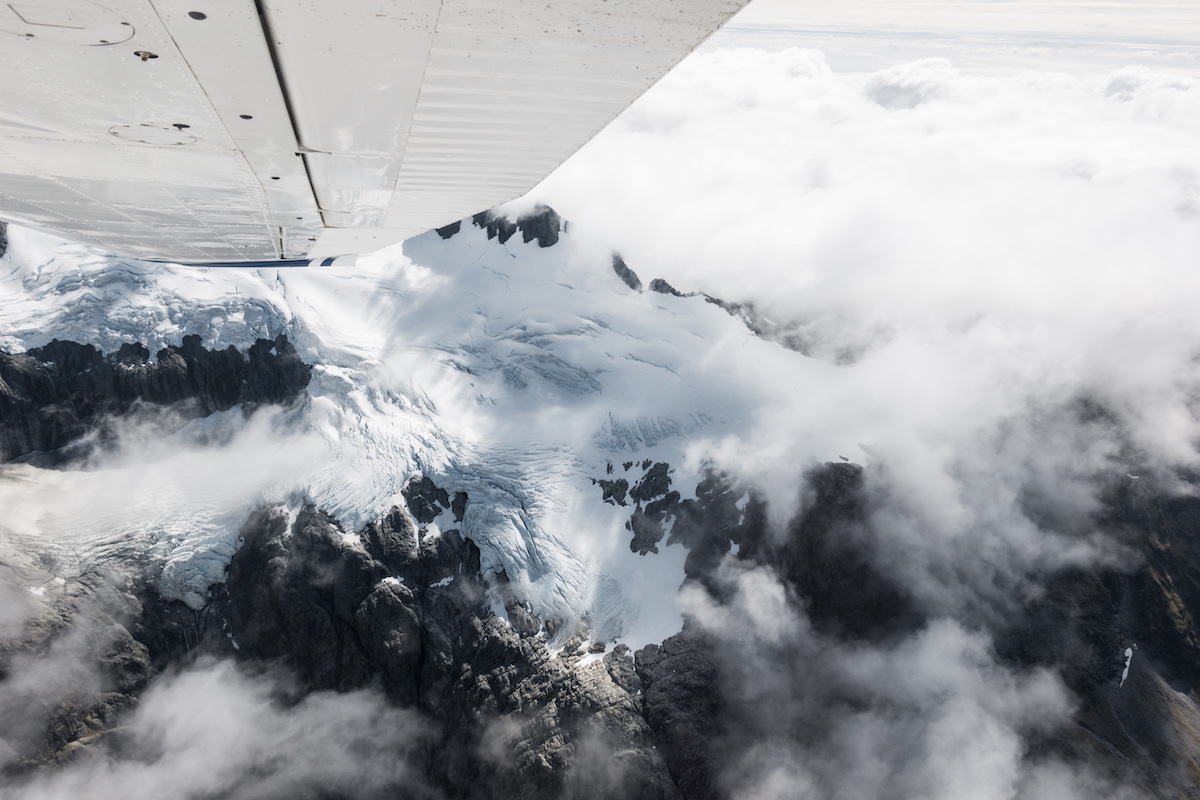
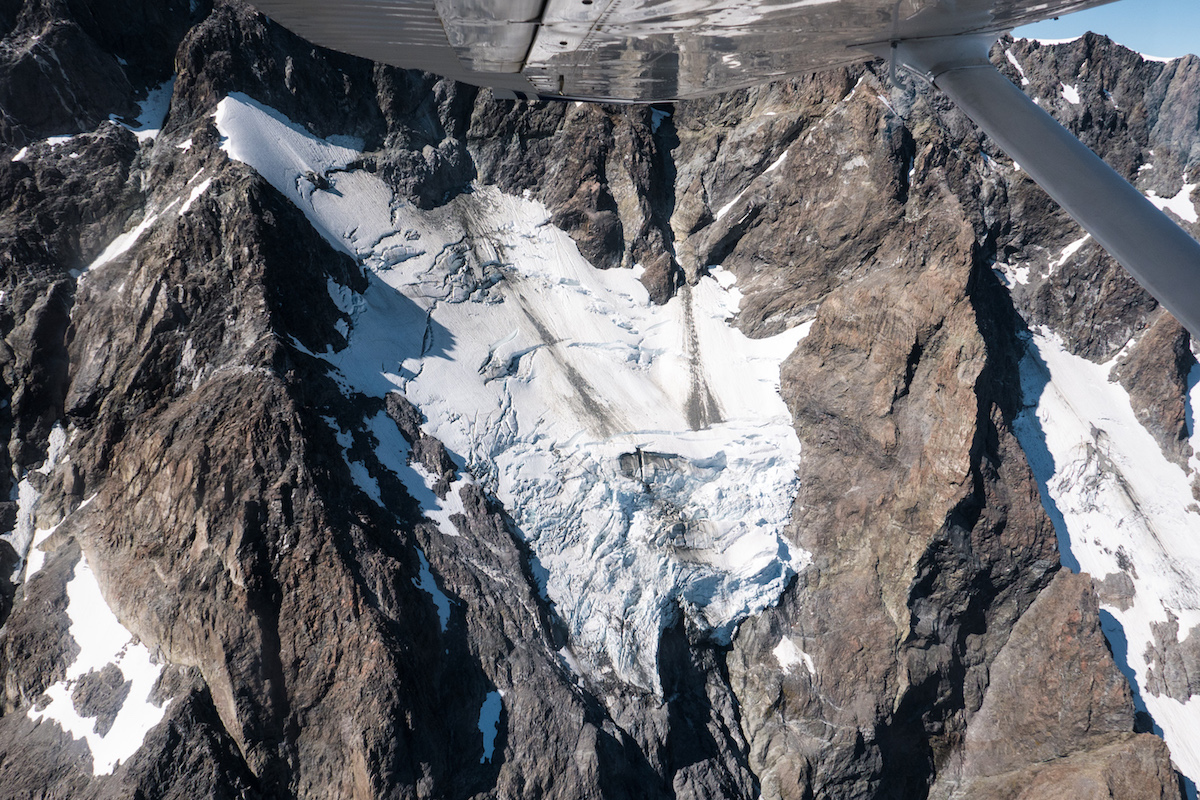
As the helicopter ascended, we moved from bare mountain faces to blanket snow covered caps. The landscape around us was simply stunning and I just snapped tons of photos of the views we had. The formations of the snow were amazing with huge crevasses and unusual shapes and patterns. Just as astounding was when we saw two hikers navigating through the snow-covered mountains and around the crevasses that could easily swallow them up.
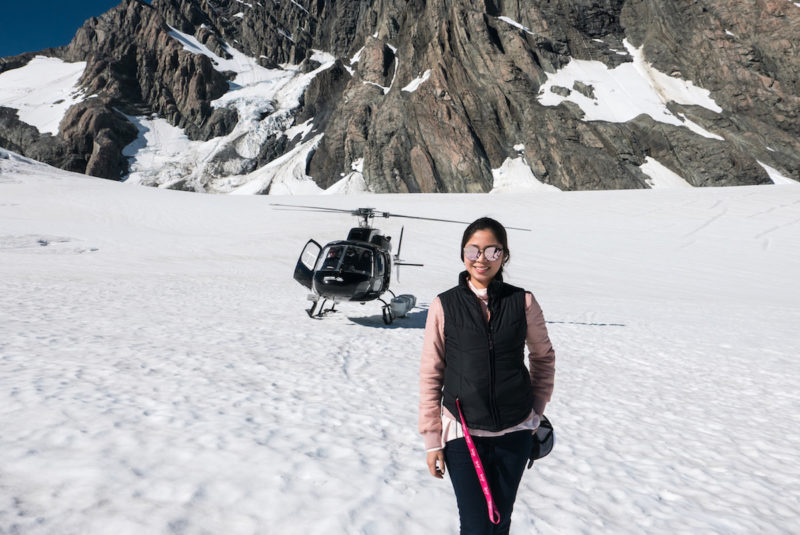
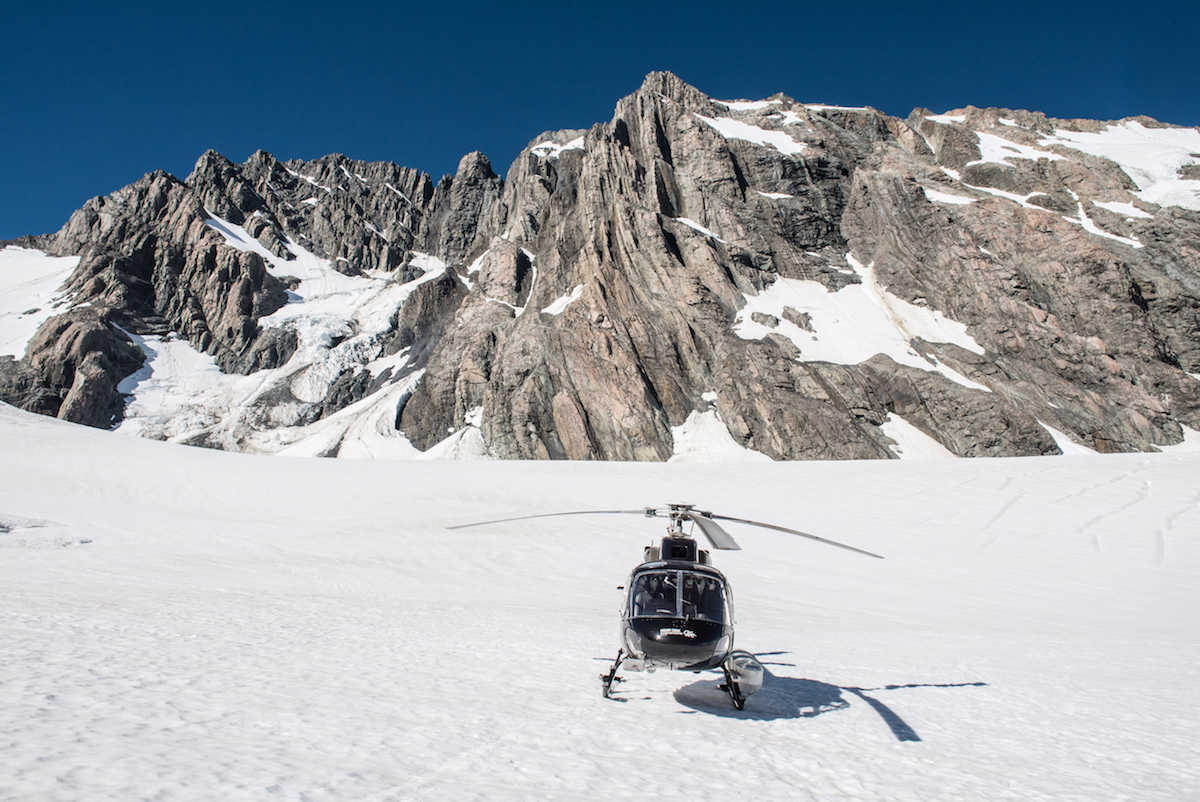
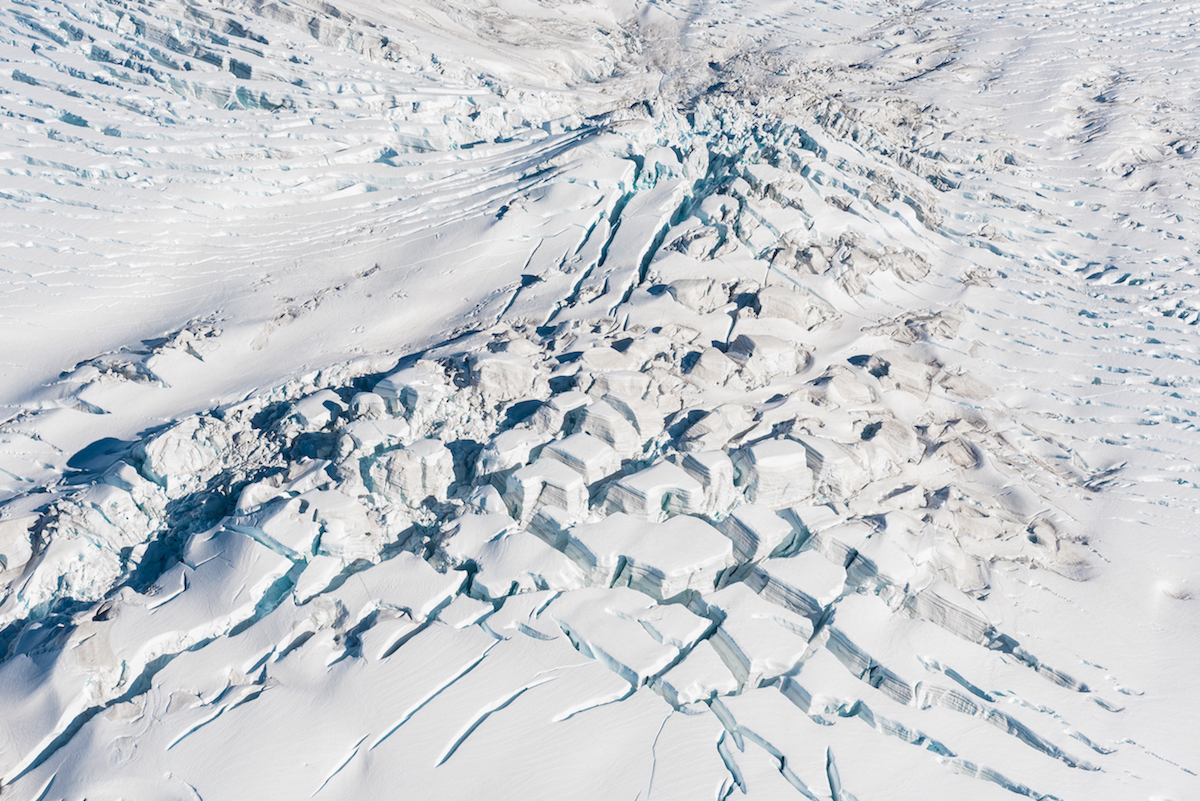
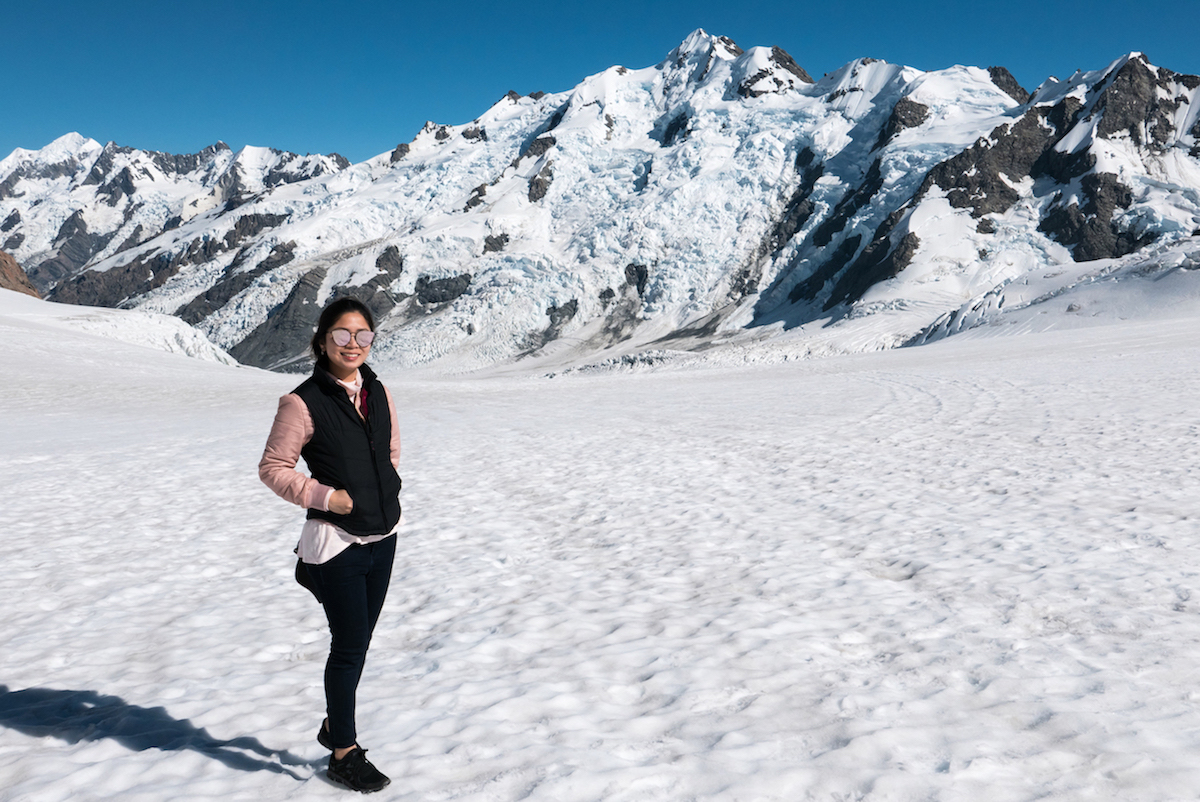
After about 15 minutes in the air, we landed in the middle of the Tasman Glacier.The snow intensely reflects the sunlight, so we were advised to wear sunglasses to protect our eyes. Our pilot gave us about 10 minutes to wander around and talked a little bit about the glacier. The pilot said often times, skiers will take a helicopter to the top of the glacier and ski all the way down to the bottom. It was an impressive experience to be on top of a glacier that’s existed for 2 million years!
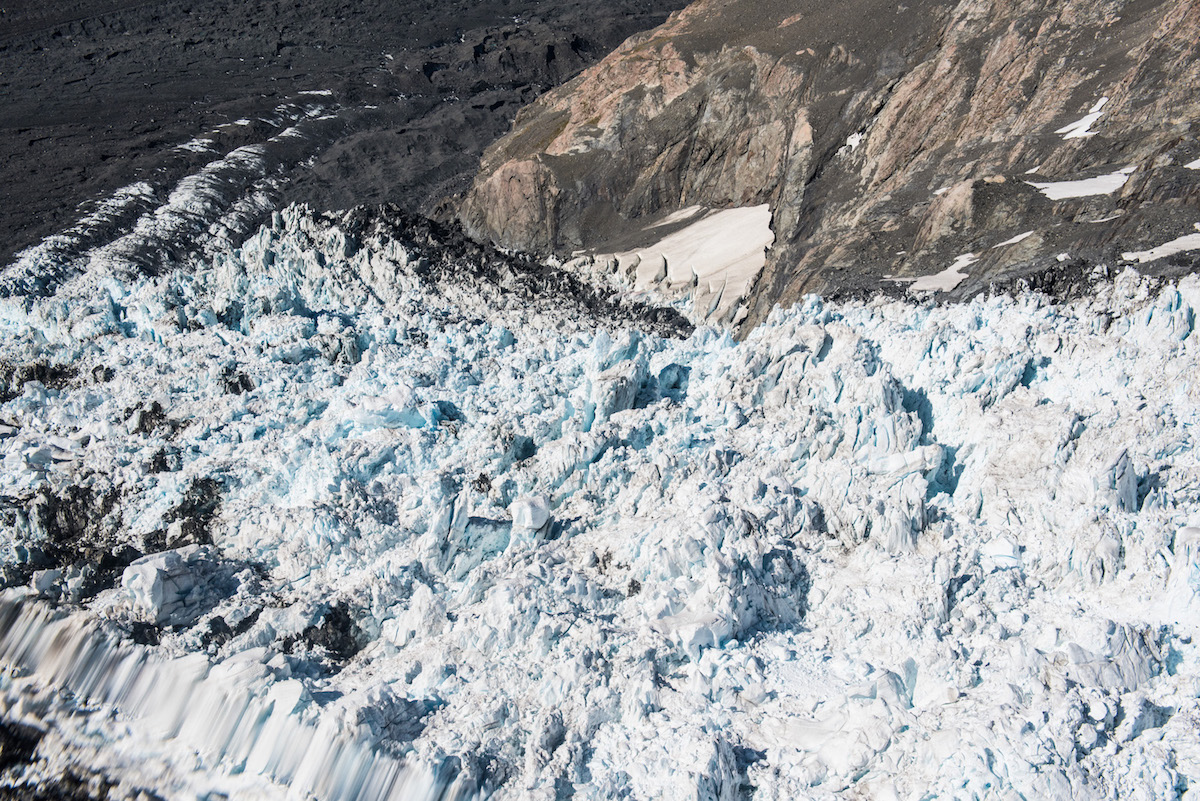
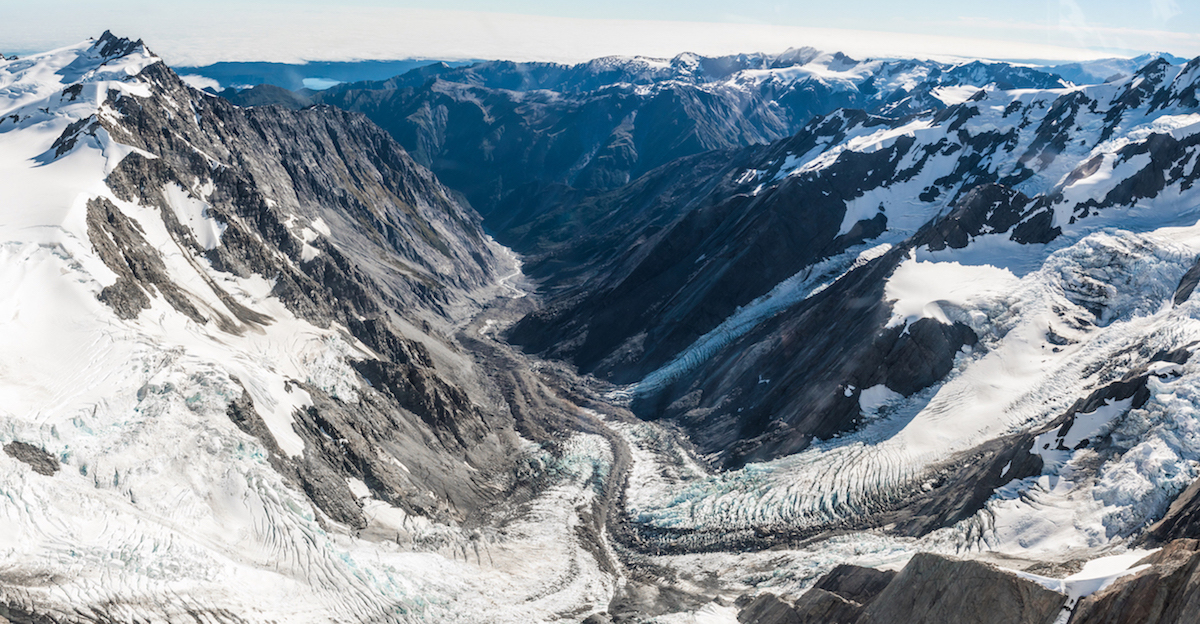
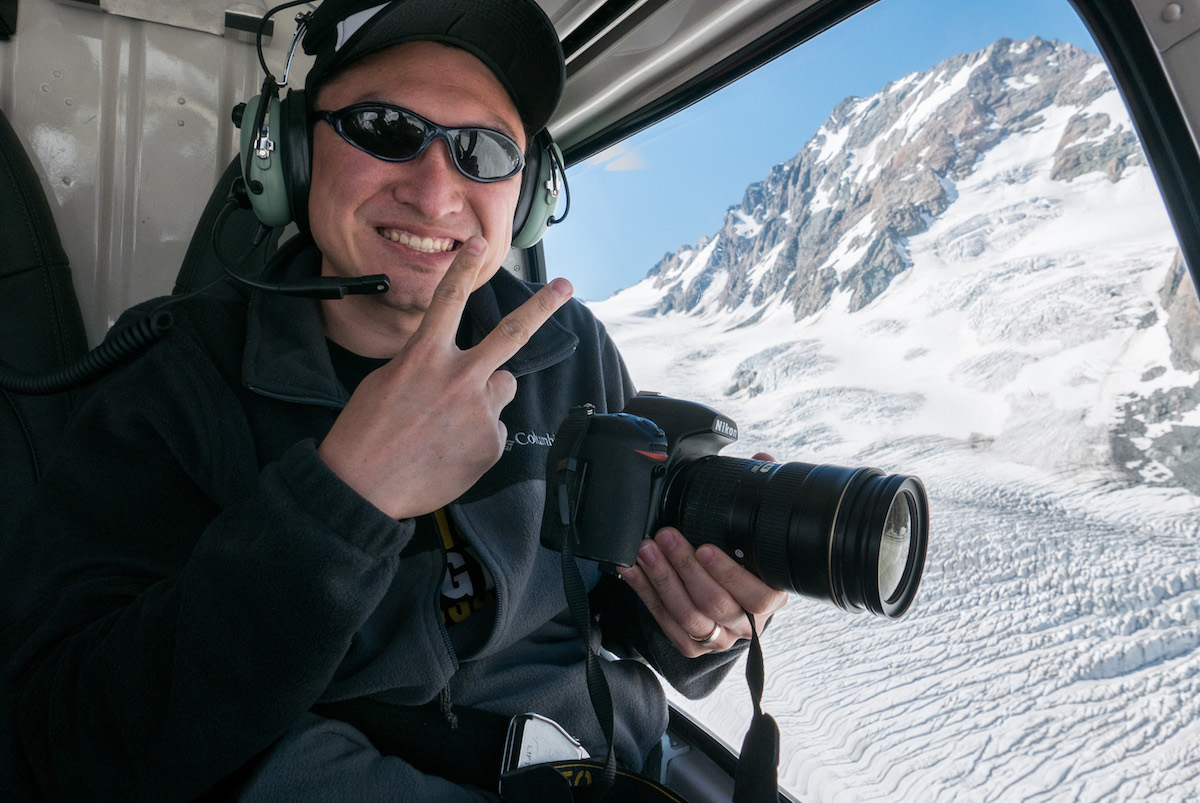
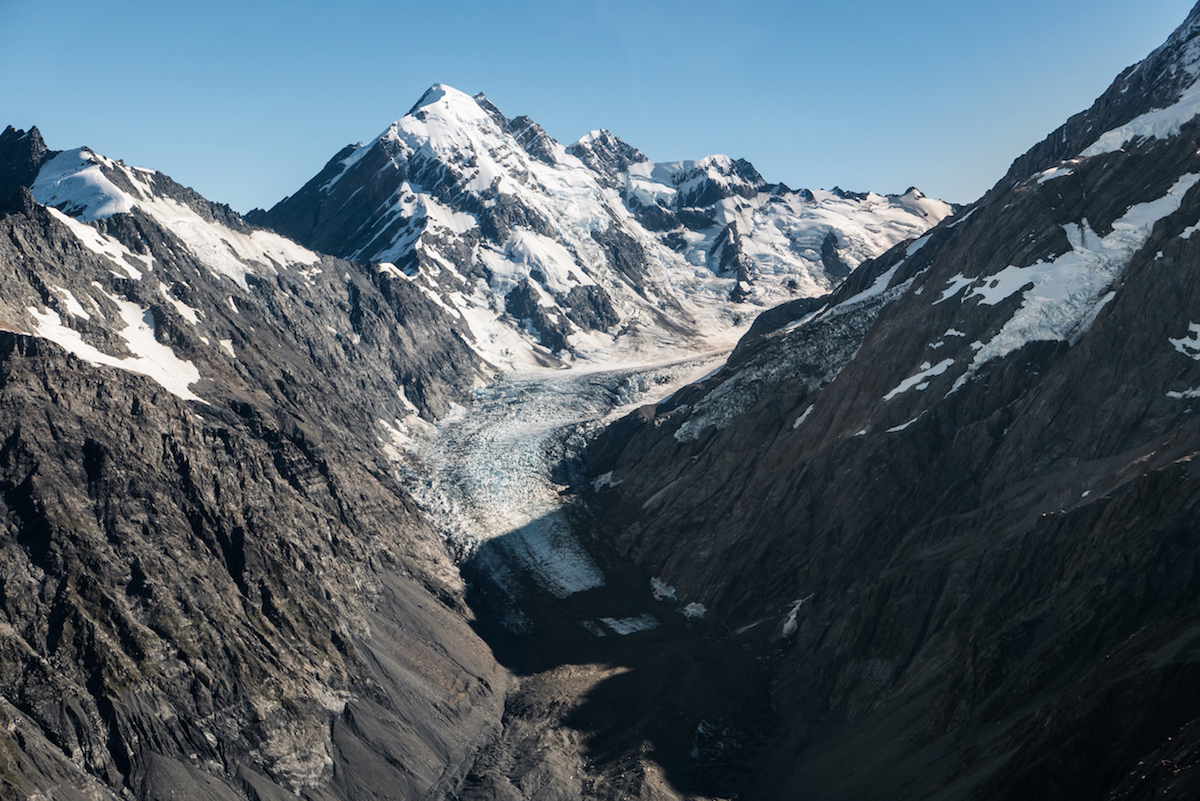
Unfortunately, the Tasman Glacier may not be around for that much longer. The glacier has been receding up to half a mile a year and is projected to disappear in as little as one or two decades. It’s a common trend affecting many of the world’s glaciers. On our flight back to the airport, Mat got to ride in the front of the helicopter to get the upfront views. We got to see what the Tasman Glacier terminal looks like today and comparing it to 30 years ago, it is staggering how much ice has been lost.
Receded Tasman Glacier
It’s pretty sad to see the plight of our glaciers today and whether or not we are able to preserve them is seriously in doubt. If we cannot slow or reverse the current trends, then we’ll face the prospect of travelers not being able to enjoy this amazing experience on top of a glacier. Hopefully, that won’t be the case for our future.
Here is the info for our flight:
Location: Mount Cook Airport, New Zealand
Company: INFLITE Experiences Price: “Tasman Experience” $339 NZD ($245 USD), other experiences range from $199-999 NZD
Getting there: From Queenstown, it is a 3-hour drive Northeast to Mount Cook
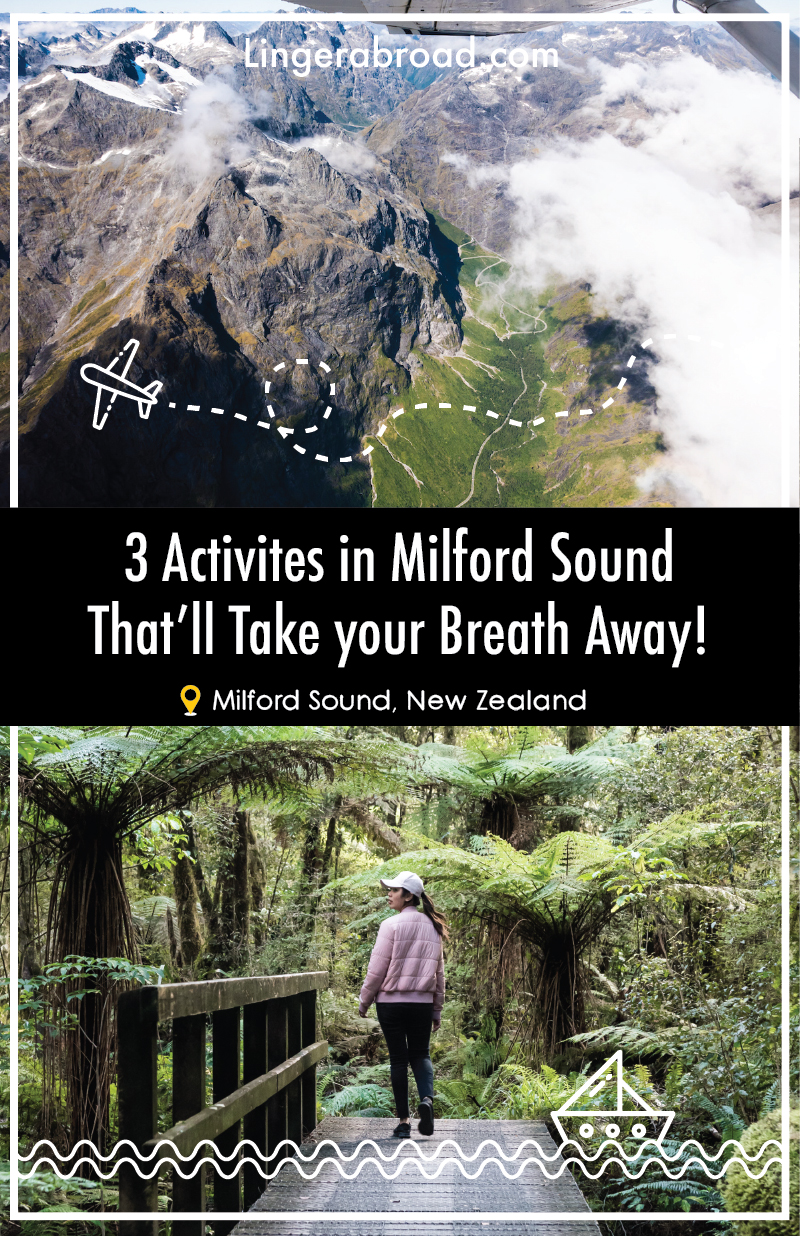
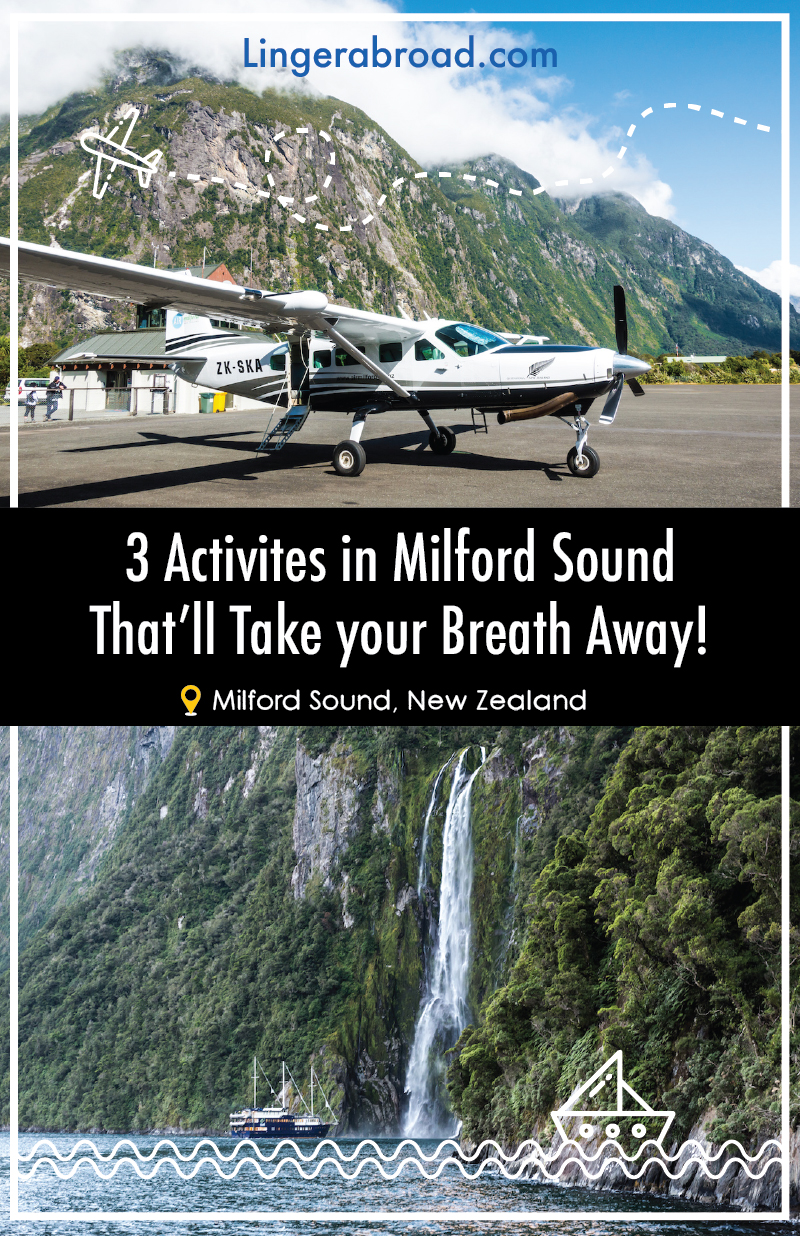
Would riding a helicopter through Mount Cook be a once-in-a-lifetime activity for you? Then be sure to save our pin for the time you visit New Zealand:
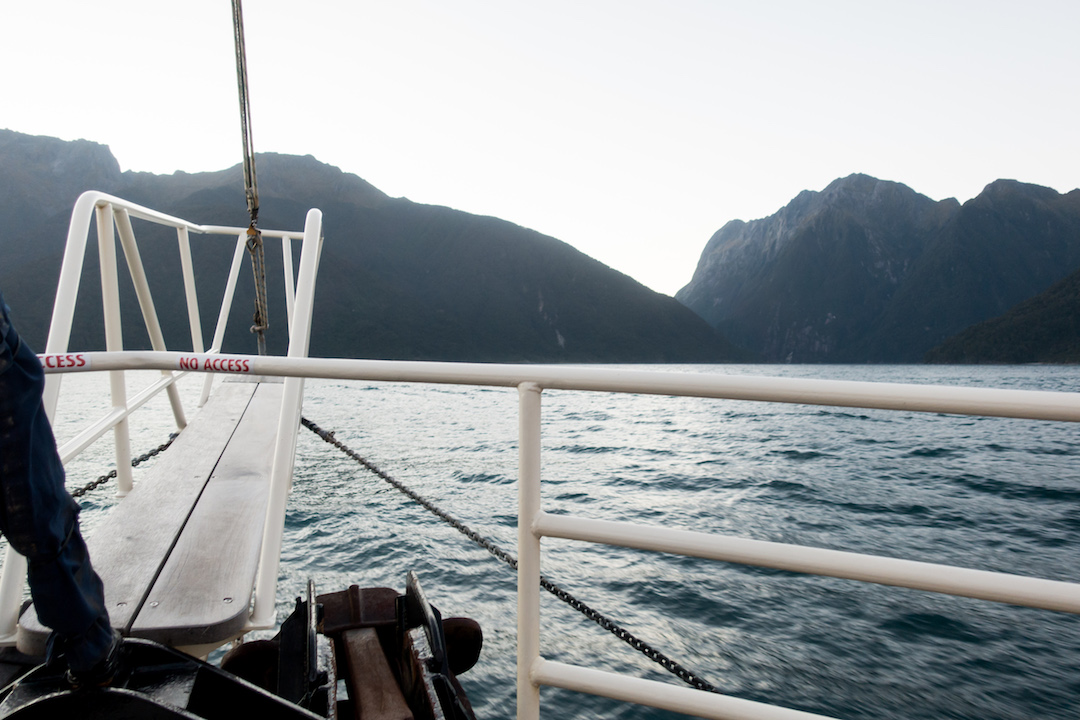
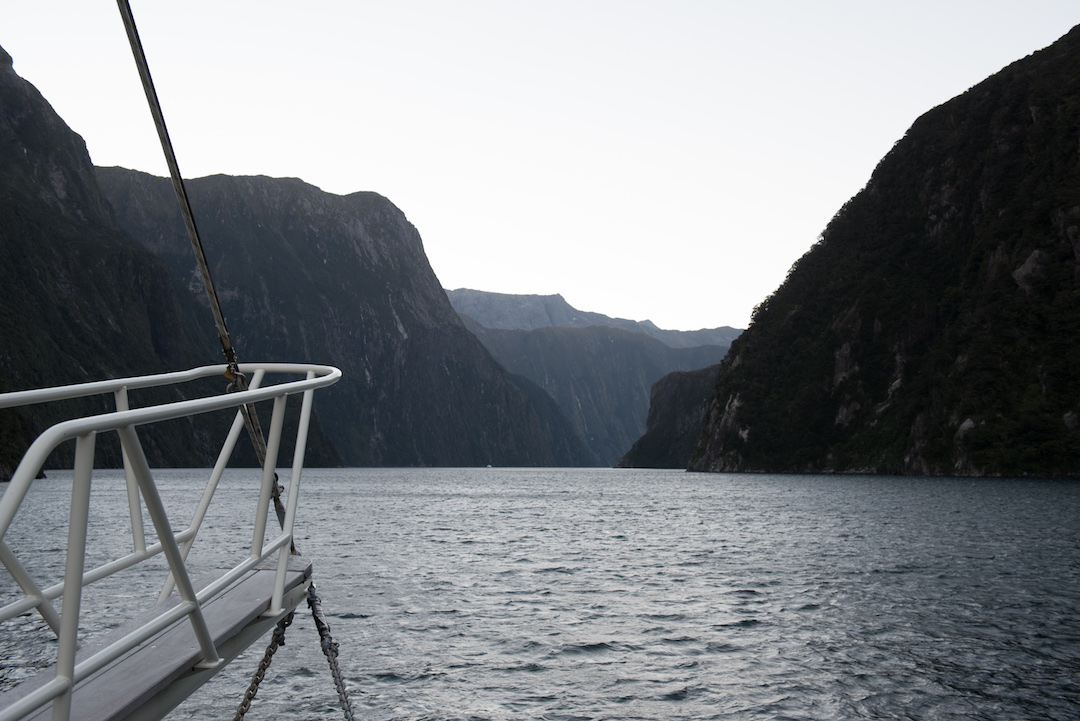
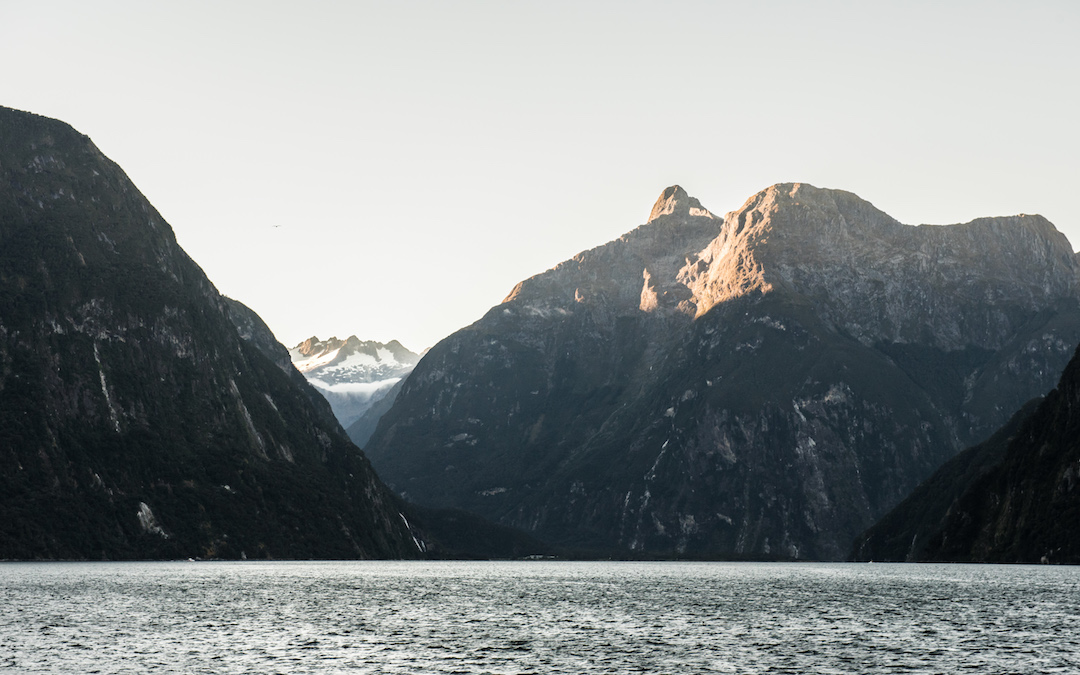
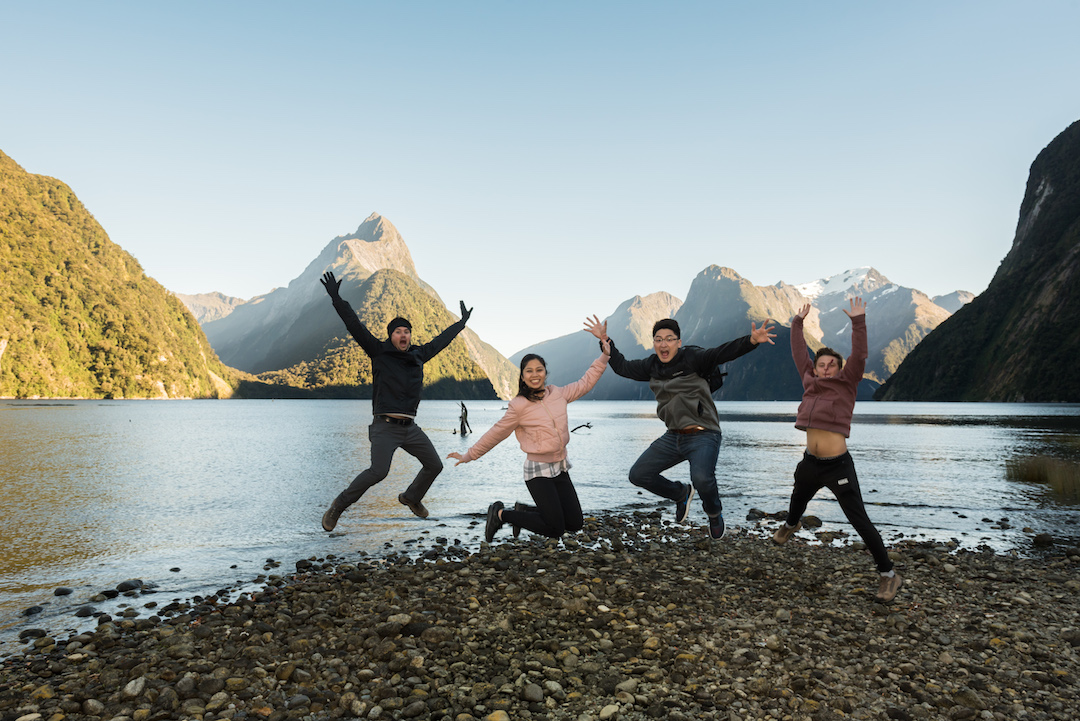
In 2010, I made my first visit to New Zealand after my parents told me how amazing it is there. A favorite place they visited was Milford Sound, which is part of Fjordland National Park. Touted as one of the most beautiful landscapes not just in New Zealand, but in the world, I absolutely had to make a visit there. I was greeted, however, with some gloomy weather for almost my entire trip. Despite overcast clouds, some rain, and fog, I still loved everything about Milford Sound and hoped to make a return trip. The next time, however, I wanted to see what it would look like with better weather.
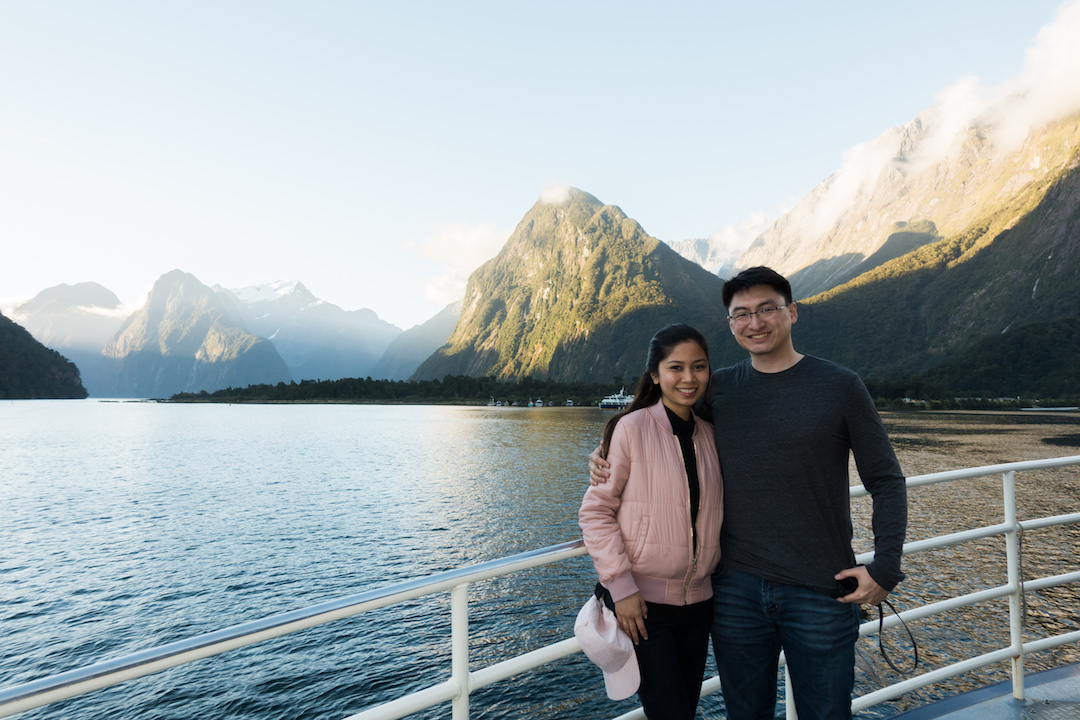
This time, we made it to Milford Sound with perfect weather, gifting us mostly clear skies and moderate temperatures. We were lucky because it was overcast and raining for several days prior! And here are 3 activities that you will love during your visit here:
1. A Scenic Flight
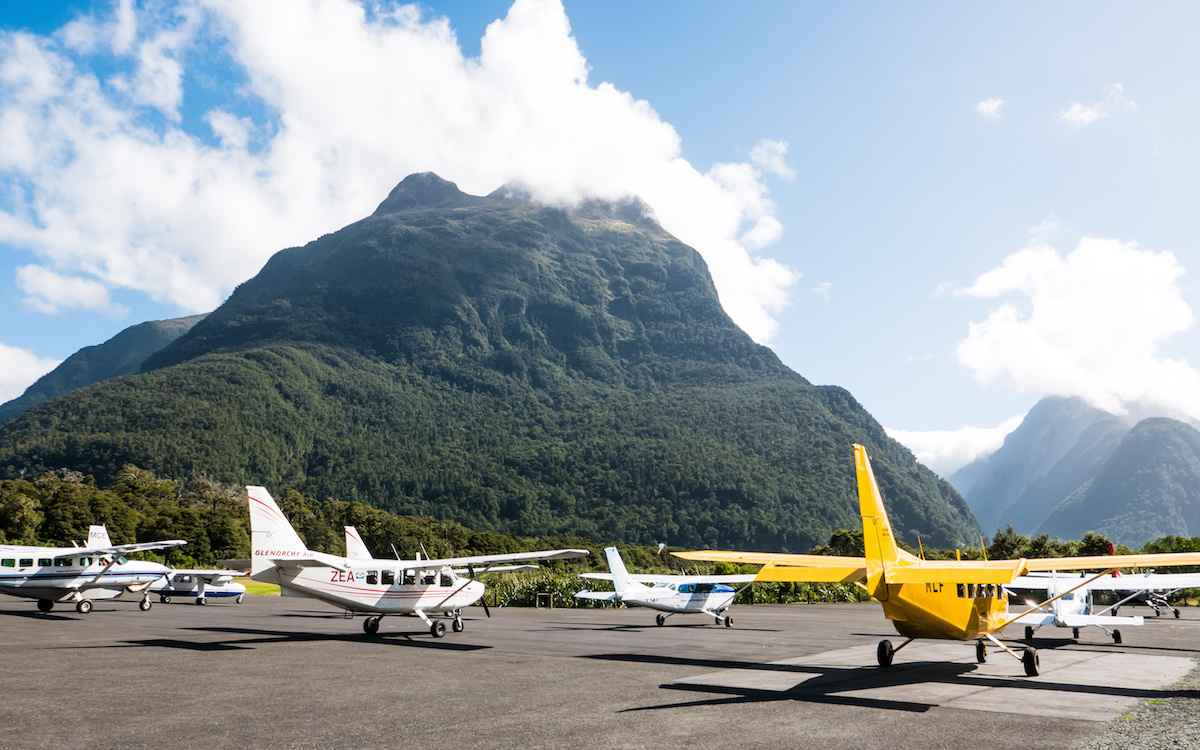
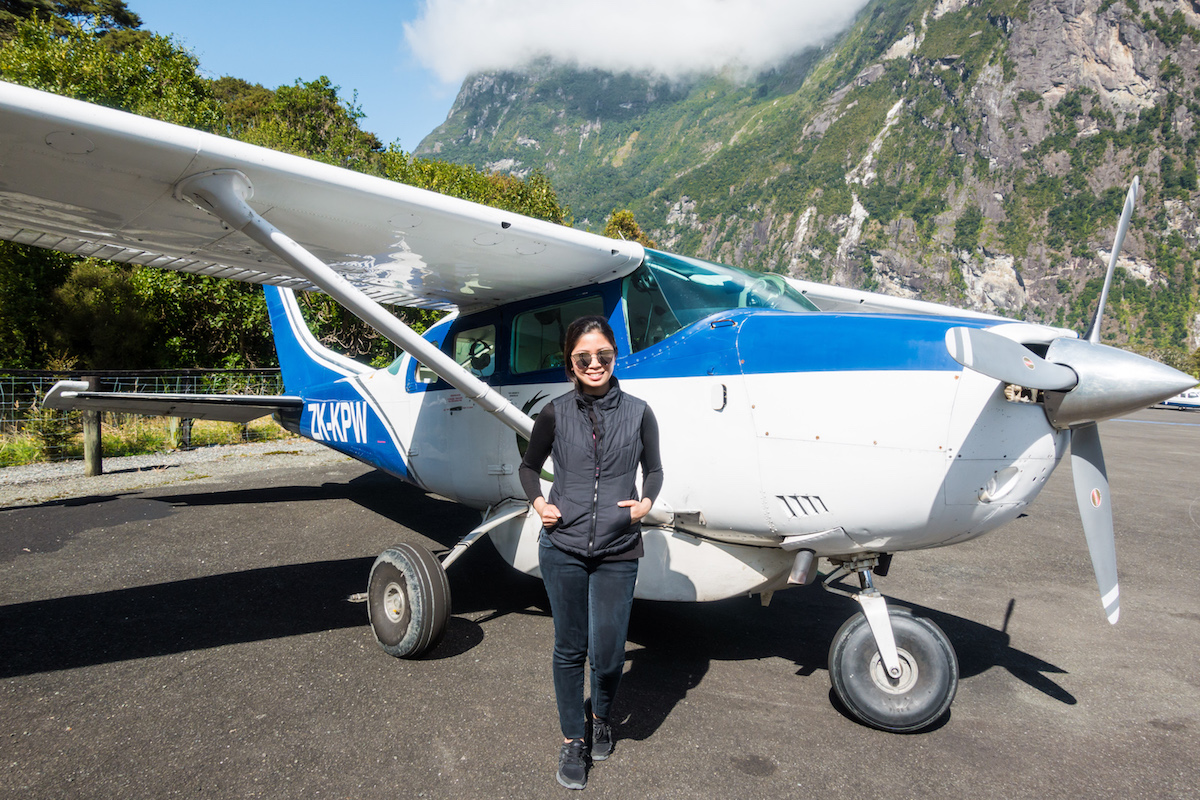
For our visit, we were taking an overnight cruise through the fjord of Milford Sound but we had arrived a lot earlier than the departure time. There was one activity that was available to us during the downtime: a scenic flight through Milford Sound that was being offered at the Discover Milford Sound Information Centre & Cafe. However, the flight had to fill all four seats, otherwise, we would’ve had to pay for all of the seats at the cost of $200 USD per person. Fortunately, we were able to find a couple that also wanted to do the flight, so the cost ended up being only $100 USD per person. This seems to be a bargain price, as most scenic flights can cost up to $400 USD per person, although usually from another location like Queenstown or Te Anau with a much longer flight duration.
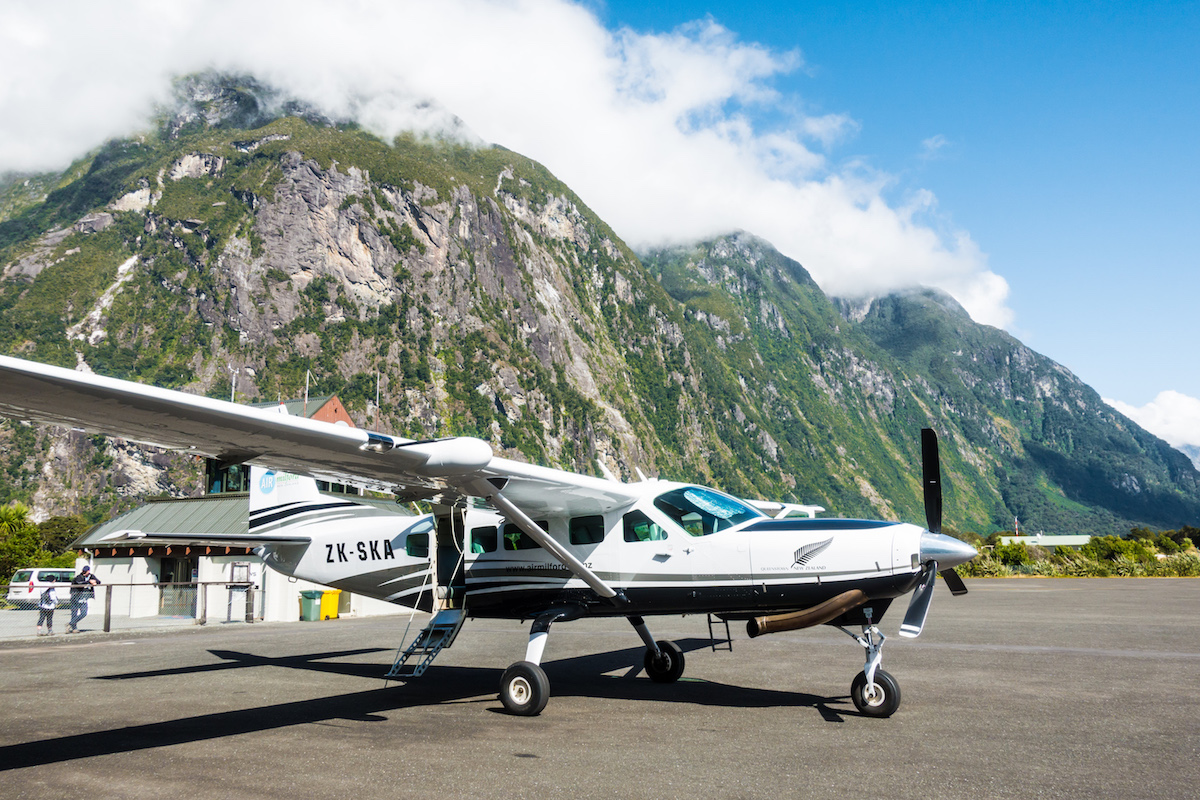
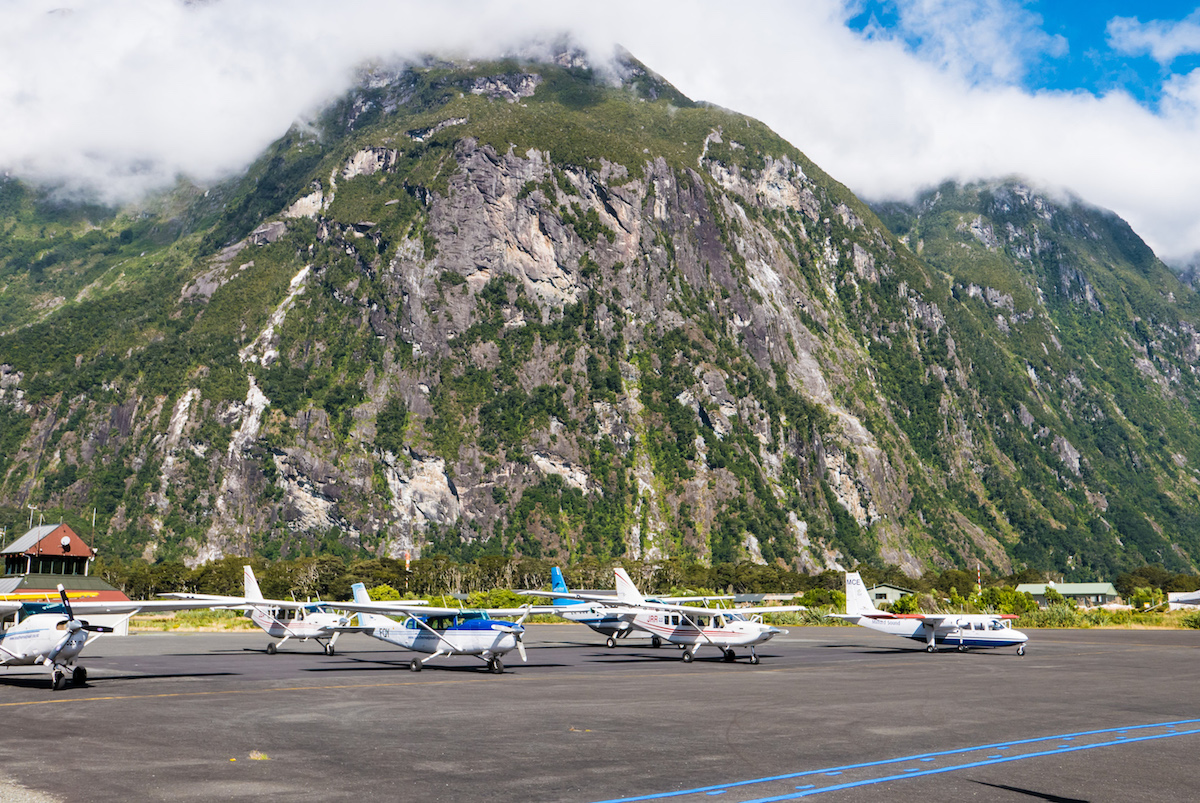
Even the Milford Sound Airport is beautiful!
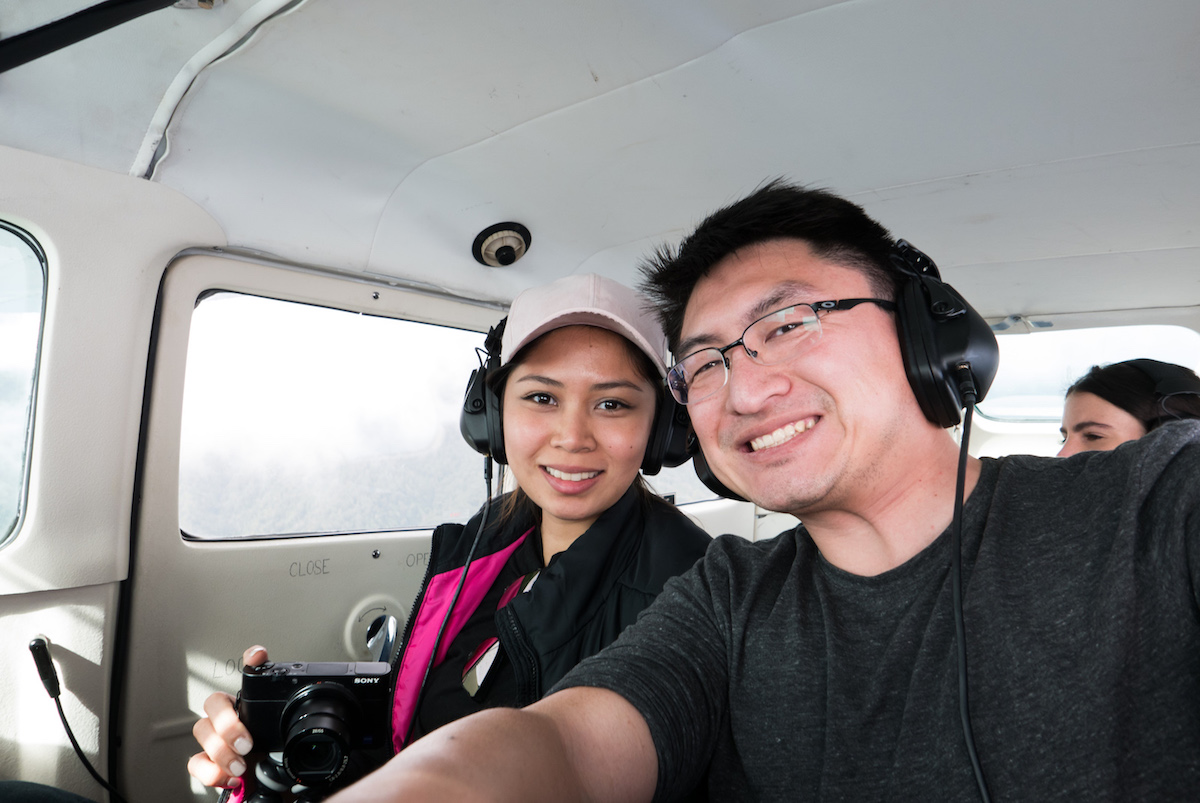
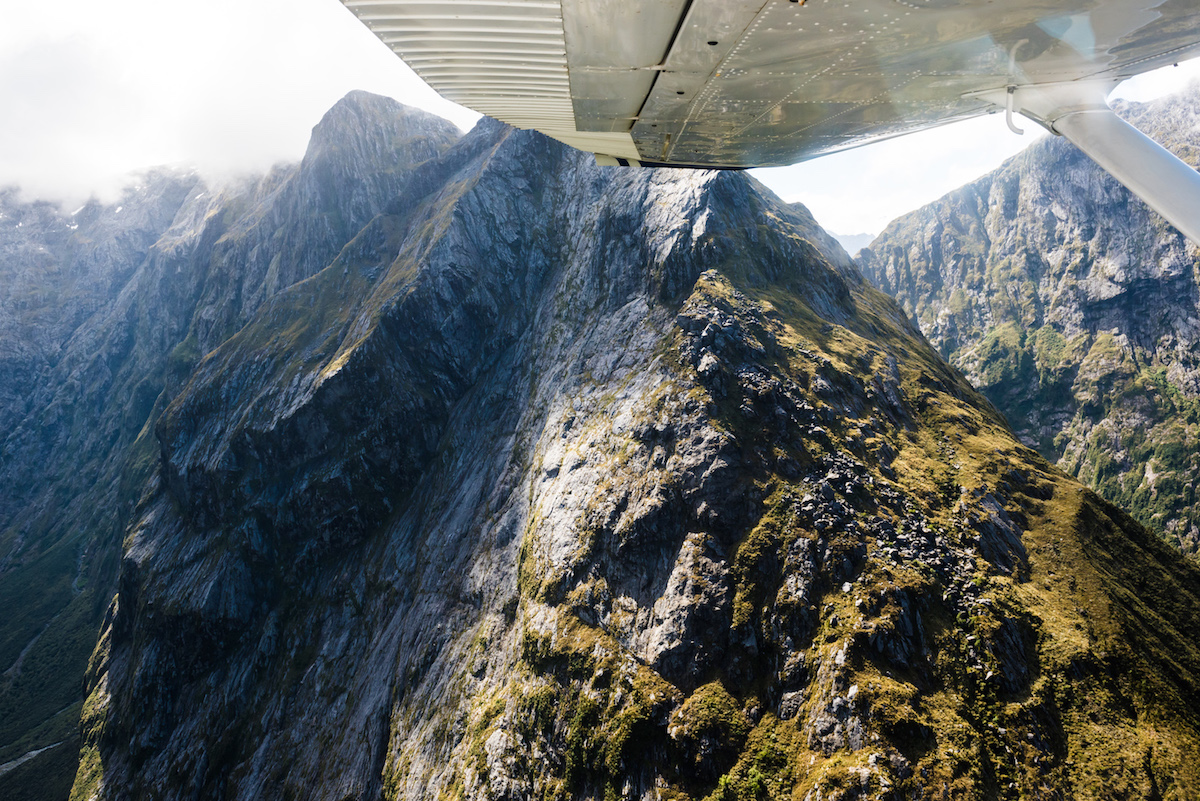
This 25-30 minute flight starts and ends at the Milford Sound Airport, which is right next to the visitor center. A charter plane is not quite like your average commercial plane ride; due to its small body and lighter weight, it is more prone to more turbulence. While we weren’t particularly nervous, those with a fear of flying may want to pass on this activity. One of the other passengers was very close to backing out of the flight before ultimately deciding to board the plane. The flight was a little bumpier than we’ve ever experienced, but it wasn’t anything that should really deter you from doing it.
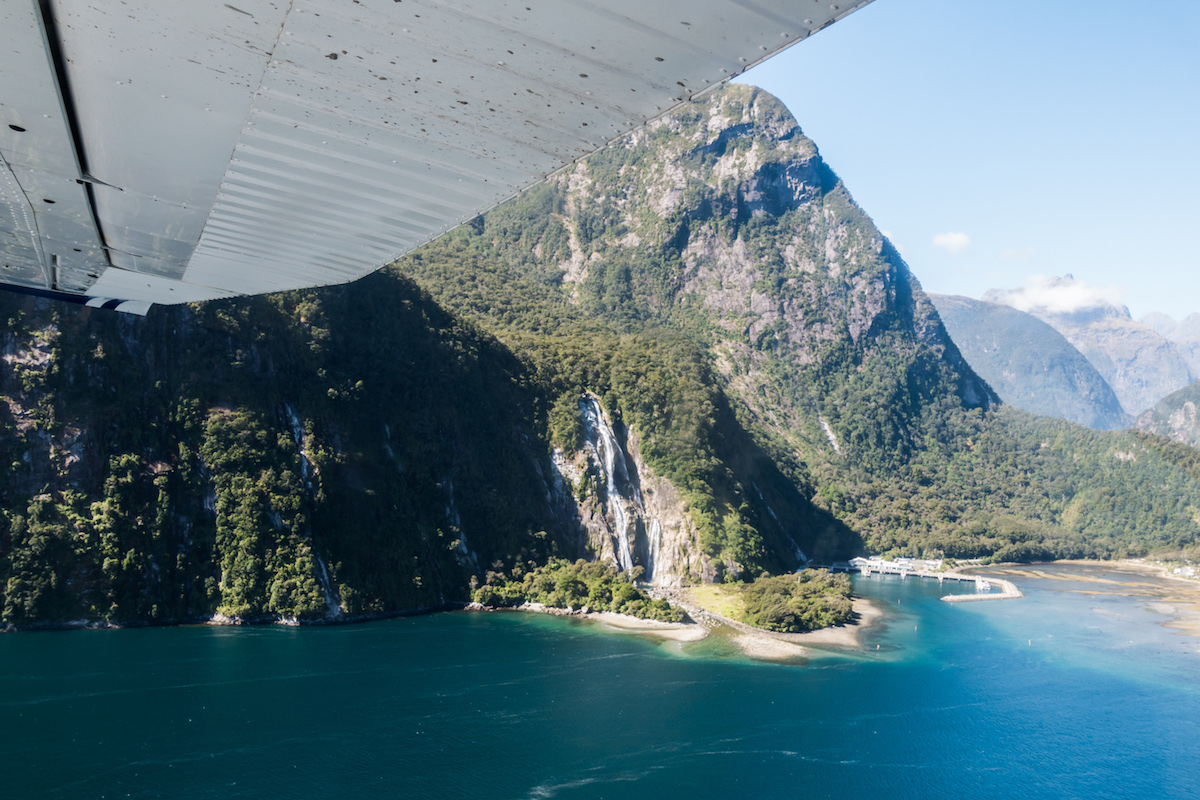
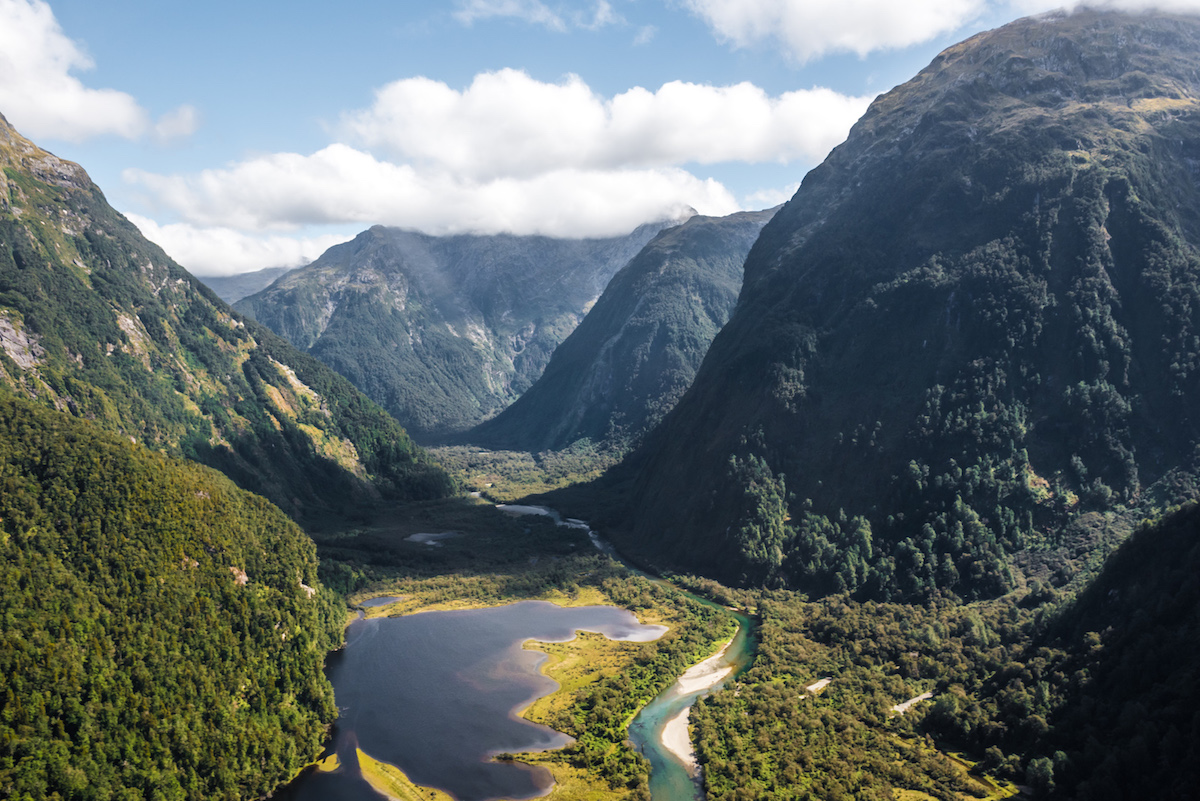
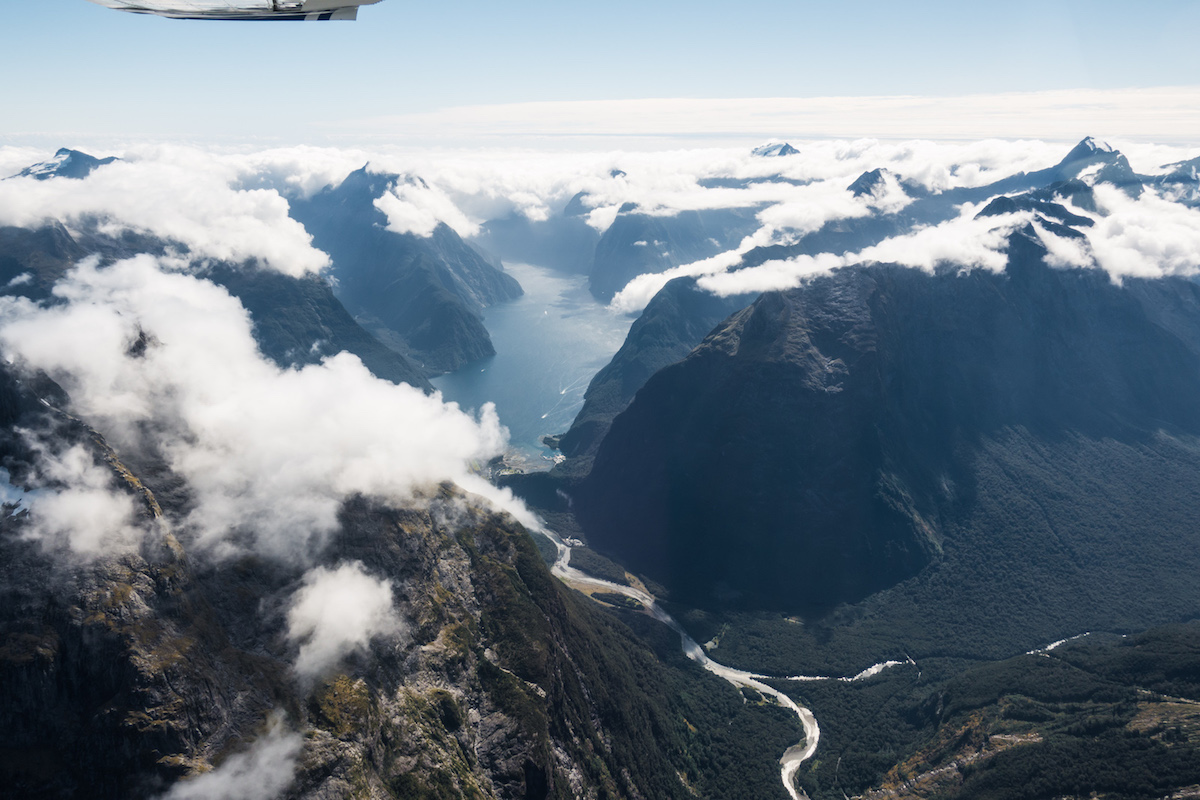
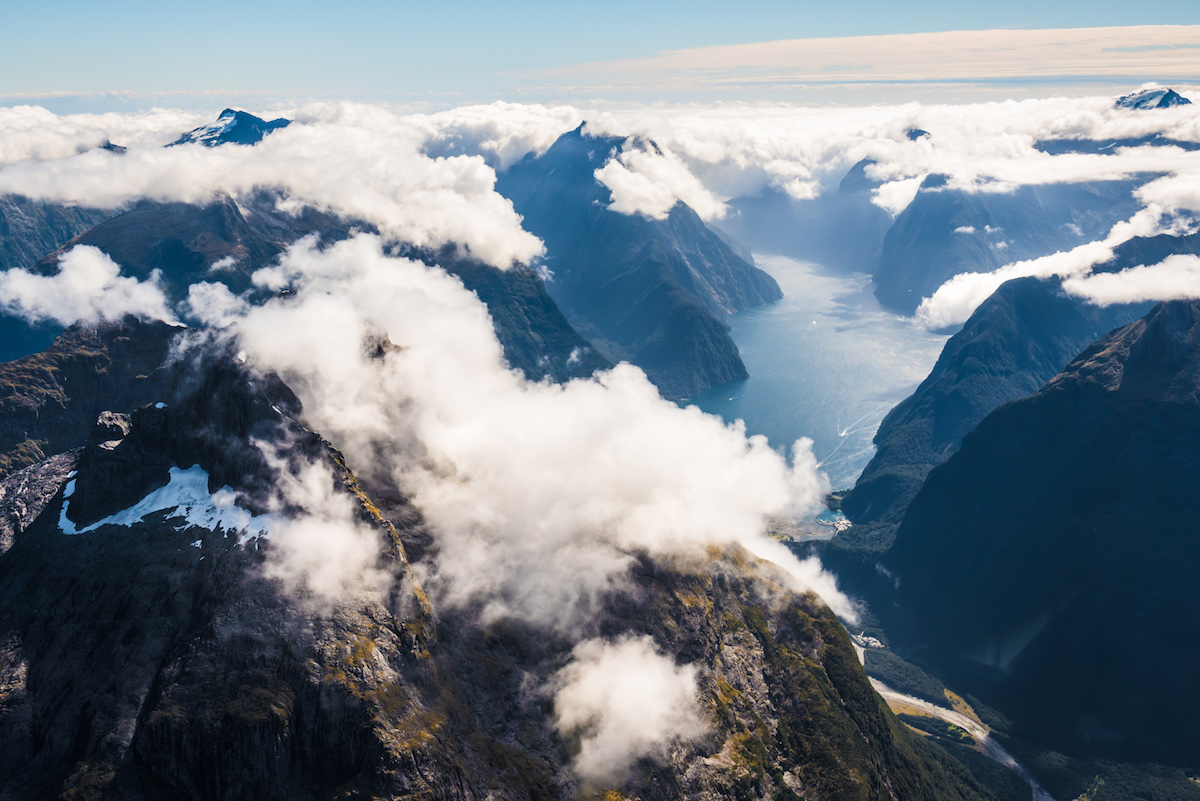
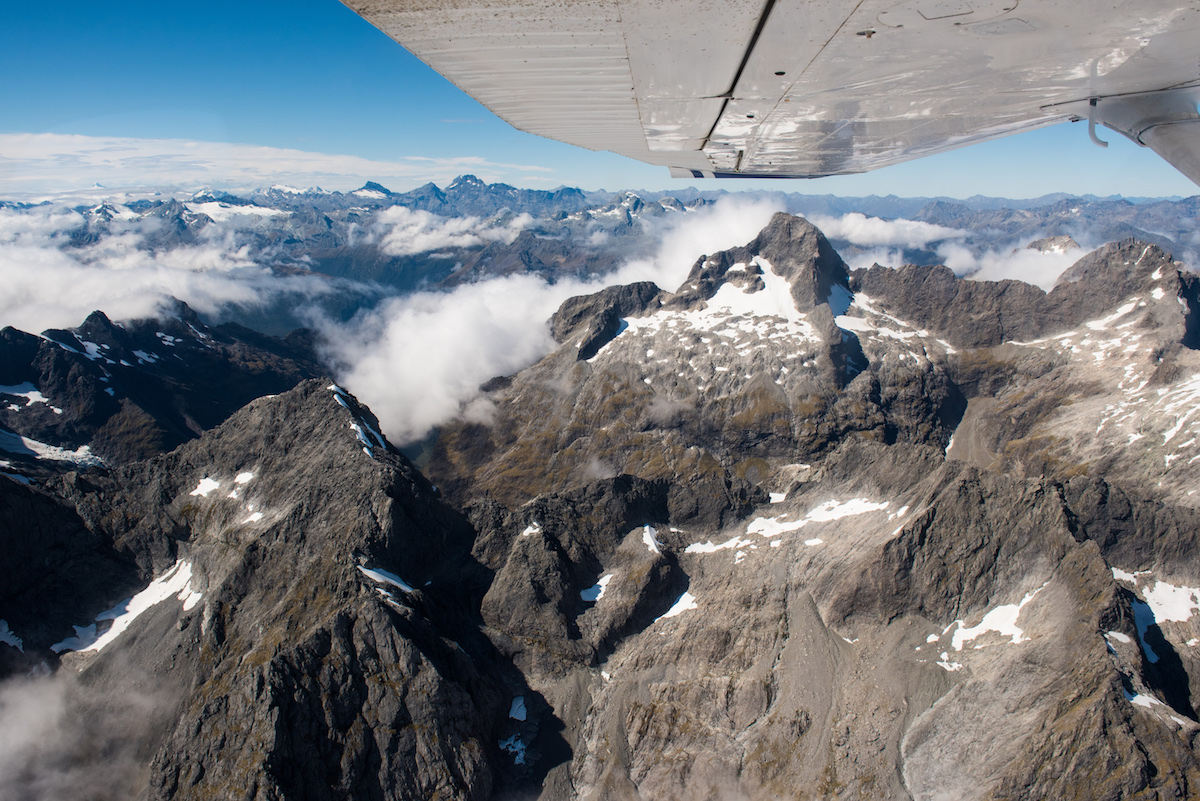
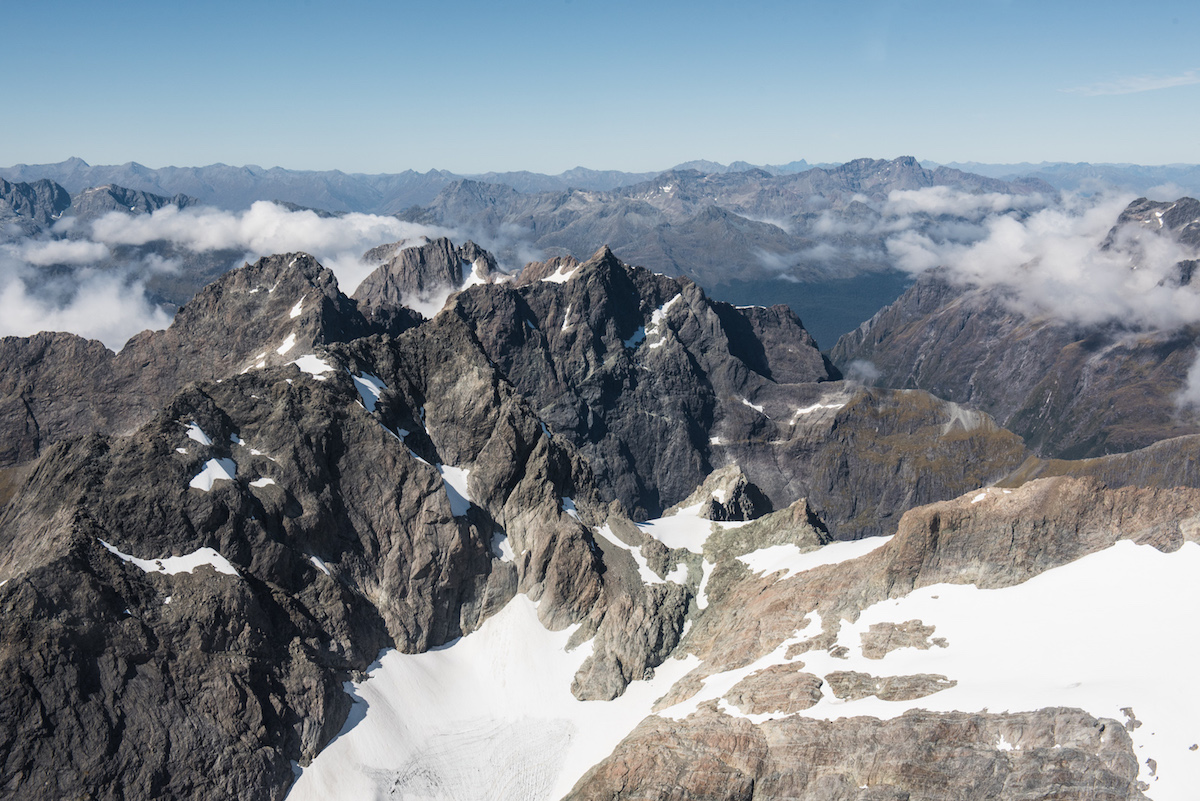
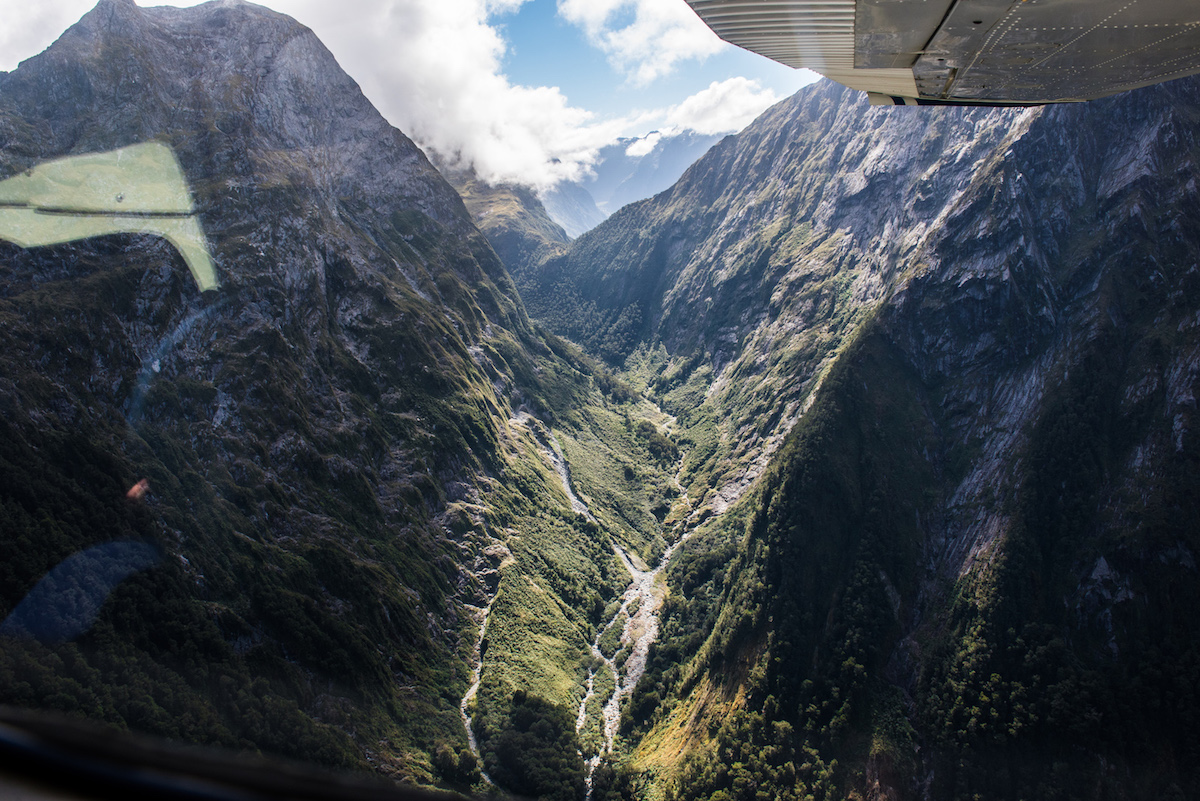
If you are able to board the plane, you’ll be treated to a truly majestic flight of Milford Sound! Much of New Zealand is unexplorable due to impassable landscapes, therefore flying is a terrific way to see these hidden treasures. The flight takes you through the entire fjord of Milford Sound towards the ocean, then fly over various mountain ranges. From bare rock mountains to those covered in forests or from colorful mountains to pristine snow cover peaks, it’s an incredible variety that you can see in the air that you may not ordinarily see on the ground.
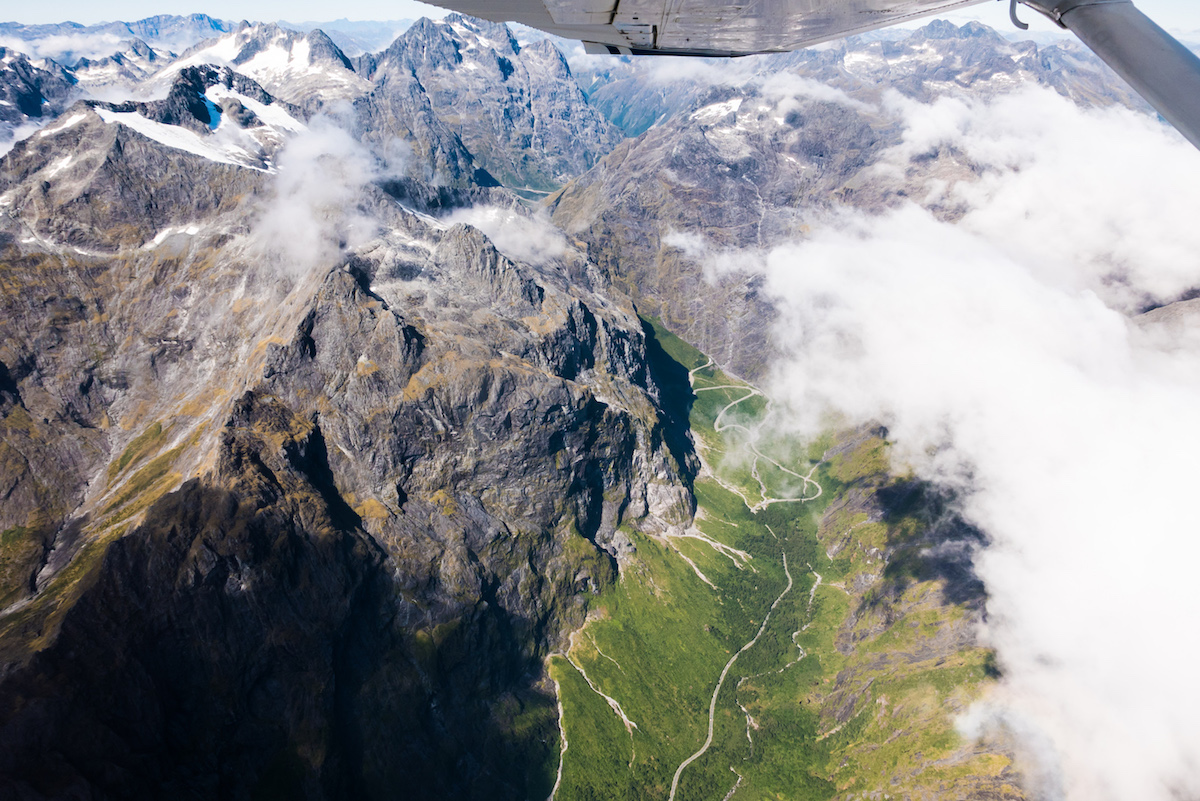
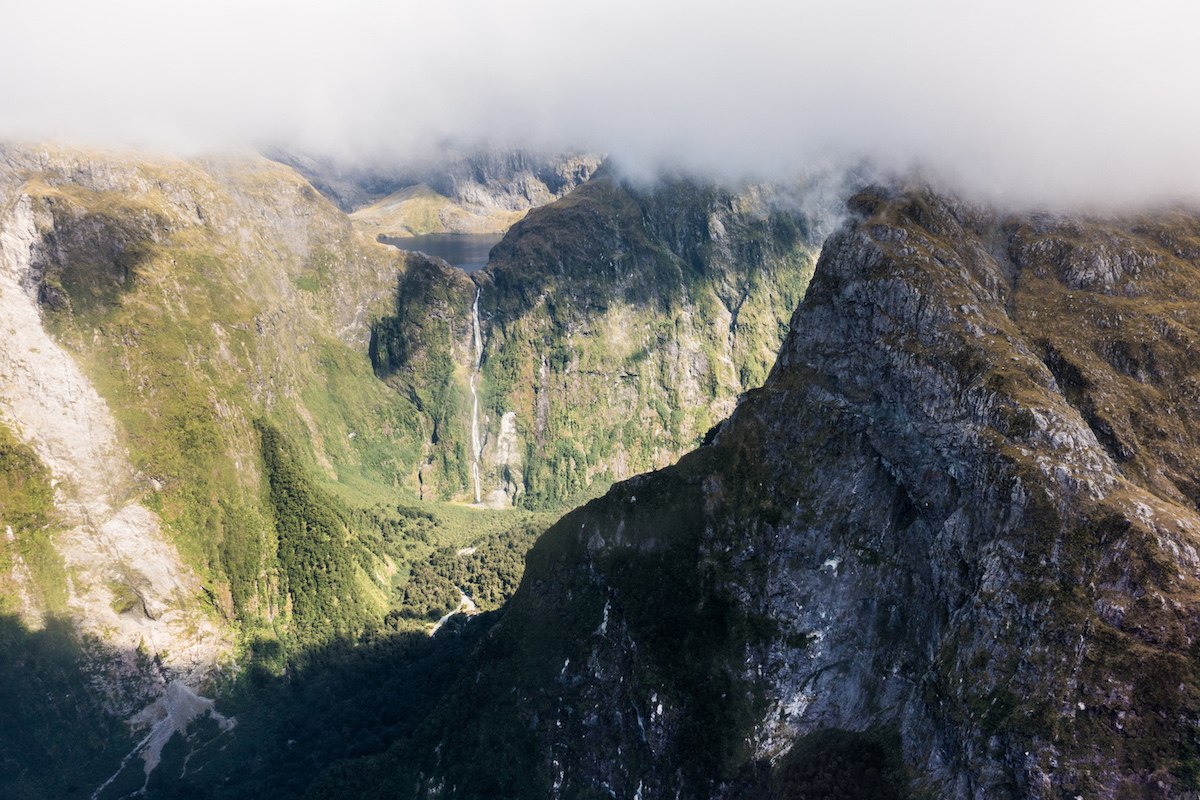
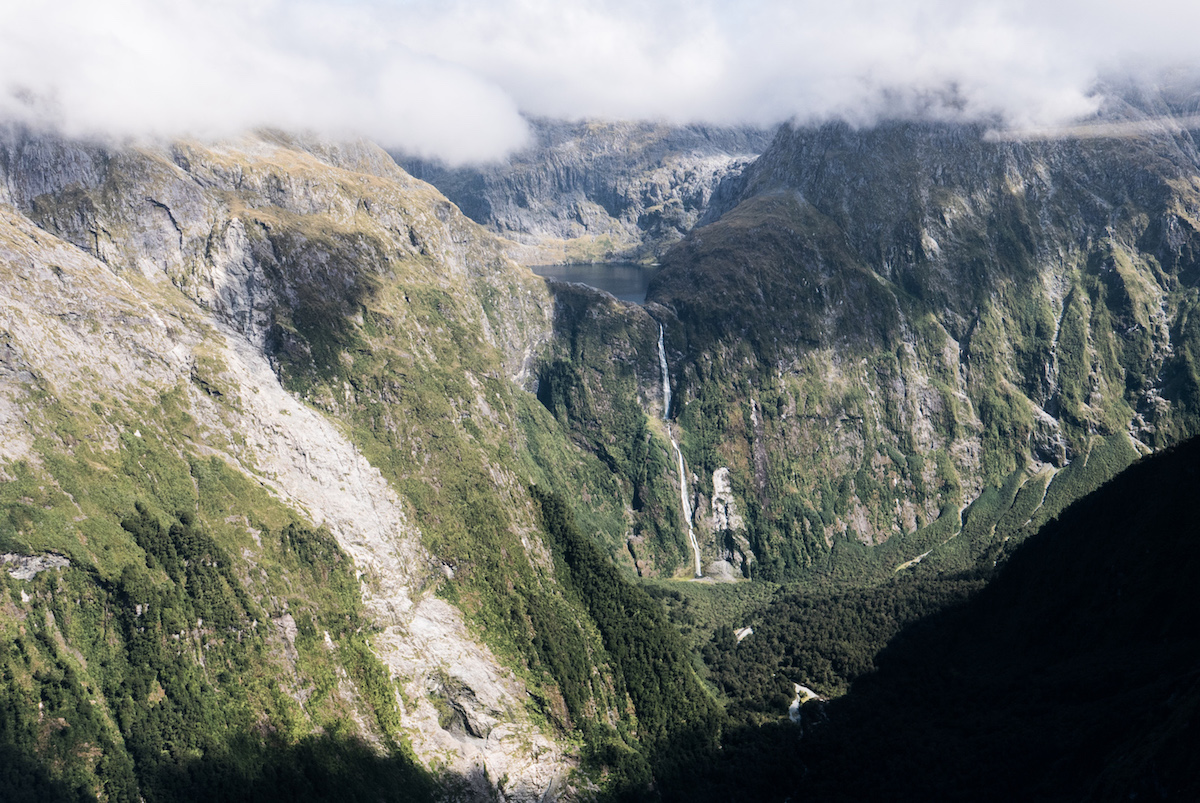
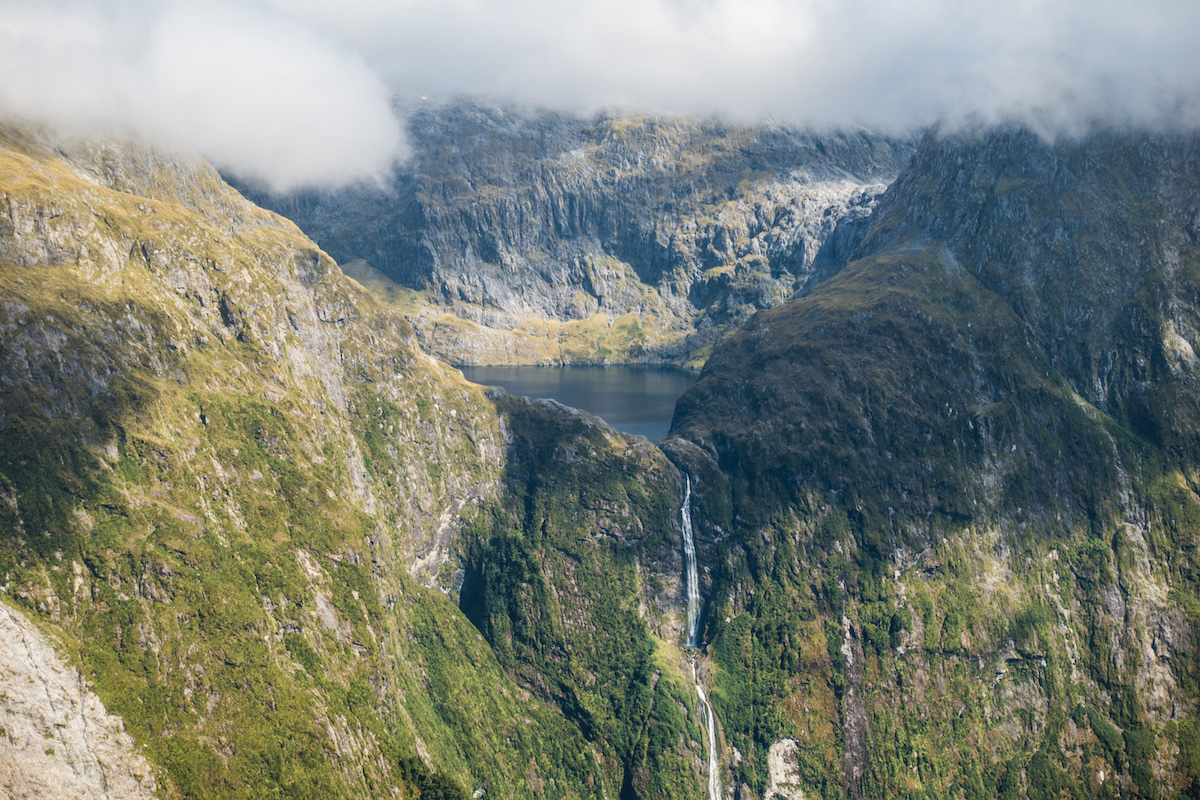
One of the coolest sights that you can see on this flight is Quill Lake and Sutherland Falls. The lake is nestled in the mountains in a basin that overflows and cascades into Sutherland Falls, which measures 580 meters (1,904 feet), making it the second tallest waterfall in New Zealand. While you can hike to the base of the falls, the only way to see Quill Lake is in the air by plane or helicopter.
This flight at Milford Sound is easily the best value for your buck to see the beautiful aerial scenery. It’s an activity worth doing, especially if you are not looking to pay hundreds of dollars.
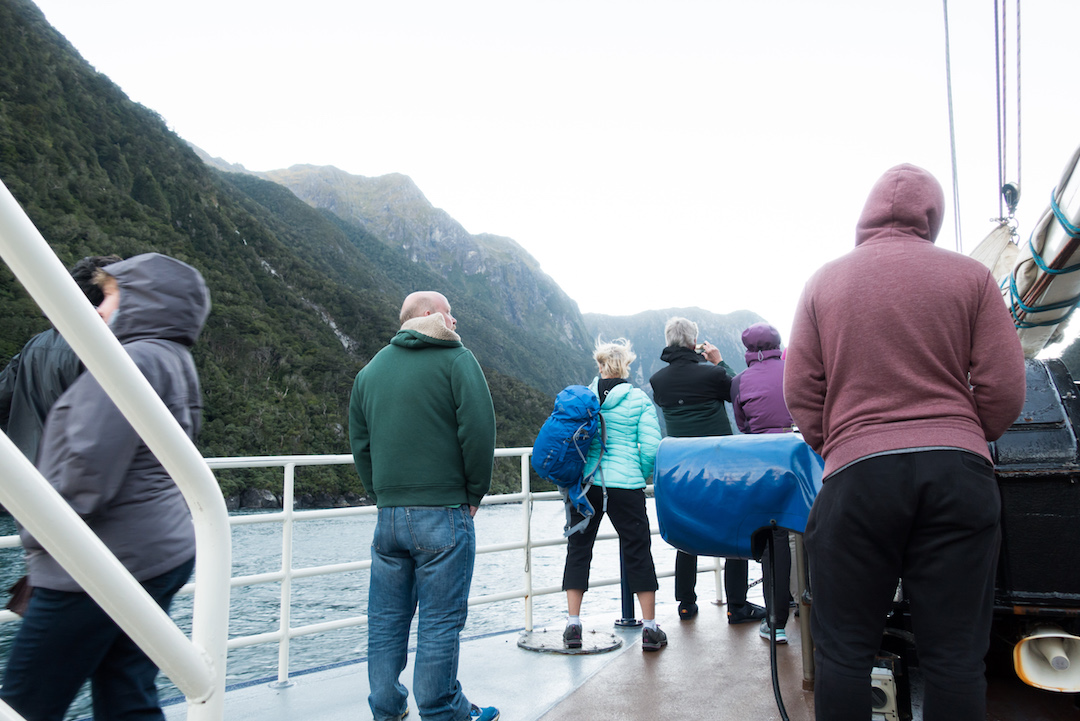
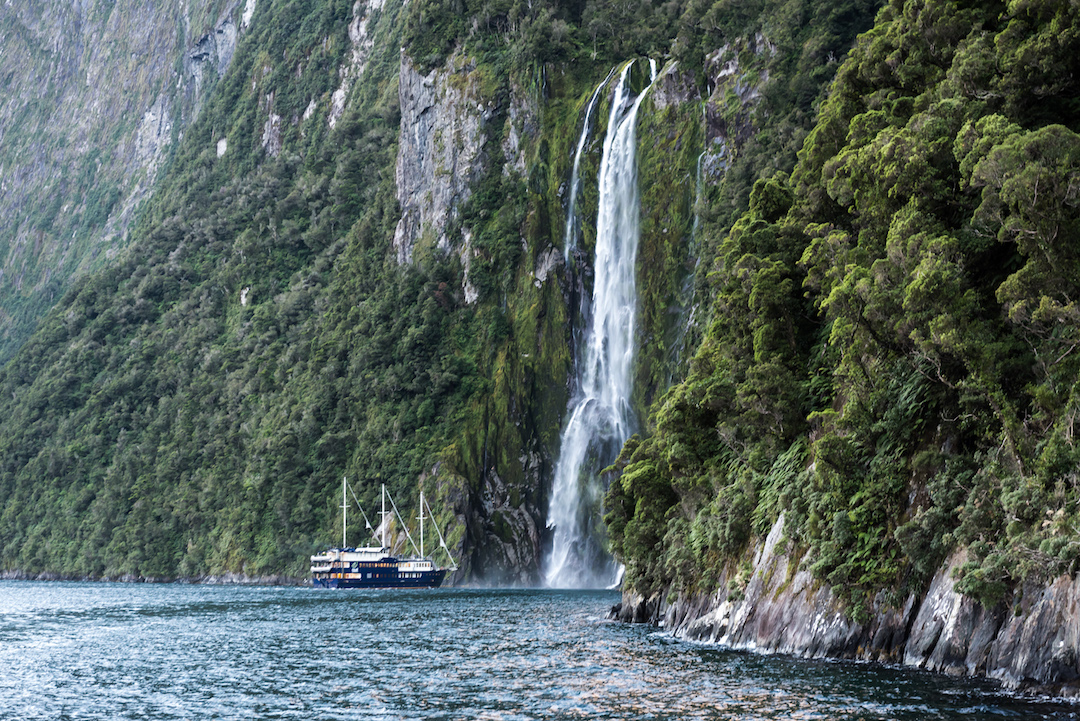
2. The Overnight Cruise
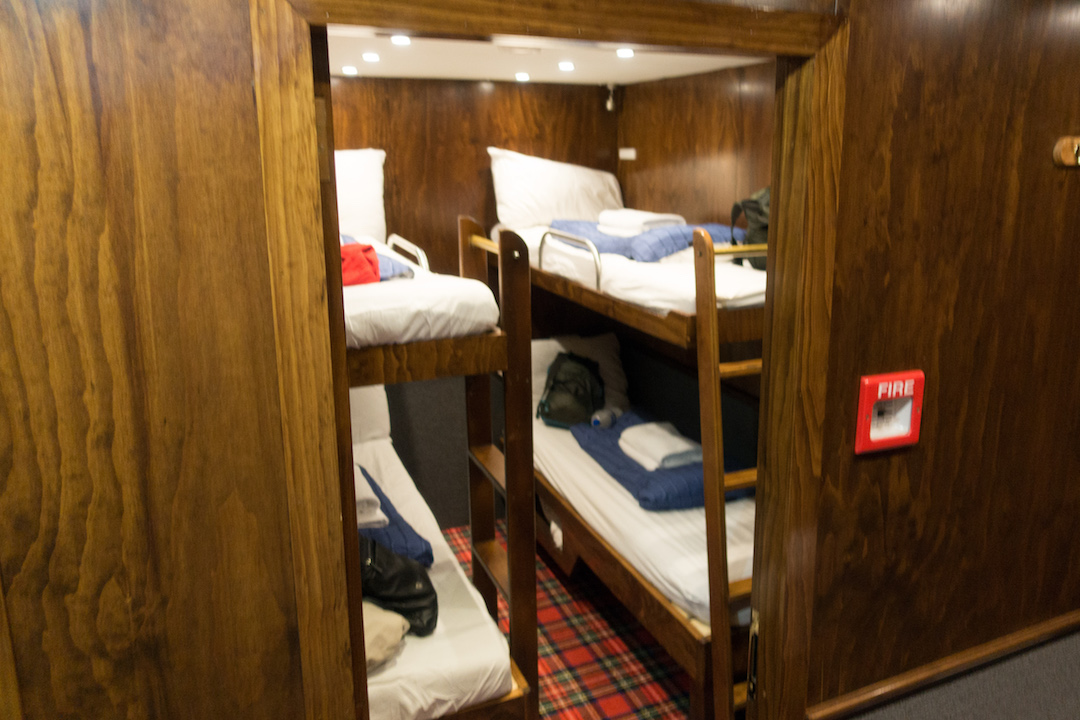
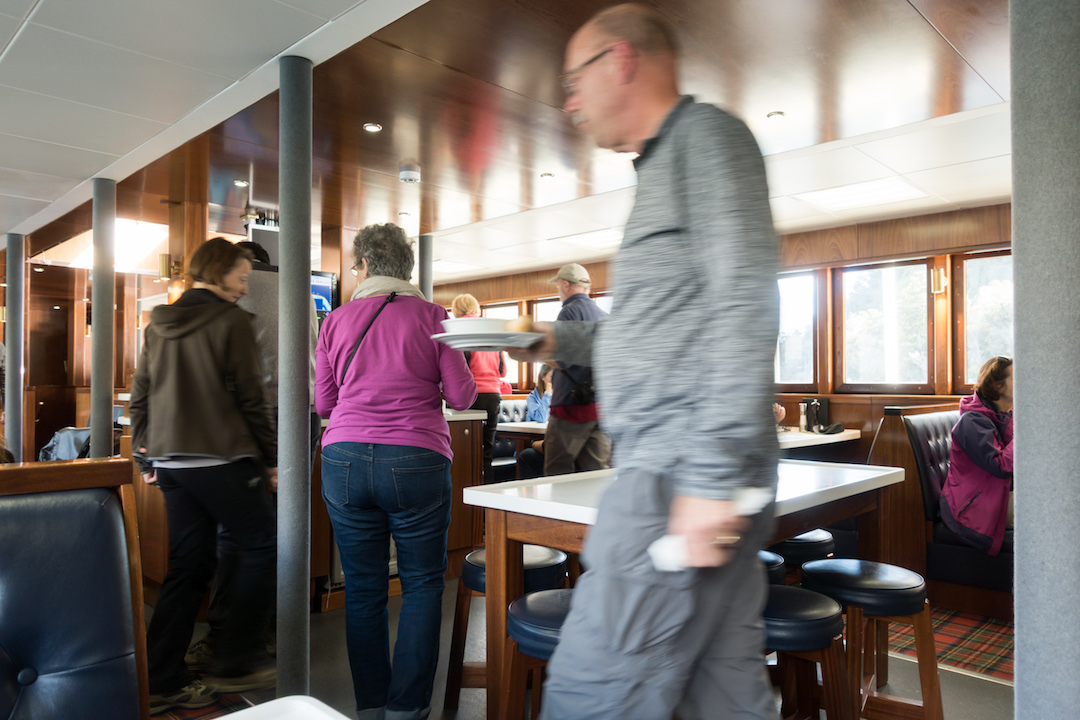
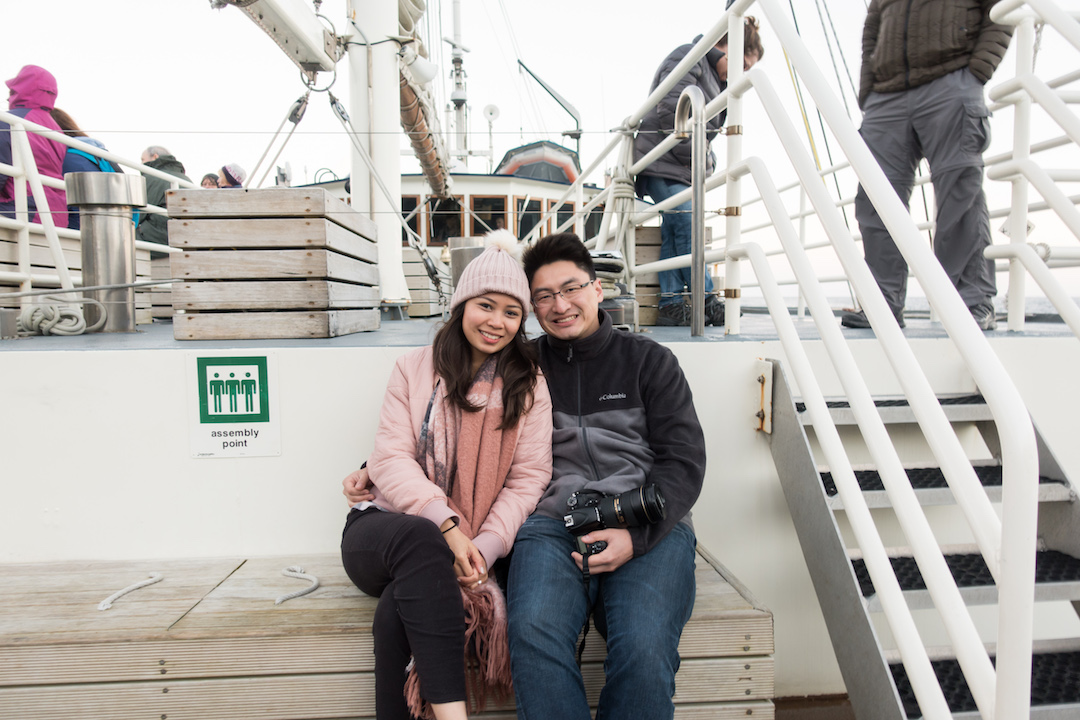
Next up on the agenda, our overnight cruise. Our parents had done the cruise previously too so they booked us the cruise as a wedding gift to us. We went go through a company called “Real Journeys” and boarded the boat named the “Milford Wanderer.” You can find several photos of what the boat looks like on their website here. However, the boat no longer had the private rooms left so we had to share in a 4-person bunk room. It all worked out though, as we met some fellow travelers and made some new friends!
Pricing varies depending on accommodation and departure location but it was about $240 USD per person for our quad-share accommodation departing from Milford Sound. Bathrooms are shared but there is only a maximum of 36 persons on any cruise. While I wouldn’t classify the boat as a luxury liner, the amenities and staff made everything very comfortable and it really was a highlight of our visit.
Our boat departed from the port at 4:30 PM and we had around 45 minutes to an hour to get settled in. During that time, the boat will find a spot to anchor overnight, while we were served some tasty soup and bread. The soup really warmed up the body and got us ready for the afternoon activities.
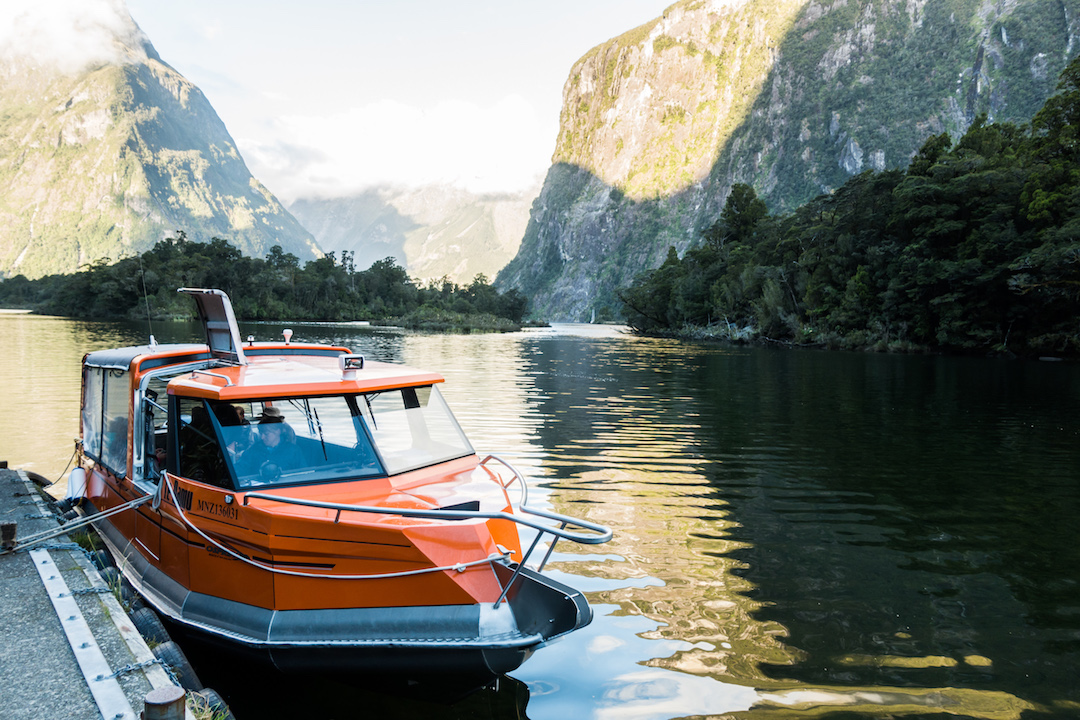
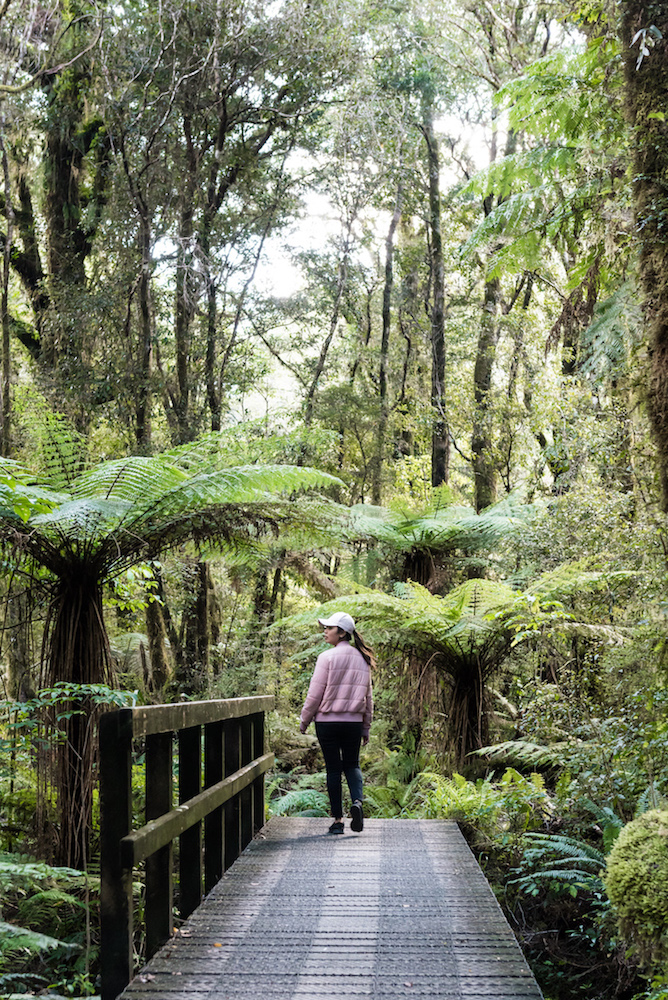
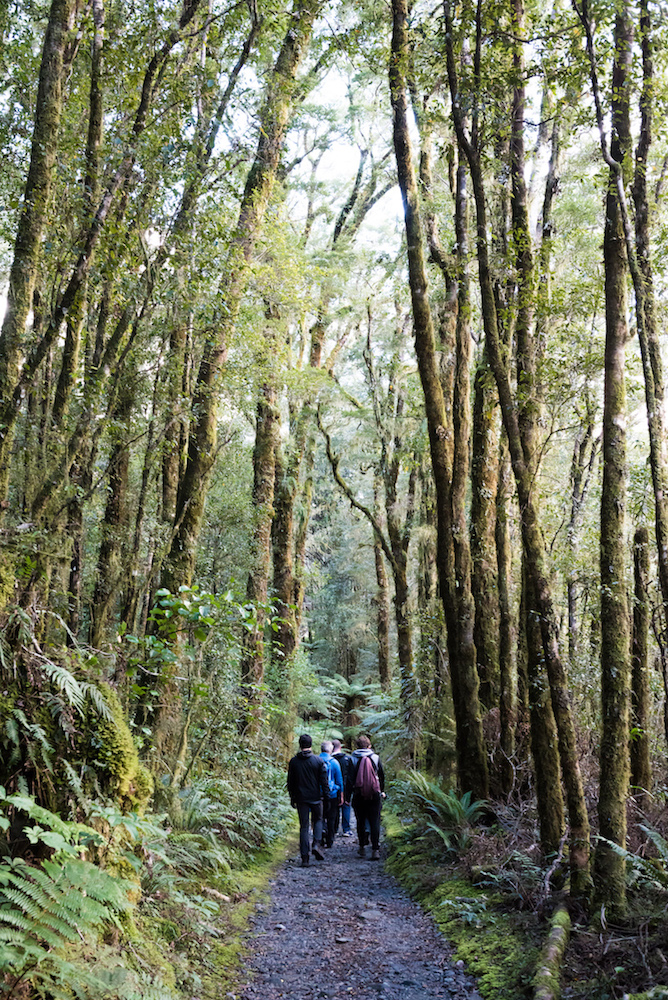
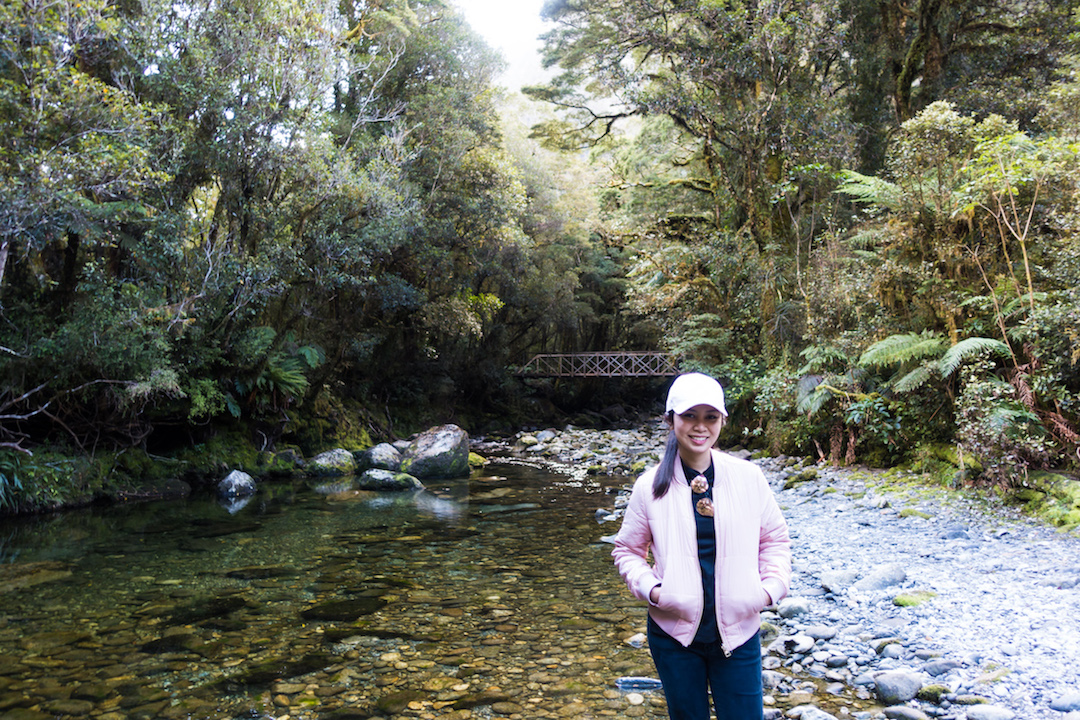
For the activities, you had the choice of taking a short hike on the Milford Track or take a small boat that will explore the fjord more closely. We chose to do the hike since the Milford Track is dubbed “the finest walk in the world.” For us, we were doing only a round-trip hike of 1.5 hours, which is just a glimpse of the whole track. For serious hikers, however, you would need to hike 33 miles and take 5 days to finish the entire hike!
Sandfly Point
View from Sandfly Point
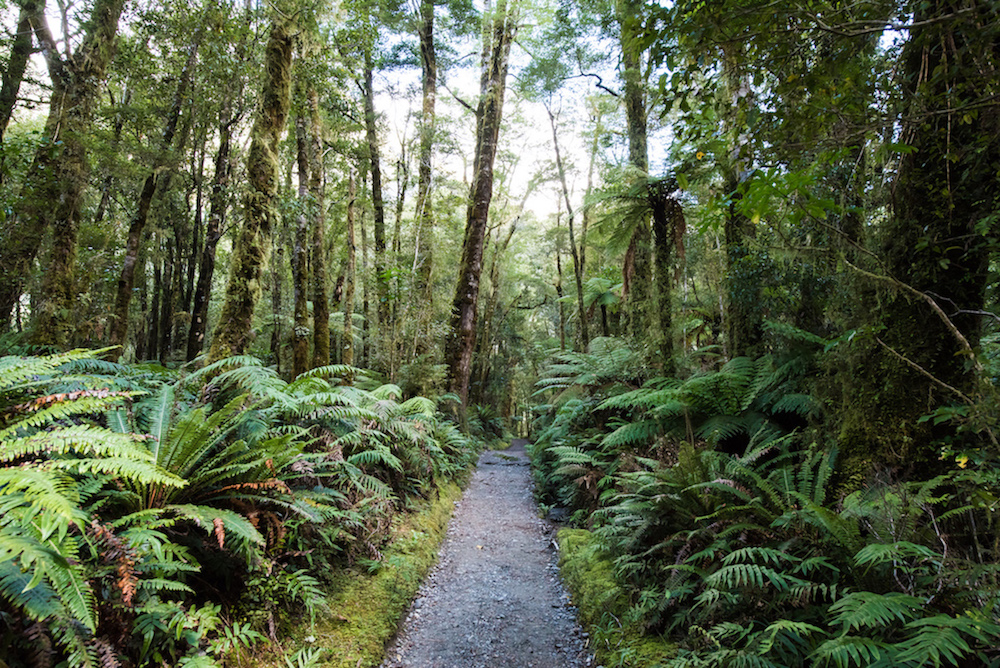
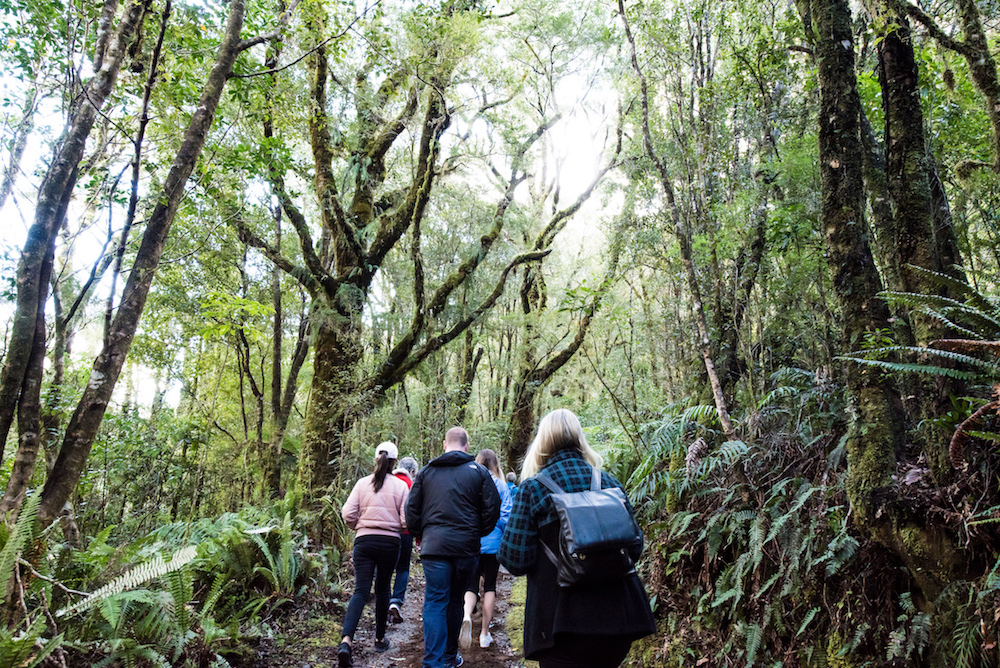
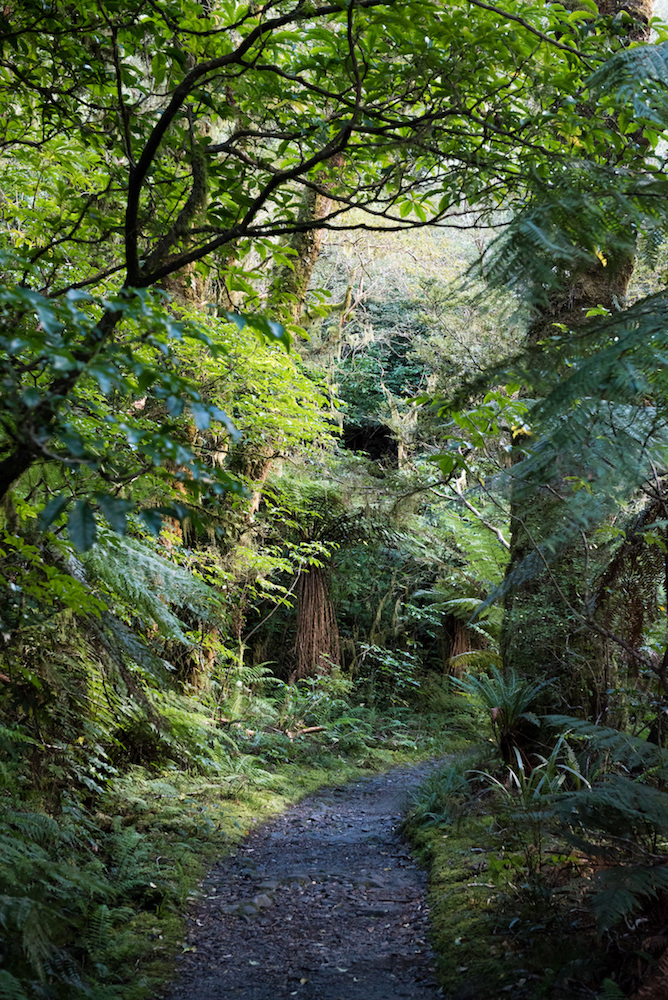
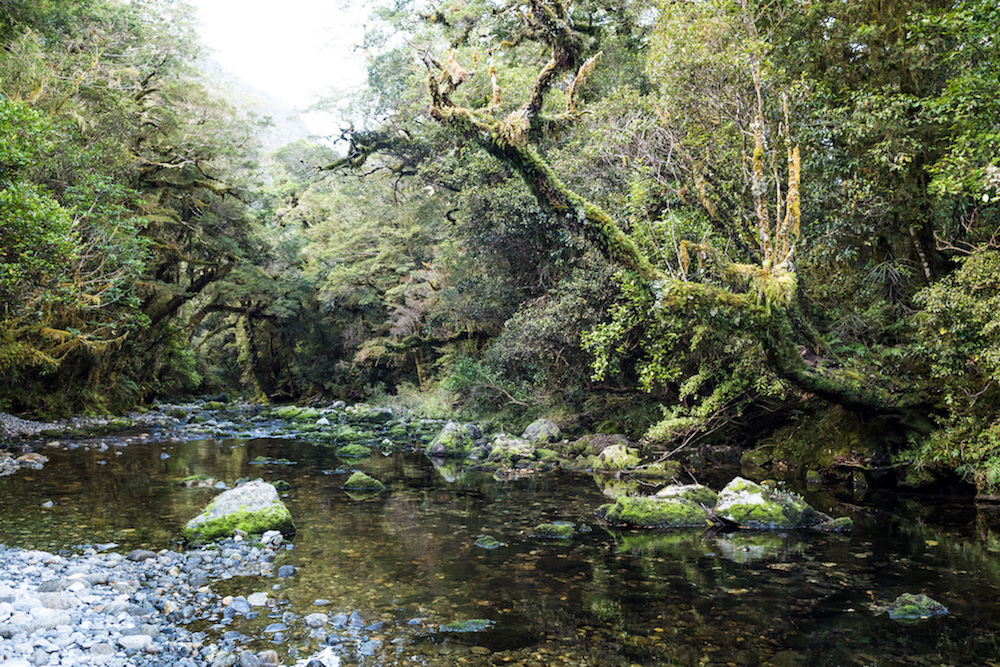
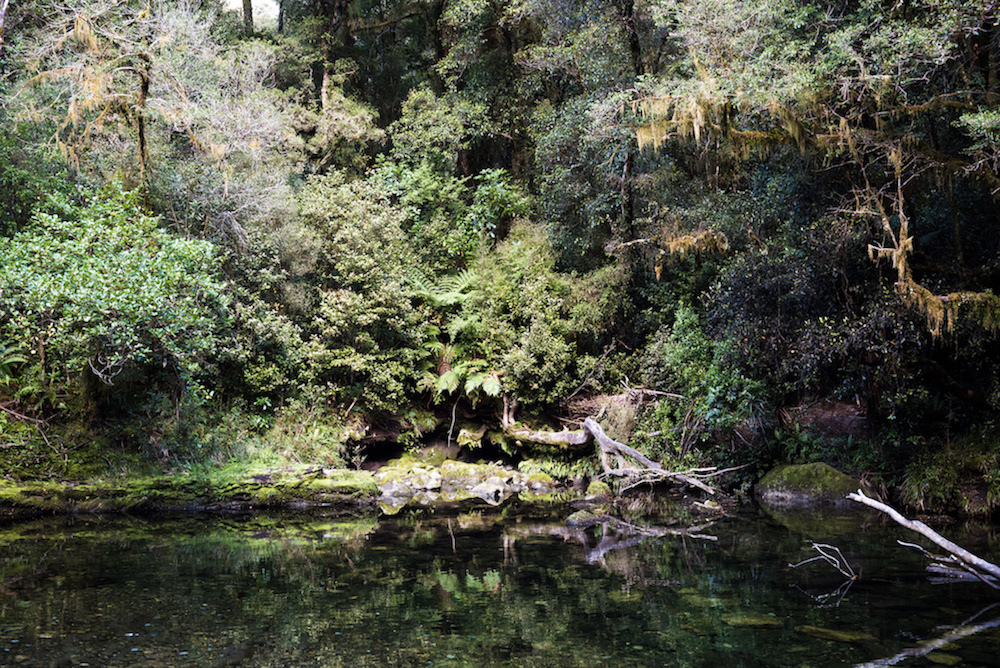
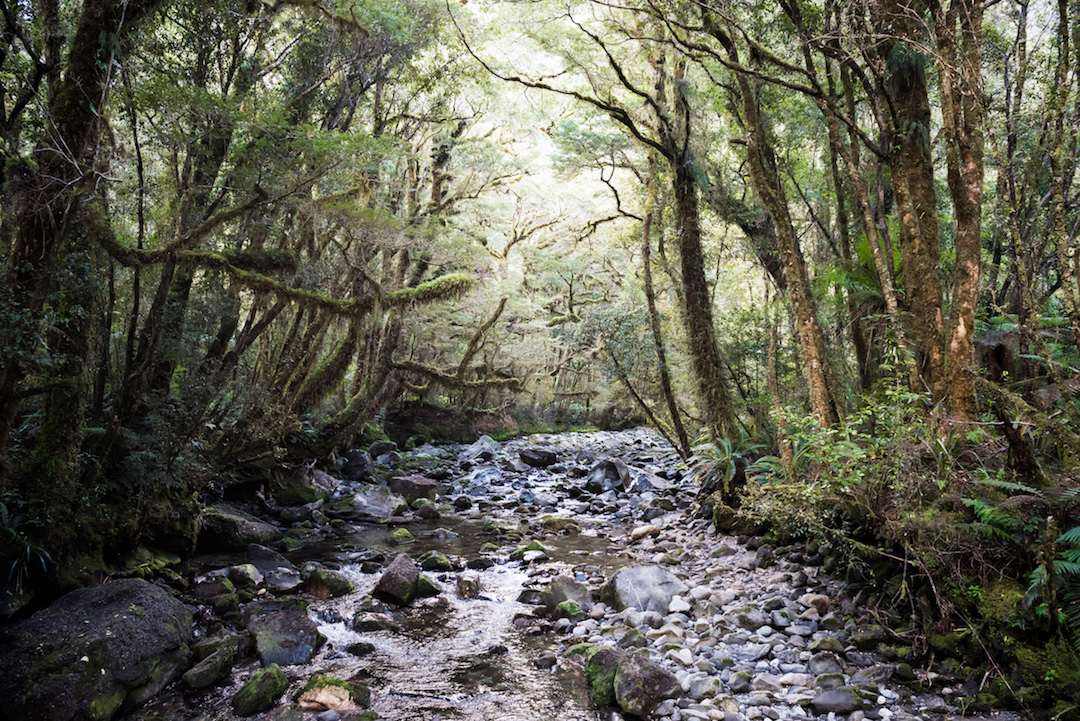
We took a smaller boat to Sandfly Point, which marks the end/start point of the track. (Also, true to its name, there are A LOT of sandflies here so fair warning.) A guide walked a group of us into a lush, dense forest thick with towering trees while pointing out varieties of ferns and moss. There were also some cute and curious birds that would come to investigate our group, some hovering by nearby branches but wary enough not to get too close. This part of the track is flat, well-maintained and the temperature was cool and comfortable, so it felt like a relaxed walk than any kind of hike.
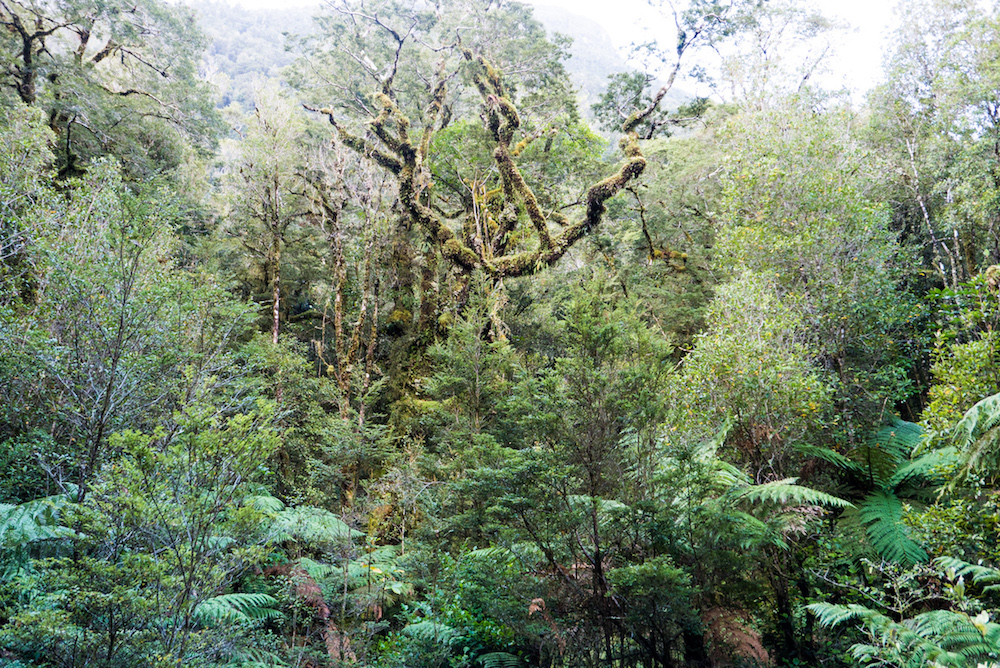
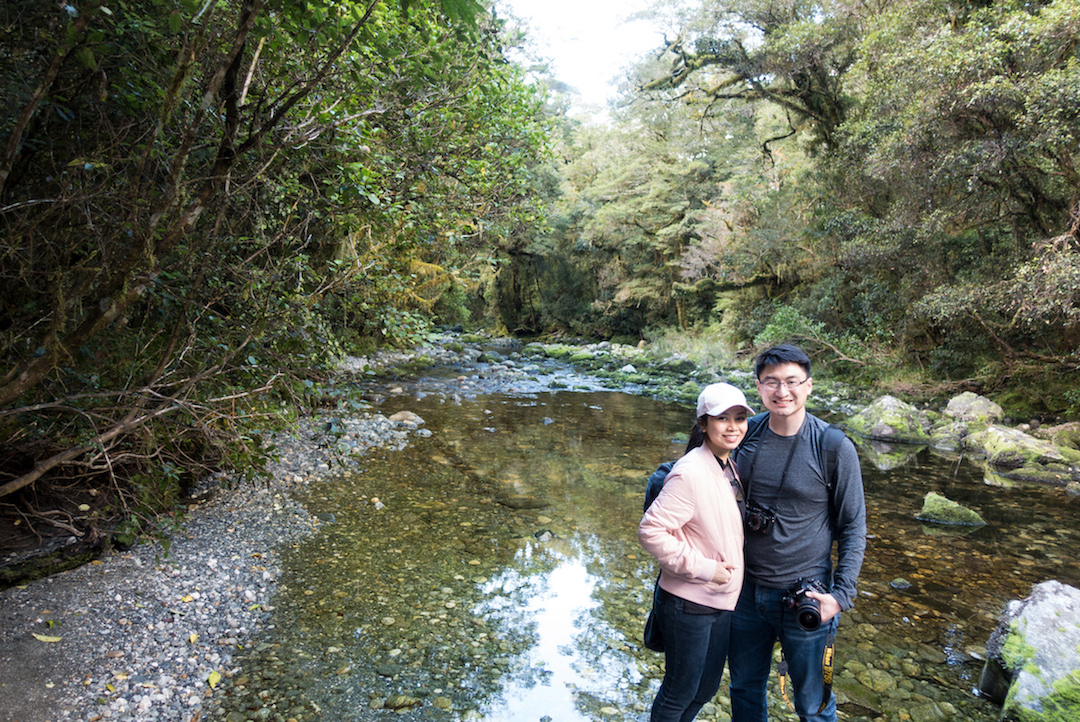
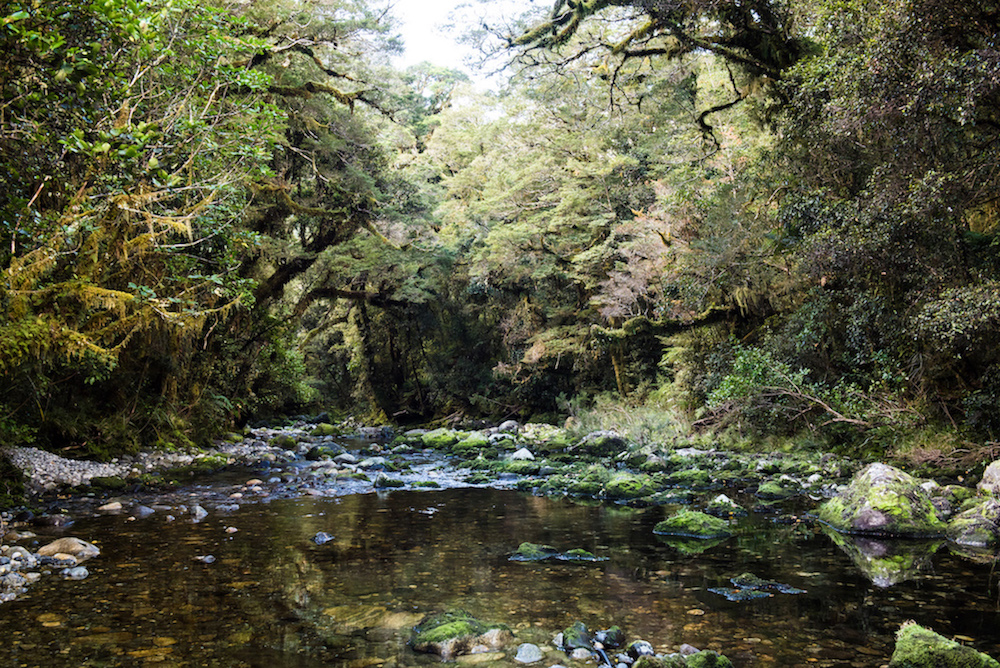
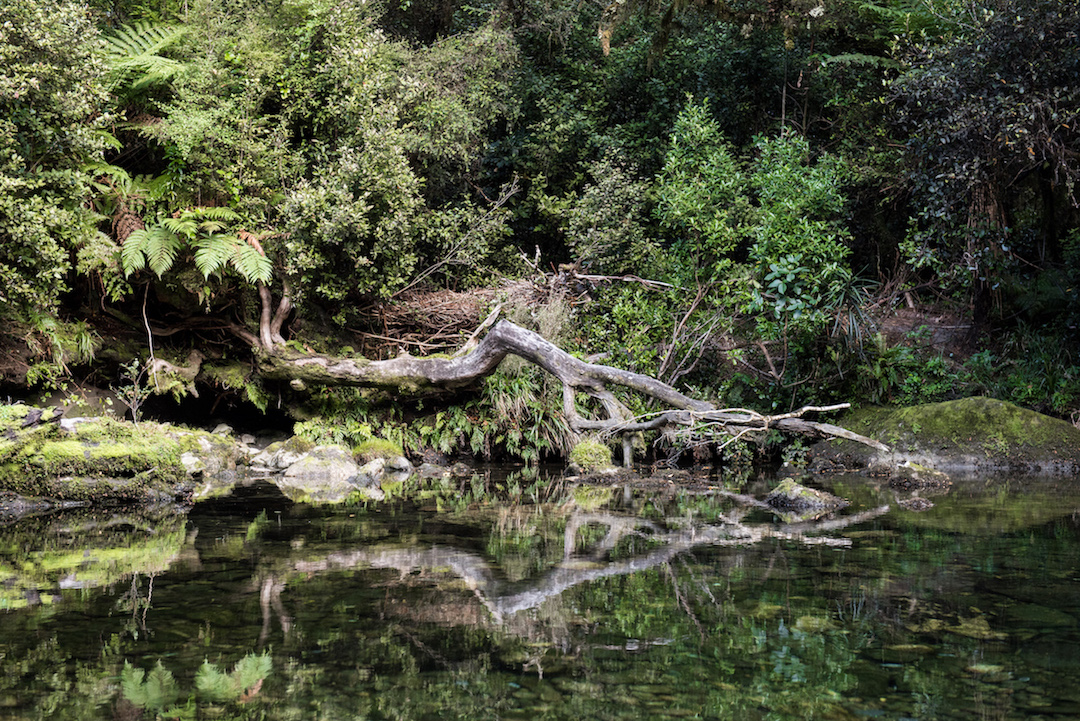
Our midway stopping point was a foresty area with a stream flowing through. In certain parts of the stream, however, the flow of water was so calm and clear that the forests above it would reflect almost perfectly in the water. It’s also amazing to see just how many different trees and plants occupy the banks in just a single photograph, the testament of an ecosystem that has thrived since ancient times.
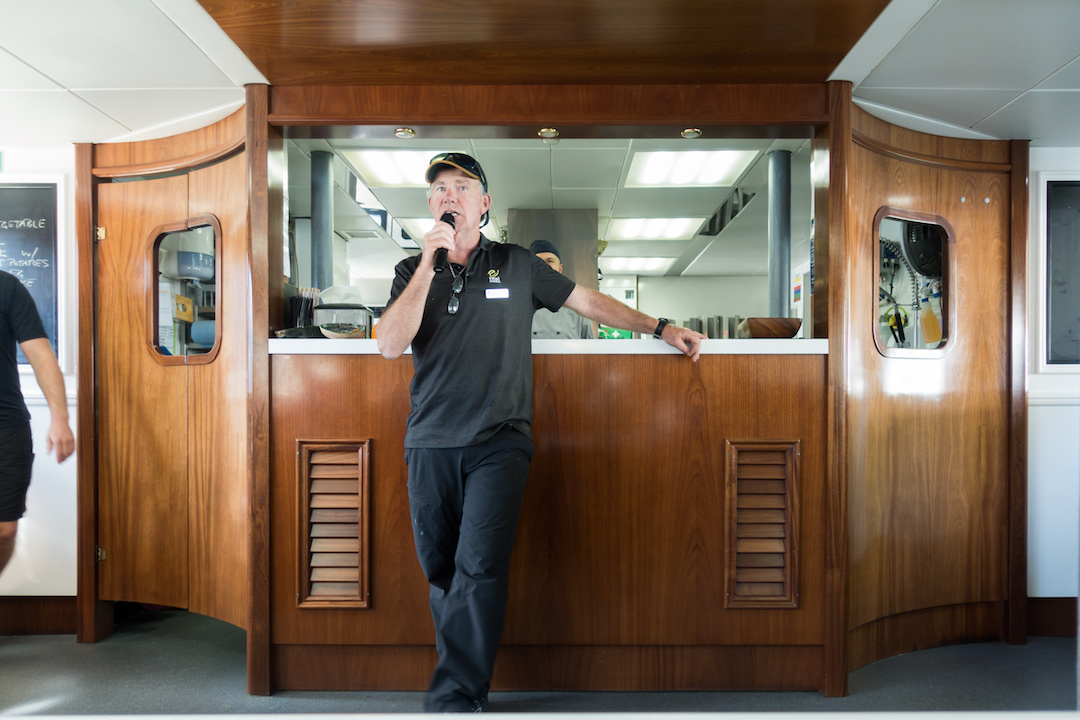
From here, we turned back around and headed back to the boat. By this time, it’s very late afternoon and the sun is starting to set. It’s a nice time to enjoy the sunset of Milford Sound or you can just relax inside where there are some board games, complimentary hot drinks, and a licensed bar. Meanwhile, the crew is preparing a 3-course dinner that included salad, roasted vegetables and meat (vegetarian options available), and topping it off with dessert.
I’m not going to lie but I did not have the highest of expectations for the food. Most other boat excursions I’ve been on, food was premade and usually bland, so I was already pleasantly surprised that everything looked like it was cooked from scratch. When we tried the food that came out to us, I think we were almost shocked at how delicious it was! The ingredients looked pretty simple but they were fresh and it truly was a restaurant-class dinner. It was one of our best dining experiences in New Zealand! Maybe that’s speaking with some hyperbole but I really was impressed with the food. And with that, we could take our happy tummies into bed and doze peacefully off into the night.
Simple yet delicious!
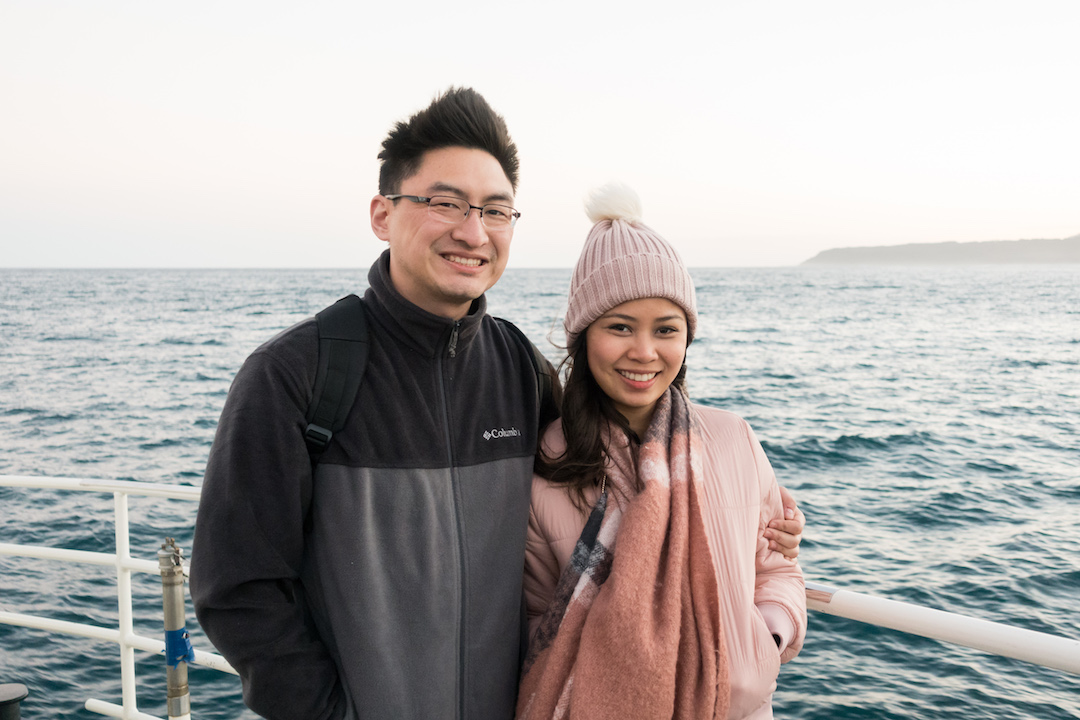
After a comfortable night of sleep, we awoke early in the morning for the cruise and enjoyed a nice, hearty breakfast. After that, the boat started to head out towards the Tasman Sea. It was still pretty early and dark within the fjord, which made the morning temperatures a little chilly. We waited inside the boat until we exited the fjord and were out on the ocean. By this time, the sun was up a bit and the temperatures were a bit warmer. It was still a little windy but the was really lovely and so serene being out on the open ocean.
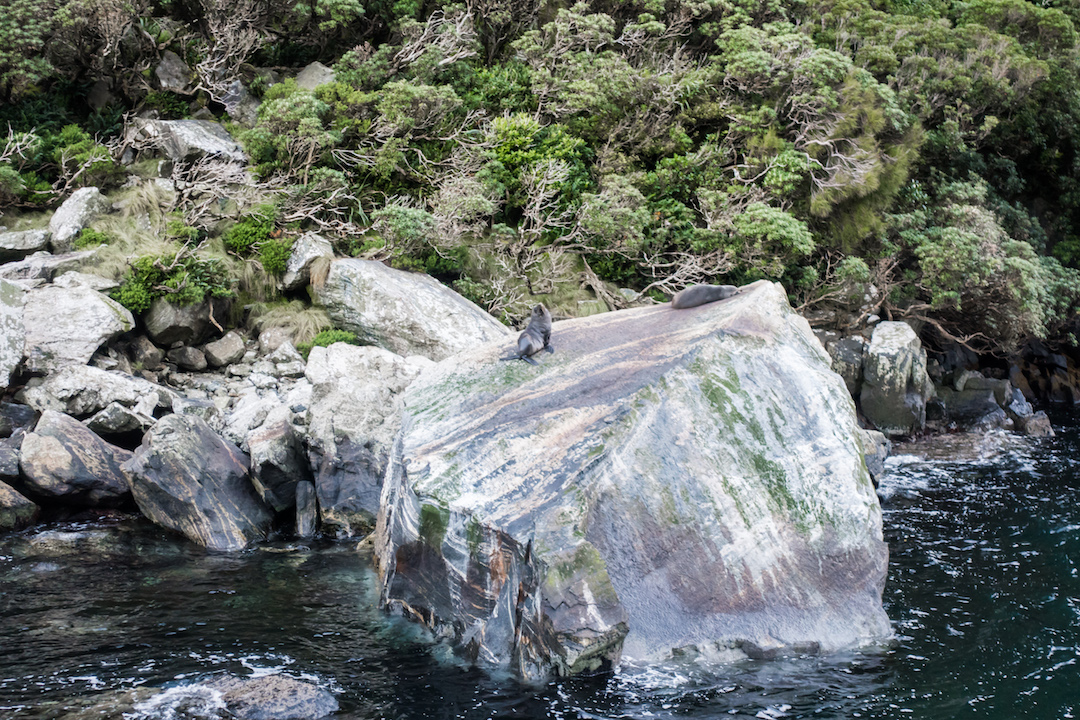
Shortly after making it out into the ocean, the boat turned around and headed straight back into the fjord. While sailing in, the captain would talk through the boat’s speakers to point out key sights and wildlife. A few albatross (sorry, no pictures!) flew around our boat and they are pretty amazing creatures. They live on the ocean for 85% of their lives, only going on land during the breeding seasons! They also have a lifespan of up to at least 40 years, which is very impressive for a bird! We also checked out to Seal Rock which, as its name implies, you can find fur seals lying on this big rock. There were only two seals lounging this time but often you can see up to a dozen seals lying here.
Seal Rock
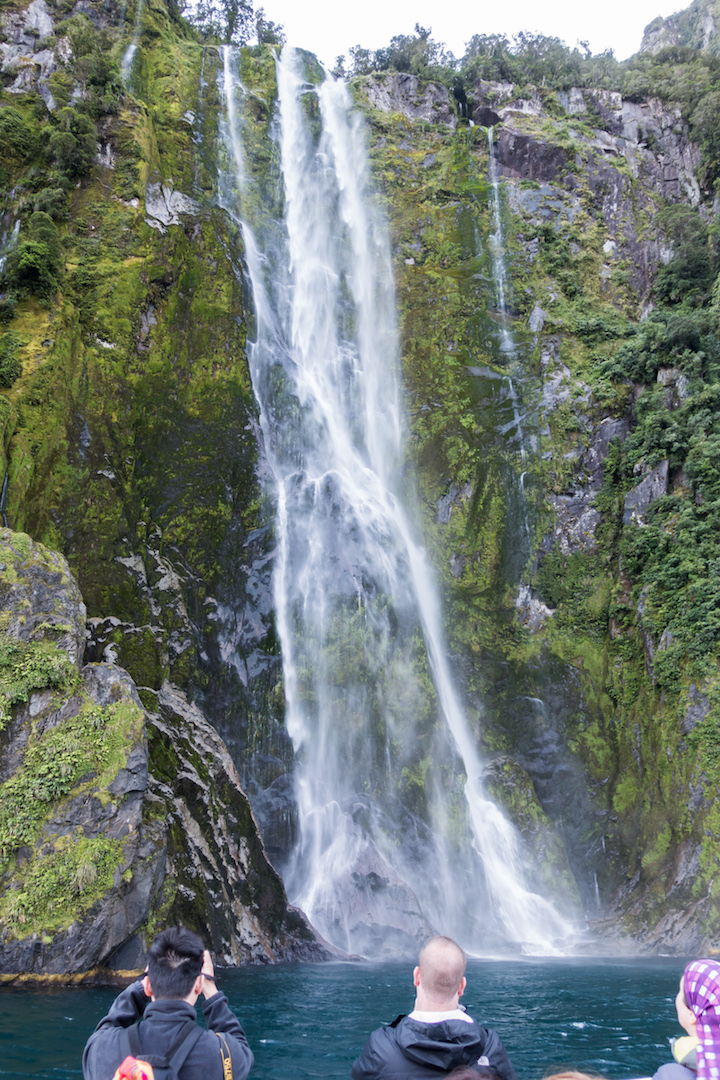
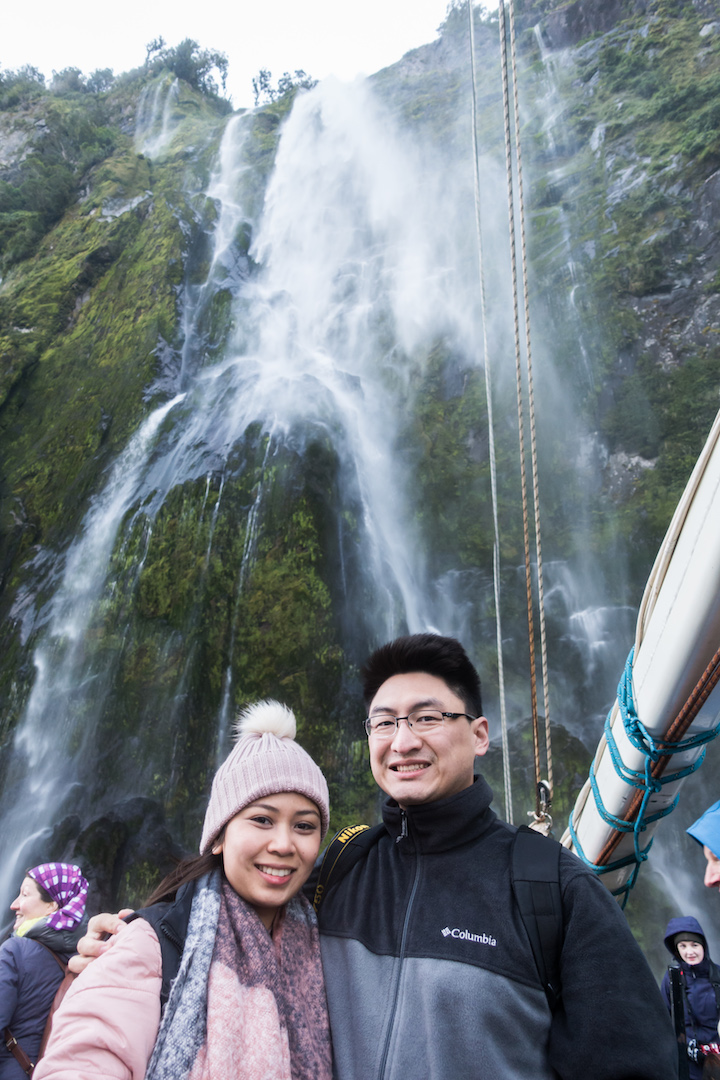
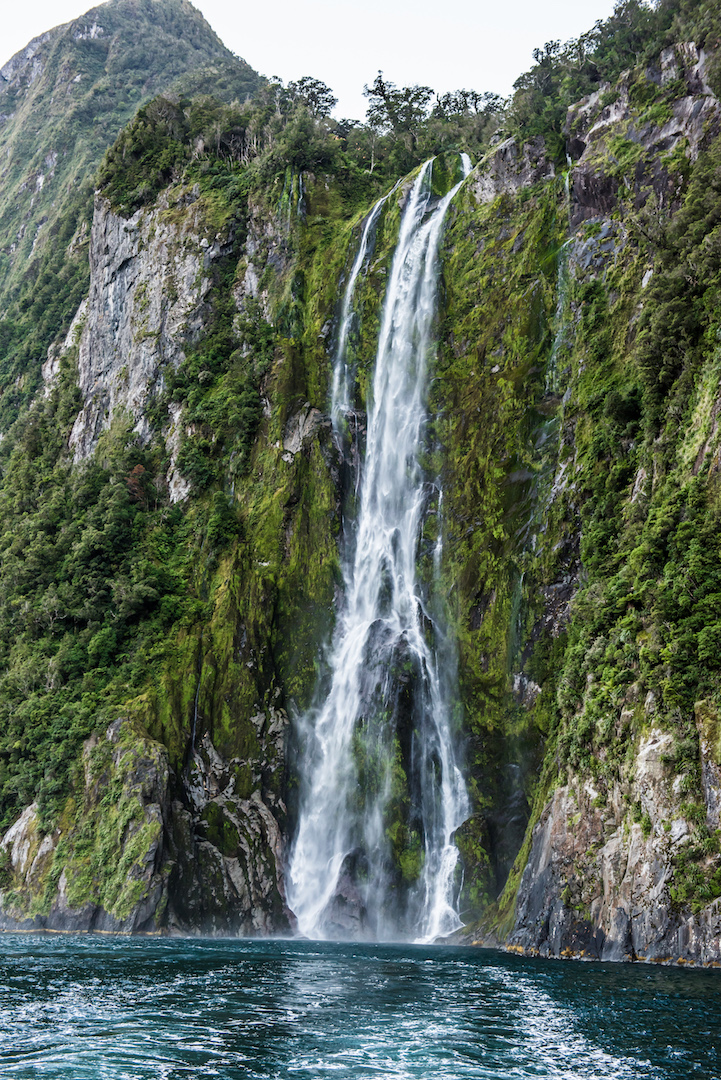
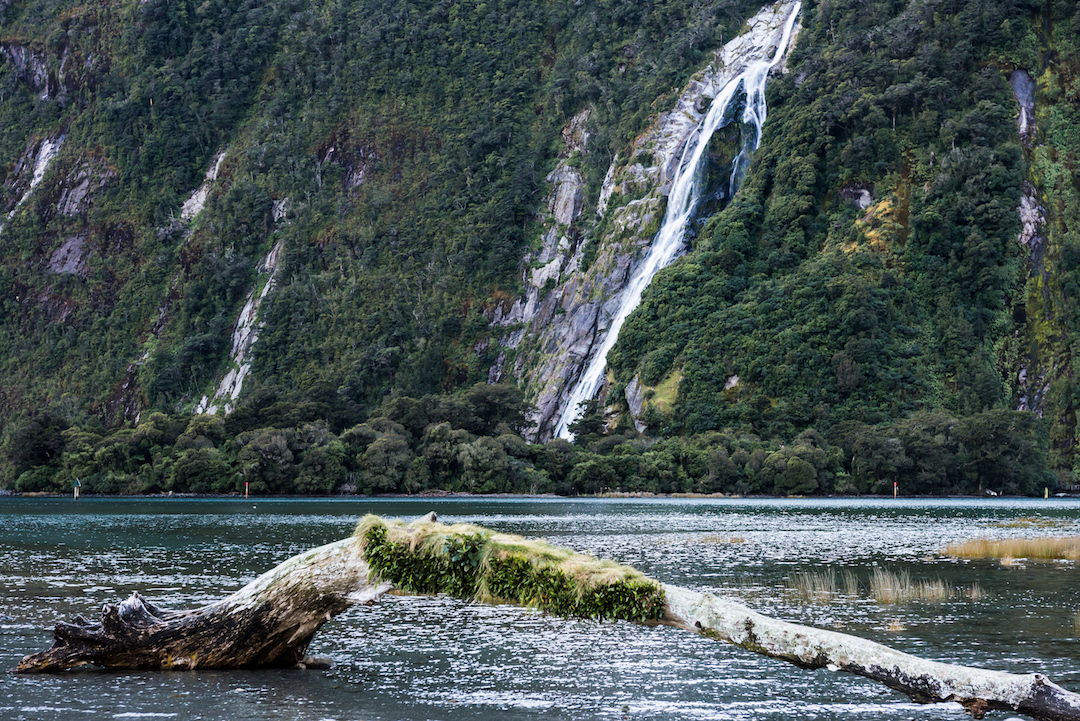
The boat also sailed close to the insanely tall rock faces, some of them shooting out of the water up to 1,200 meters! Of course, no Milford Sound visit is completed without visiting one of its famous waterfalls, Stirling Falls, and at 151 meters, it is the second tallest waterfall after Lady Elizabeth Bowen Falls in Milford Sound. What’s cool about this waterfall is the boat is able to sail pretty close to the falls, which allows you to feel the intense force of the colliding water through the strong winds and spray. I was told you can even kayak to the base of the waterfall. When it rains, you are able to see a lot more waterfalls but you can’t see them due to lack of rainfall from good weather. Some other famous parts you’ll see include Harrison Cove and the aforementioned Bowen Falls.
When you pass Bowen Falls, that essentially marks the end of the overnight cruise and brings you back to port. Though it was sad having to leave the boat, it was a truly perfect experience for our Milford Sound visit.
Boat approaching Stirling Falls
Harrison Cove
Bowen Falls
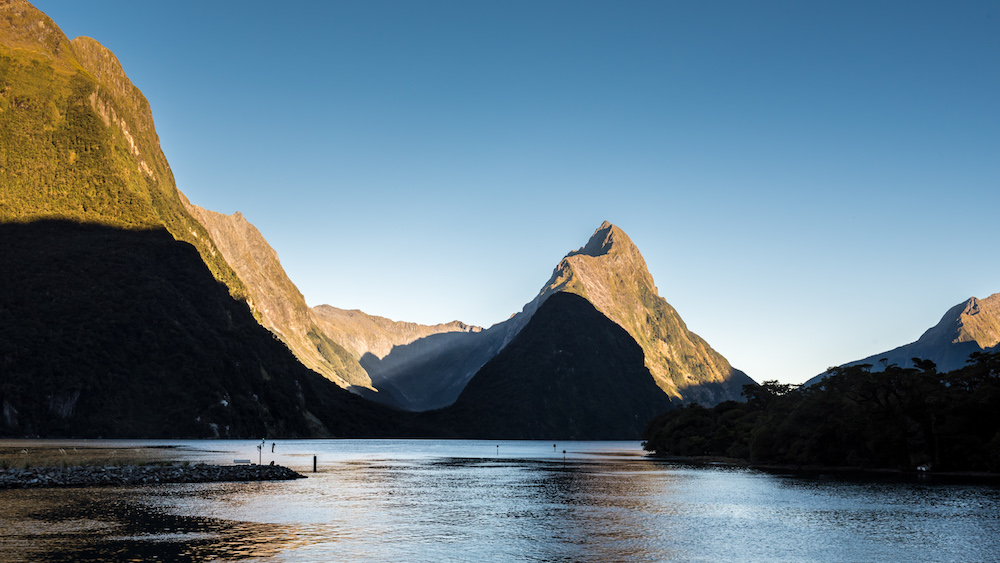
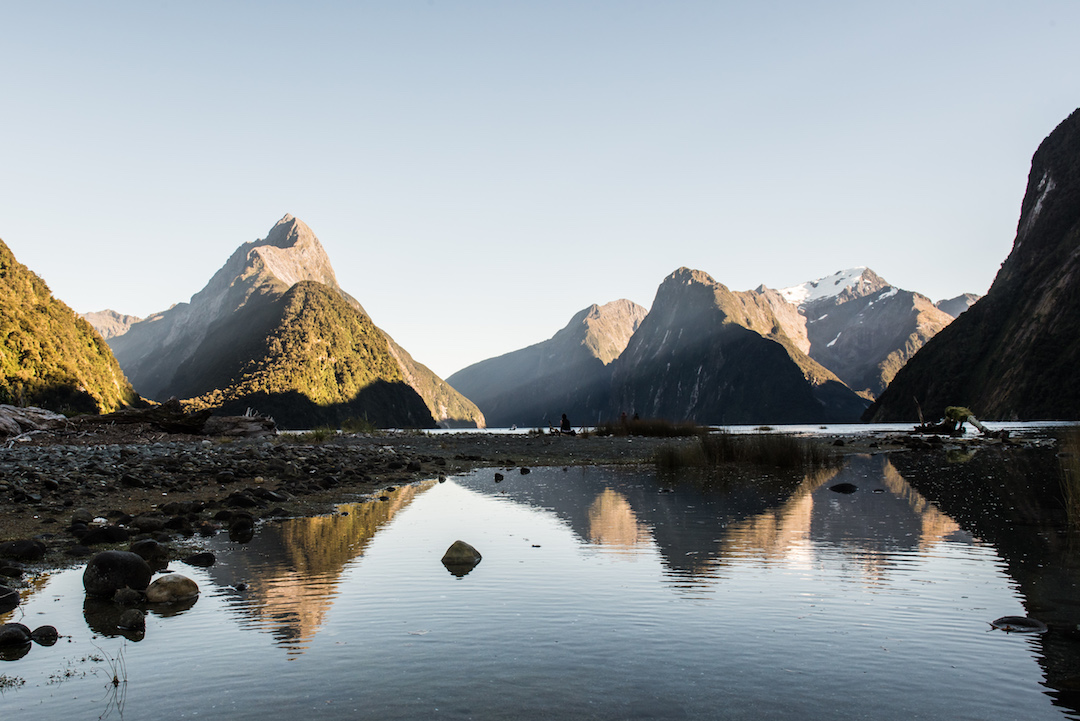
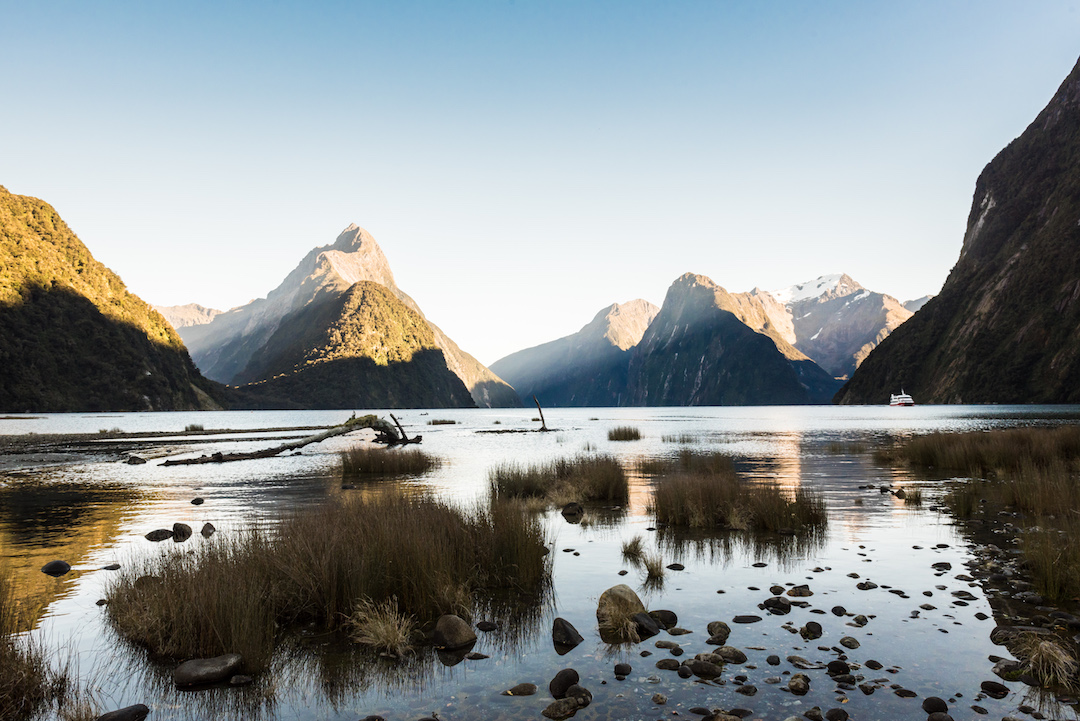
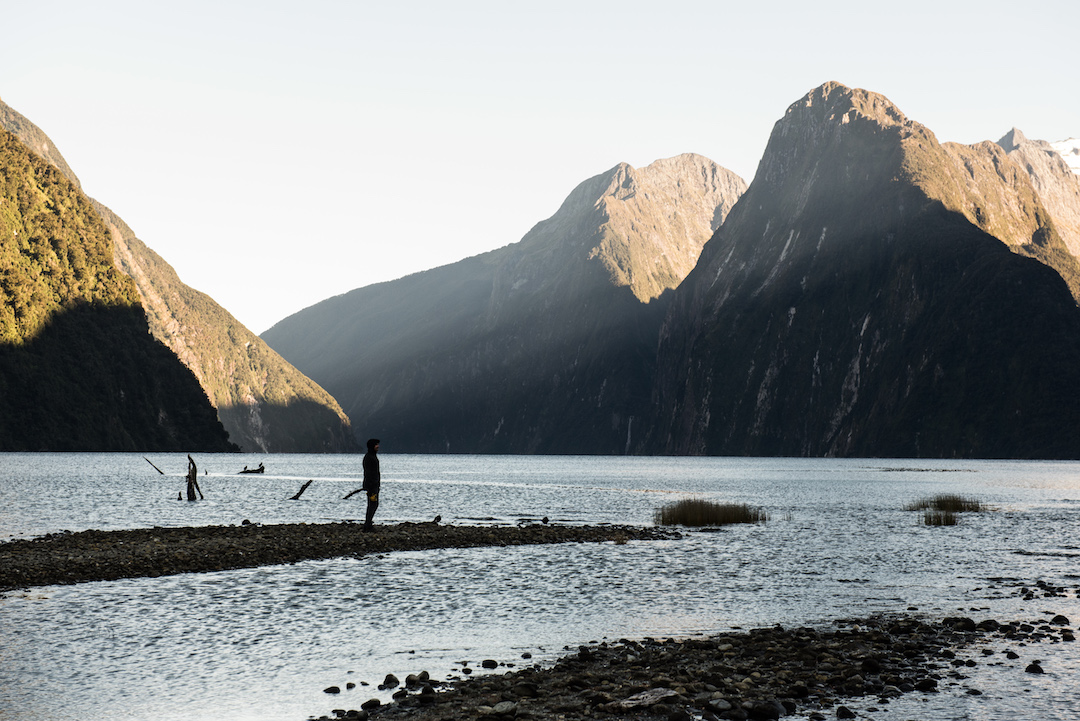
3. Walking on the Milford Sound Lookout Track
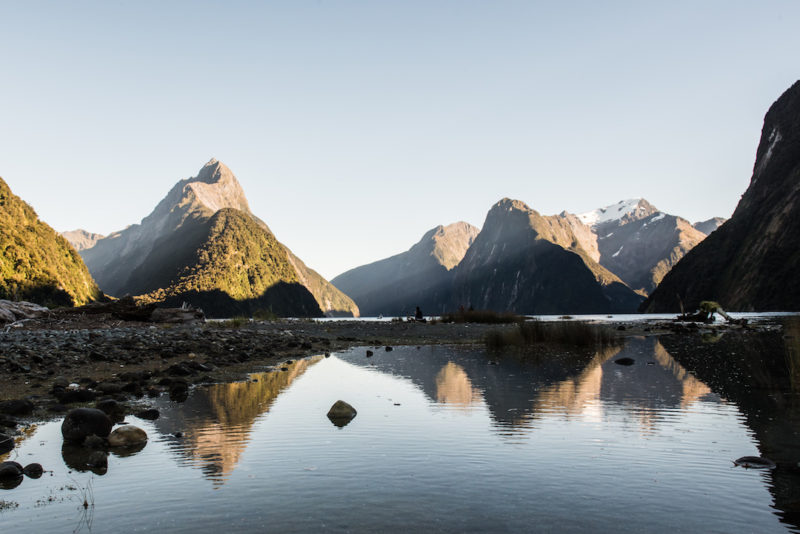
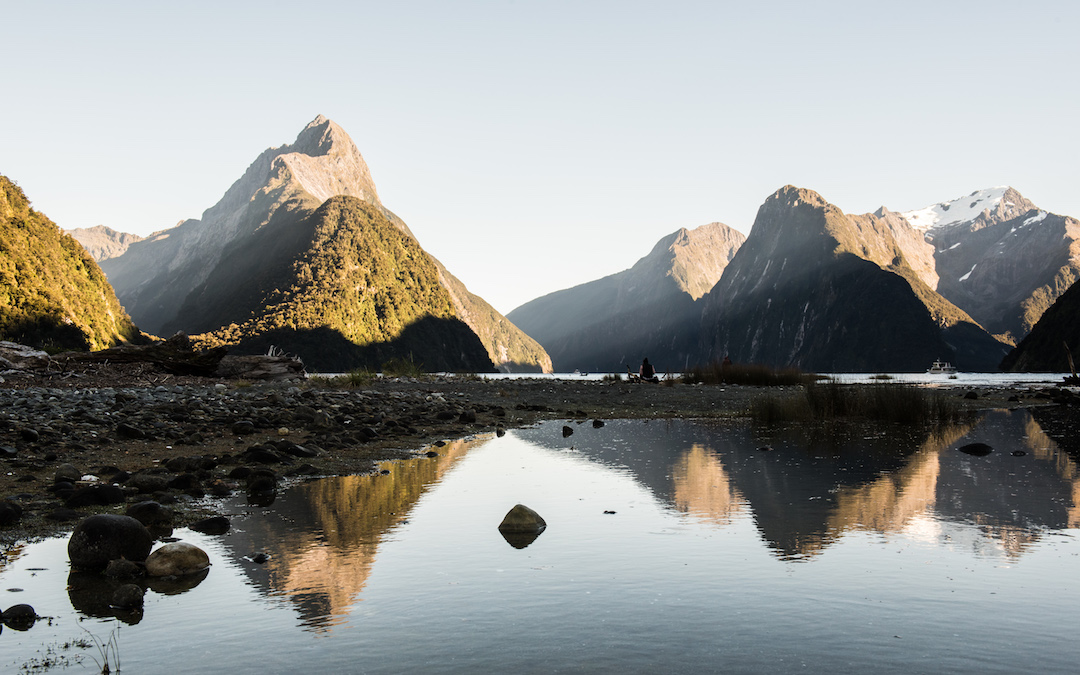
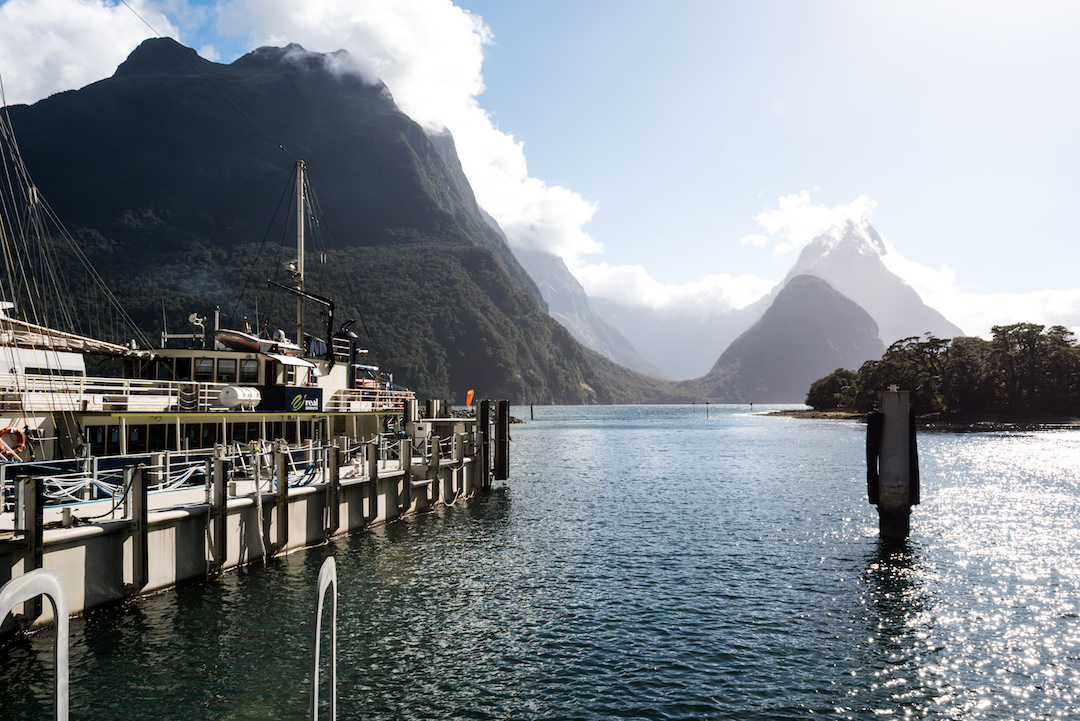
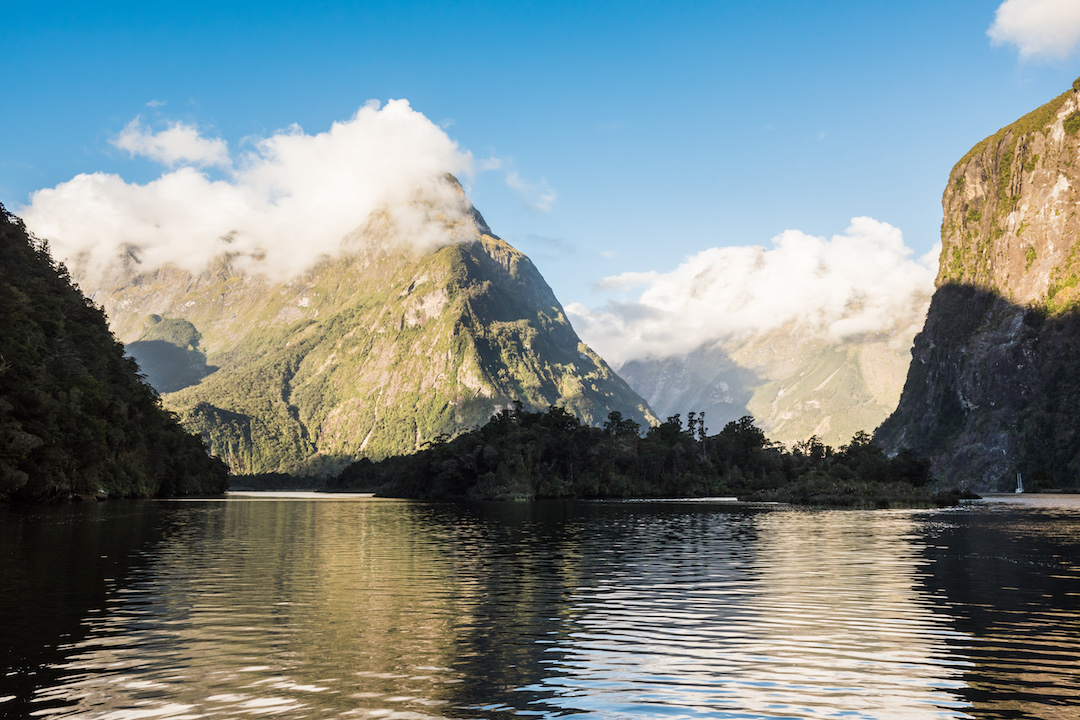
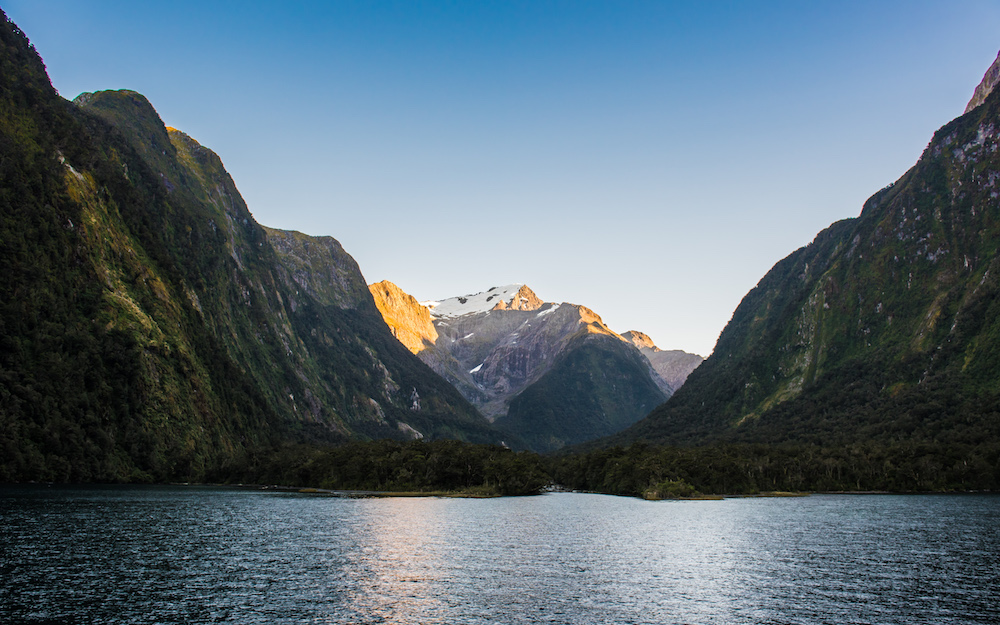
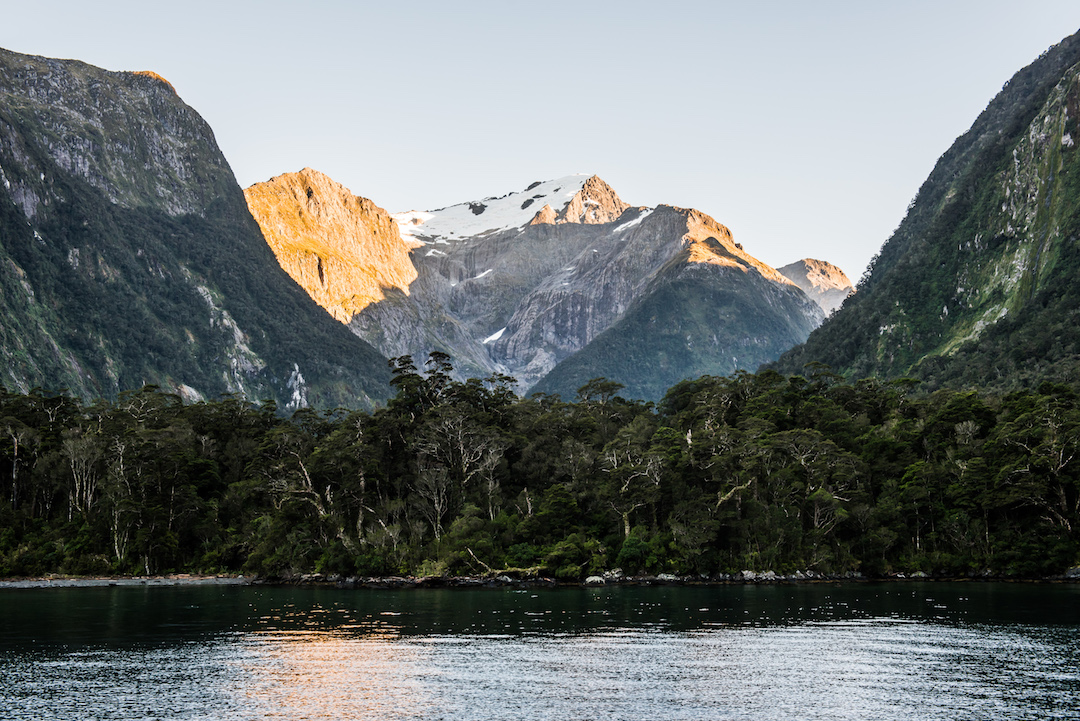
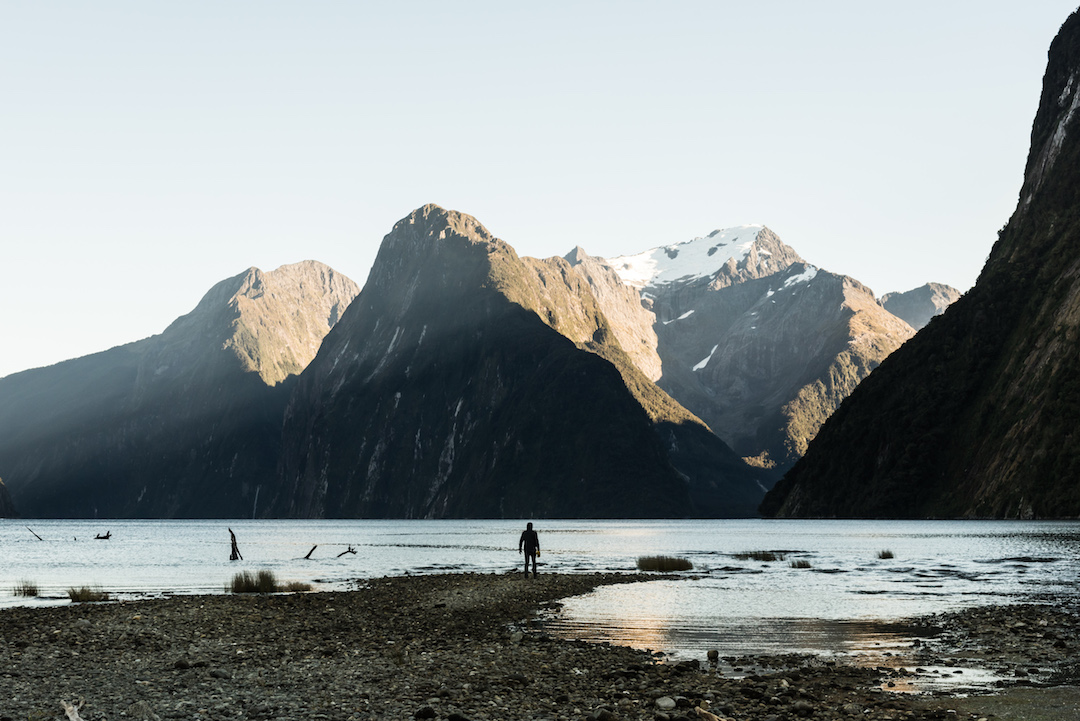
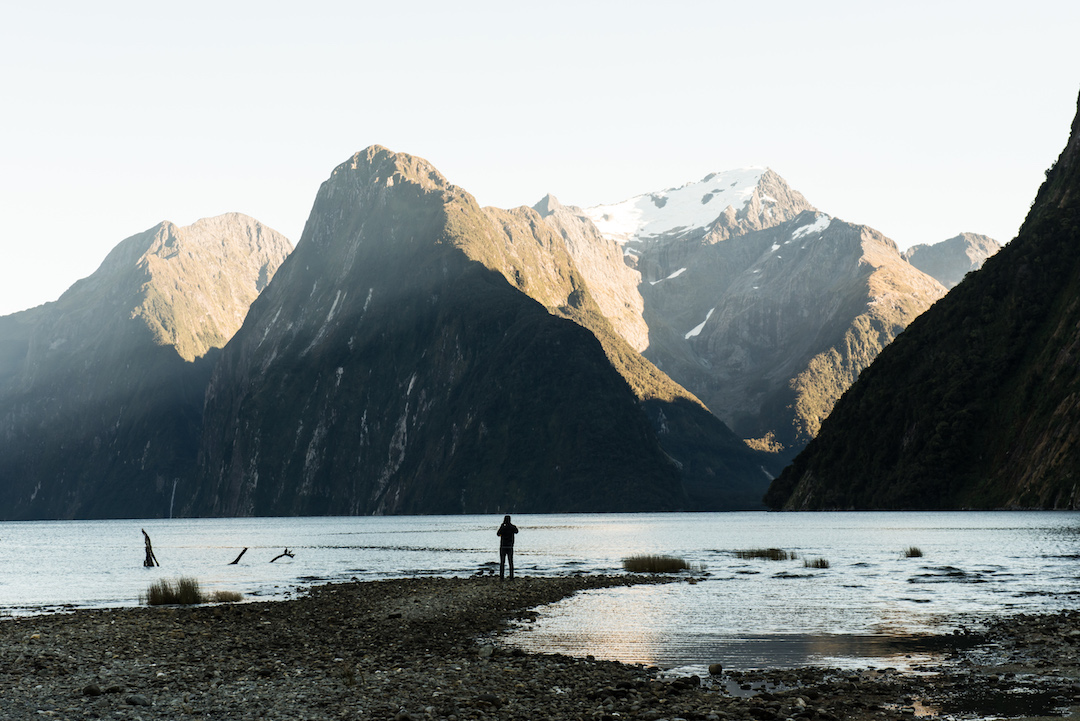
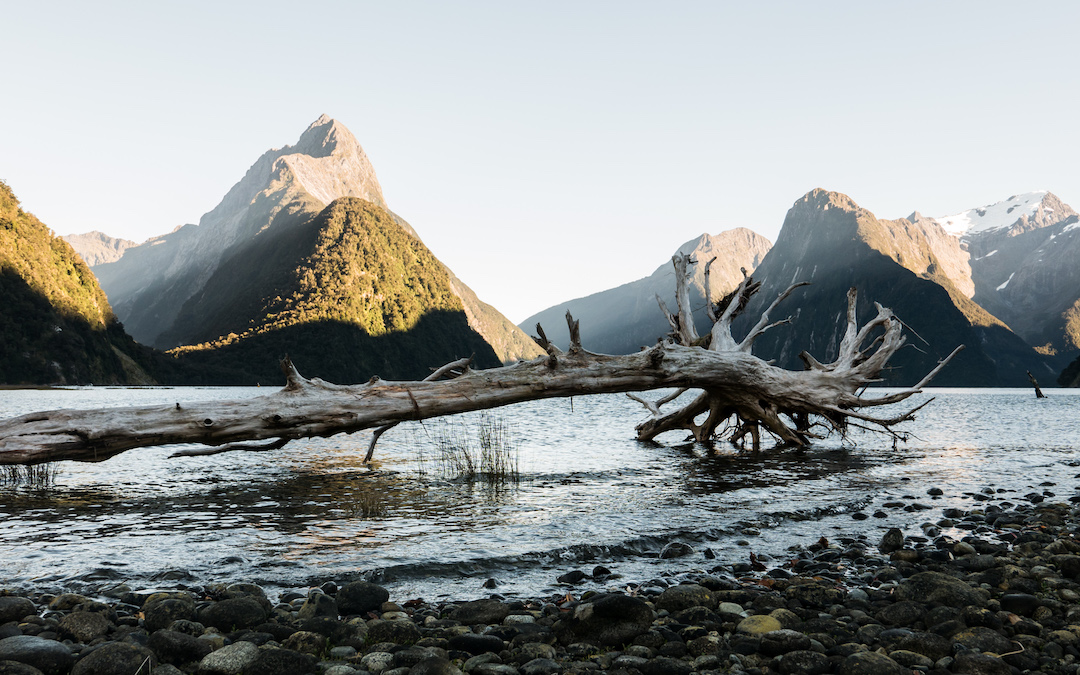
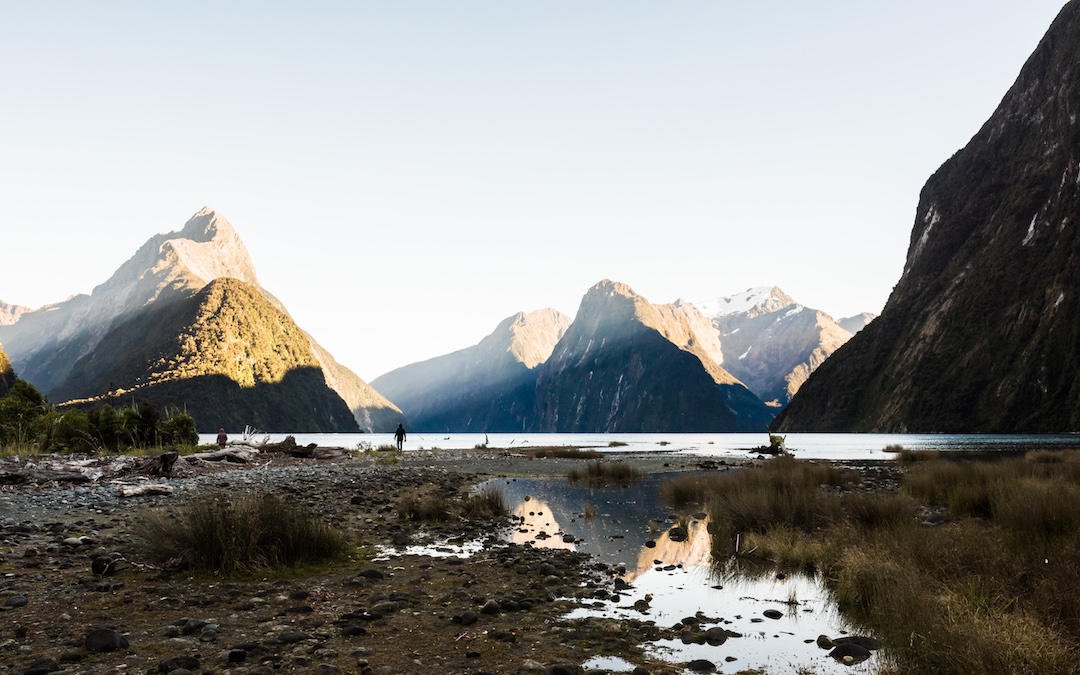
We can keep this one short and sweet. Before leaving Milford Sound, there was still one area we had to check out. From the visitor center, you can find marked signs for the Milford Sound Lookout Track. It’s a short walk that will take you to the edge of the water and offer stunning views of the landscape. With the sun still rising, you are able to see distinct sunbeams streaming between mountain peaks. If you can find calm water, you can get a beautiful reflection of the landscape, which is one of the most photographed shots at Milford Sound. The best experience here I think, however, is simply enjoying the peace and serenity of this majestic landscape. Just sitting there makes you think that you can stay there forever, which I wouldn’t object to that!
Mitre Peak, Milford Sound
Here is also a video of our scenic flight, overnight cruise, and the view from the lookout track:
Below is some information on these activities:
Scenic Flight: We cannot find this information online or on the visitor center website. You should be able to find more information when you visit in-person at the Discover Milford Sound Information Centre & Cafe, where they also have a slew of other activities to offer. But expect the pricing to range from about $100-200 USD per person. This activity is also only available with permitting weather.
Overnight Cruise: Price: Ranging from $349-700+ NZD, depending on accommodation and season Departure: Milford Sound. Options are also available to depart from Queenstown or Te Anau Getting there: From Queenstown, it is a 4-hour drive to Milford Sound; from Te Anau, 1 hour and 40 minutes. You can also take buses or planes for transport. Website: https://www.realjourneys.co.nz/en/experiences/cruises/milford-wanderer-overnight-cruises/ Other tips: Best to book this activity in advance, as this boat only holds 36 people at a time
Lookout Track: Price: FREE! And who doesn’t like free?? Getting there: From the visitor center, there are marked signs pointing towards the track Other tips: The track is only about 400 meters and open during park hours
So, there you have it, 3 amazing activities that you can enjoy for your Milford Sound visit! Hope you enjoyed reading this and we’d love to hear from you if you’ve done any of these activities or other activities that you would recommend. If these activities inspire you to visit Milford Sound, be sure to save the pins below for your future visit:
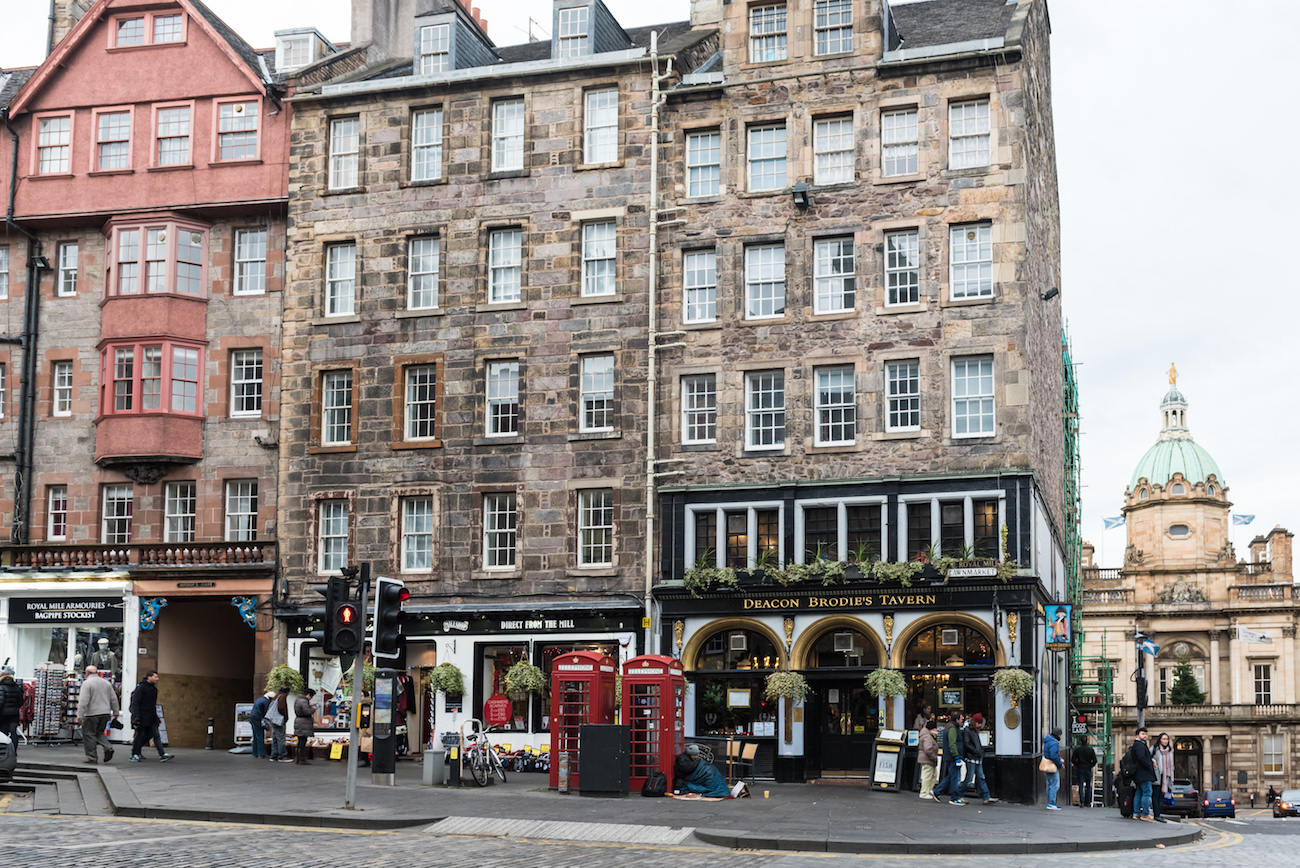
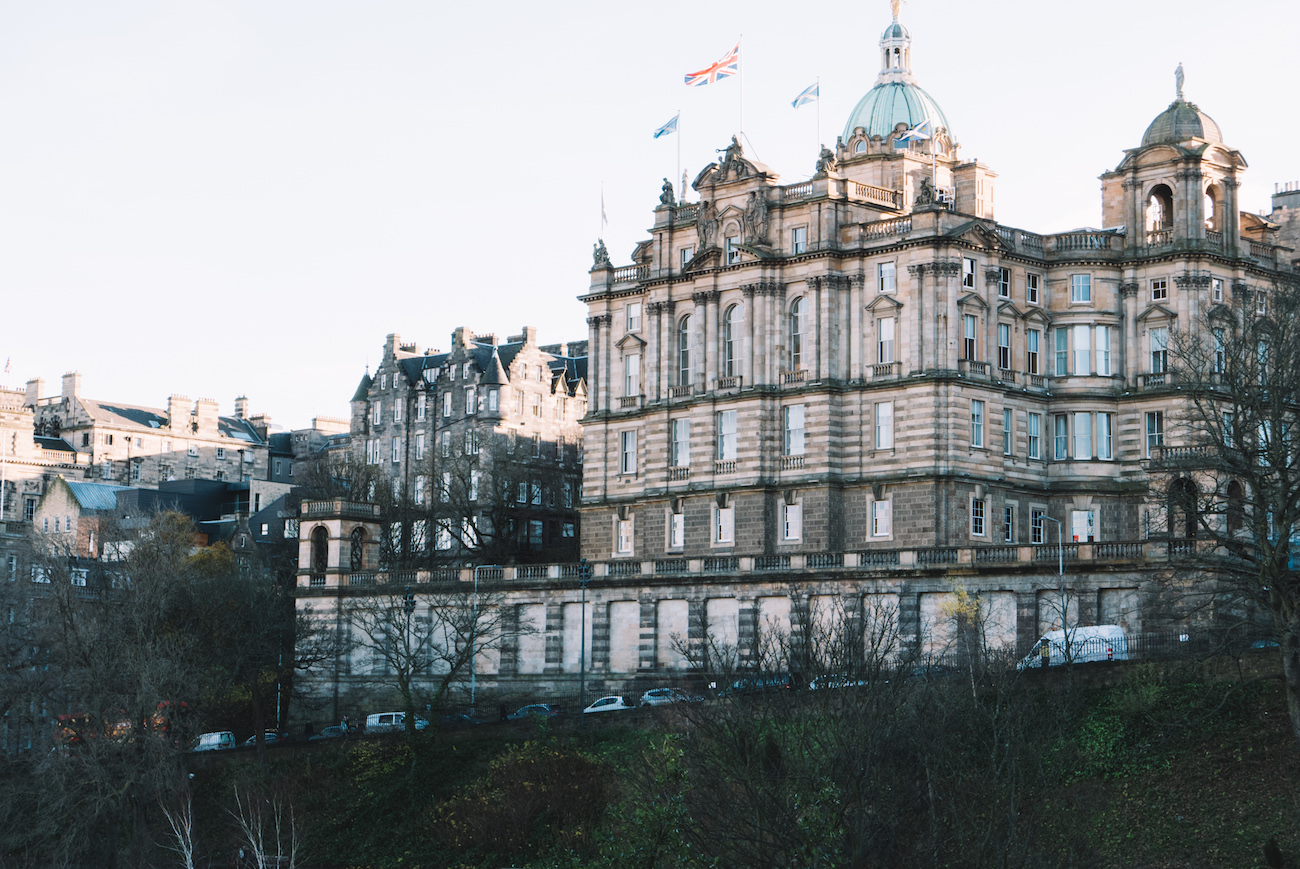
What I really enjoyed about visiting Edinburgh, Scotland was how charming the city was in just about everywhere we went. We would walk down any street or around every corner and we would find something interesting, whether it was the architecture, Scottish shops, small restaurants/cafes, whisky bars, or a unique attraction. With so many things to do and see, it’s easy to get lost and fall in love with the city.
Unfortunately for us, we were only able to spend two days in Edinburgh and probably left with many things unseen. But even for such a short time, we still had an amazing visit and felt like we saw a lot and got to do a lot. So, we’ve listed out 9 things that you should definitely do during your visit to Edinburgh:
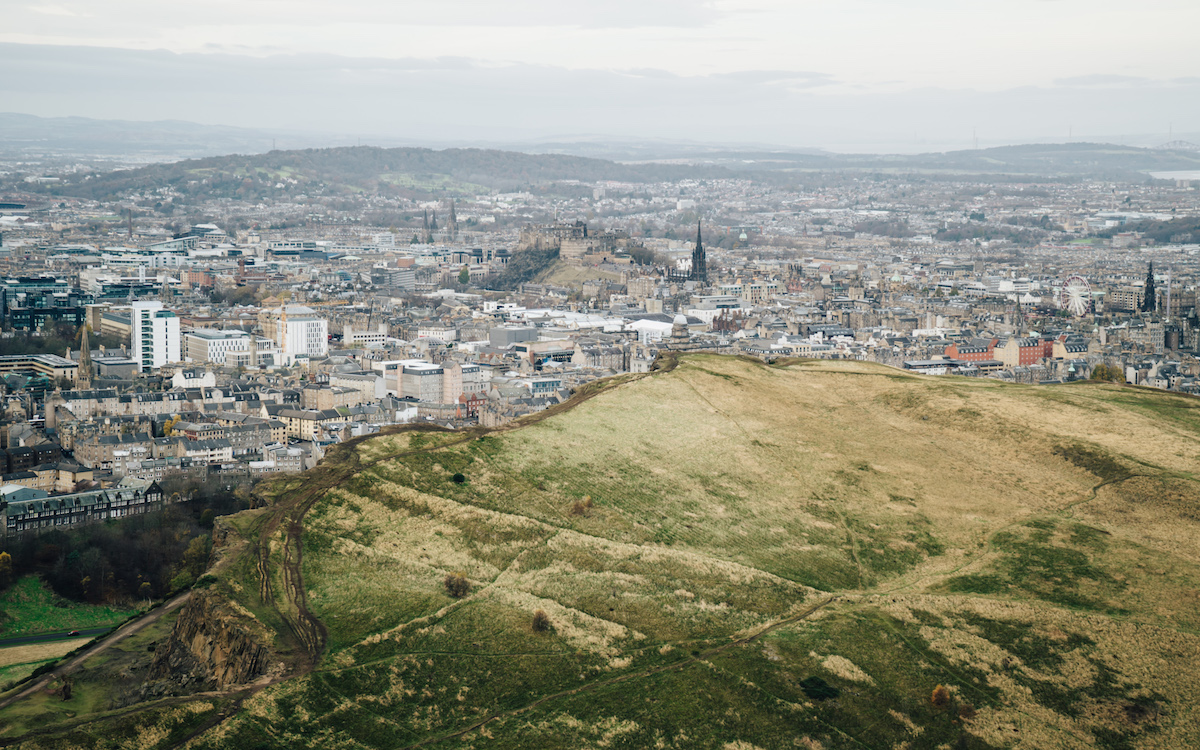
At 251 meters, Arthur’s Seat is the highest point in Edinburgh. It’s about a 30-45 minute hike to the top depending on your speed but is totally worth it for the amazing breathtaking views of the city. You can also explore the rest of the park, including St. Anthony’s Chapel and Salisbury Crags, massive cliffs that oversee the city. Click here to see more of the views.
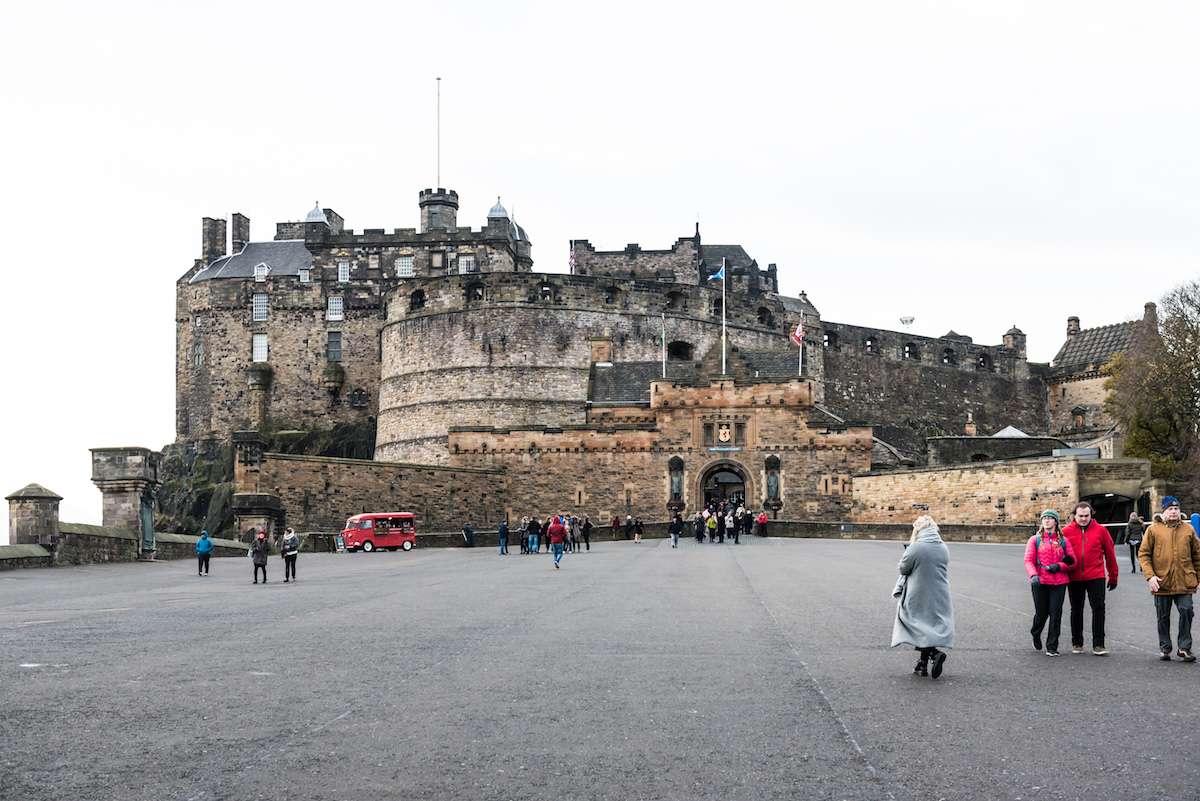
The Edinburgh Castle is an obvious choice, as it is the nationally recognized symbol of Scotland and one of the top attractions in the country. The castle sits atop Castle Rock and offers vast views of the city. See more of the castle here.
Scotch whisky is the pride and soul of the country so if you want to understand what goes into this craft or simply love whisky, then you have to do the Scotch Whisky Experience. There is an interactive ride, you’ll get to do some tasting, and see the largest scotch whisky collection in the world. For more of this tour, you can read here.
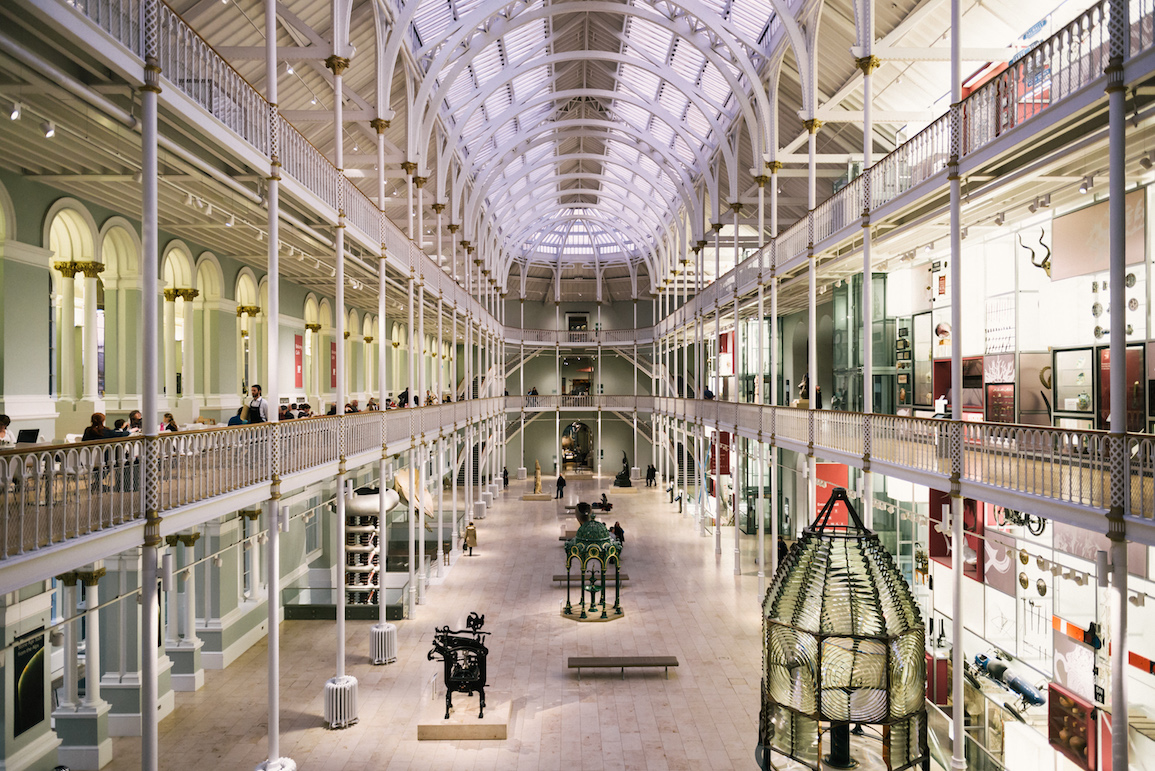
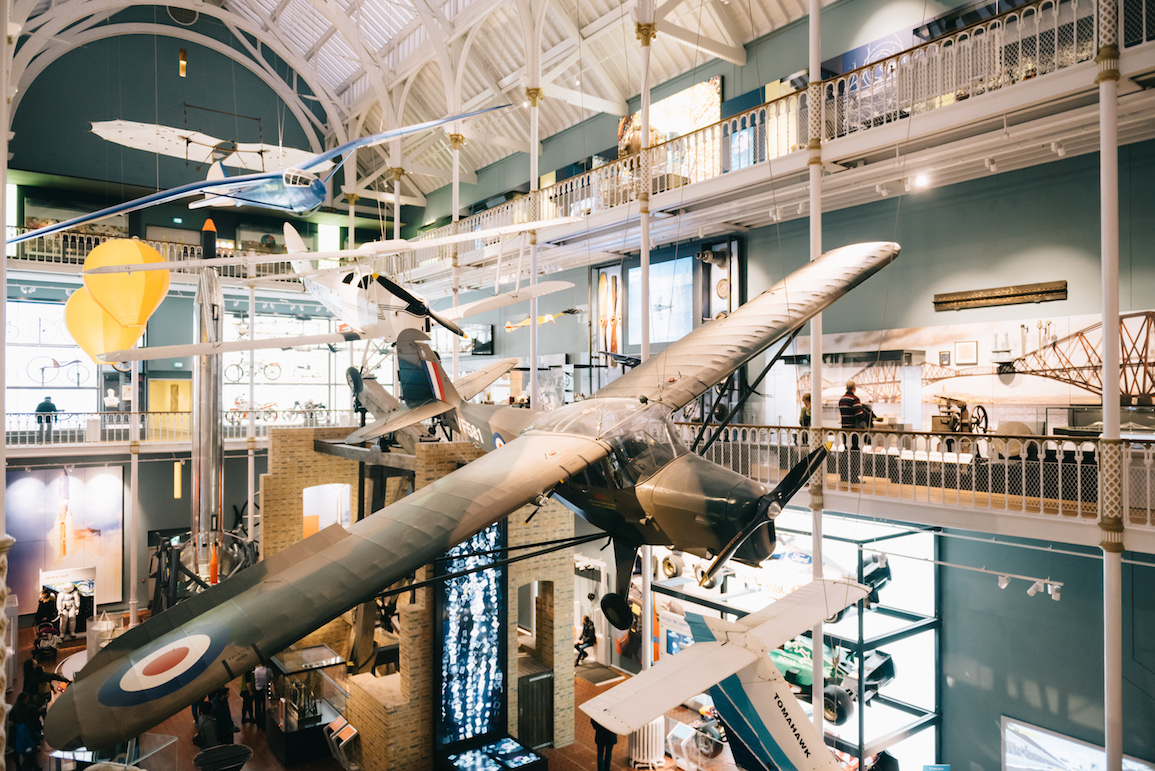
The National Museum of Scotland is actually the most visited attraction in the whole country and the best part is that it’s completely free to visit. Not only can you admire the architecture but the museum houses a number of really cool exhibits from biology, technology, fashion, Scottish history, astrology and much more. To see more of the other exhibits, you can find more photos here.
5. Stroll down George Street for some shopping
George Street is well-known for being the best place in the city to do some serious shopping. We weren’t planning to do much shopping when we started walking but there were some many interesting shops that we ended up buying quite a bit of stuff. If you are able to resist the temptation to shop, the street does offer some beautiful sites and architecture that you can enjoy.
Statue of William Pitt, George Street, Edinburgh
6. Eat at ANY restaurant/cafe
Many times when we go out to eat, we tend to use an app like Yelp or Tripadvisor to find the best spots. In Edinburgh, you really don’t have to worry about that (unless you’re looking for something specifically). Just about any restaurant or cafe you pass by is probably a great place to eat. We just walked around and picked places near our hotel and each of those places just had amazing food, such as the Magnum Restaurant & Bar, which is where I had the best burger that I’ve ever had (or at least it was really darn good). We also loved The Square, where they had delicious breakfast items and sandwiches.
Maybe the best burger I’ve ever had at the Magnum Restaurant and Bar
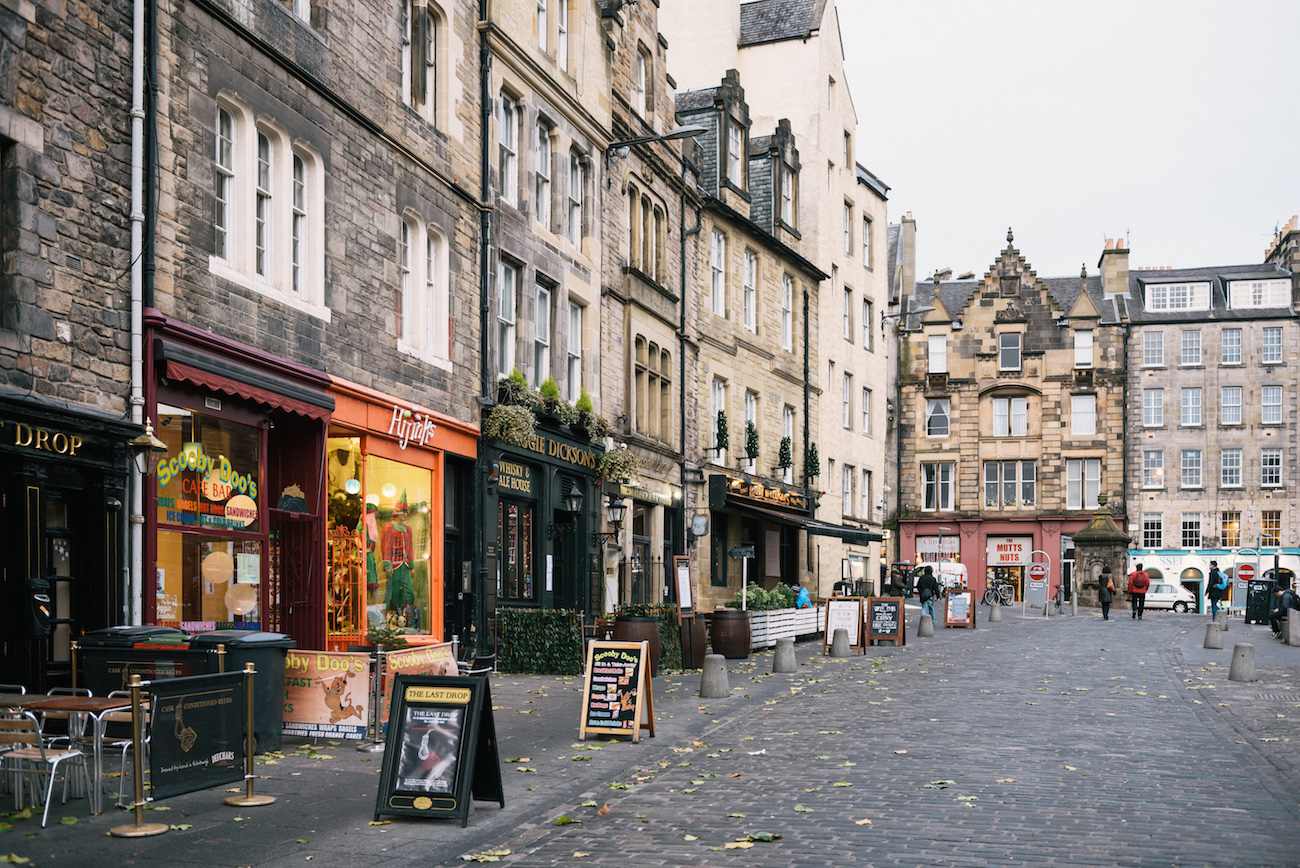
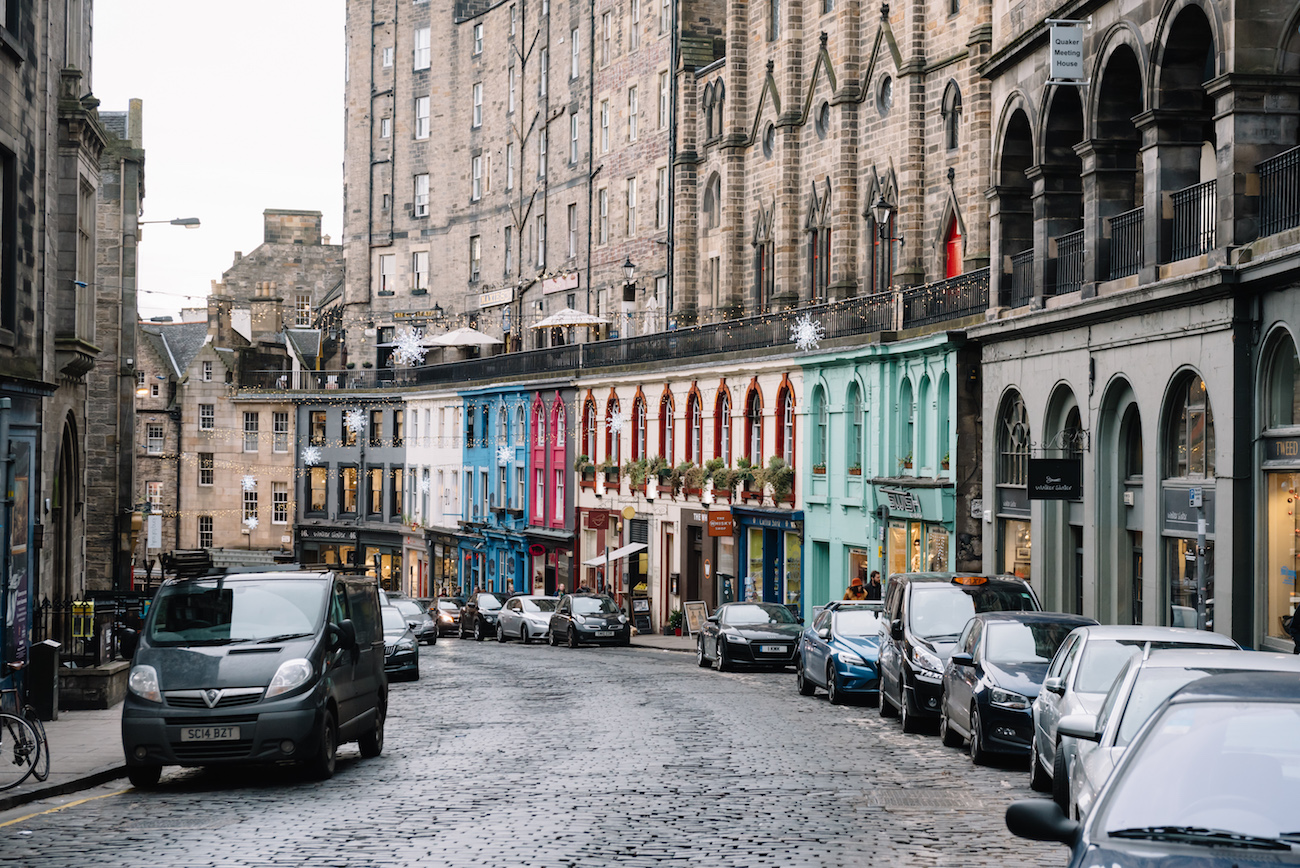
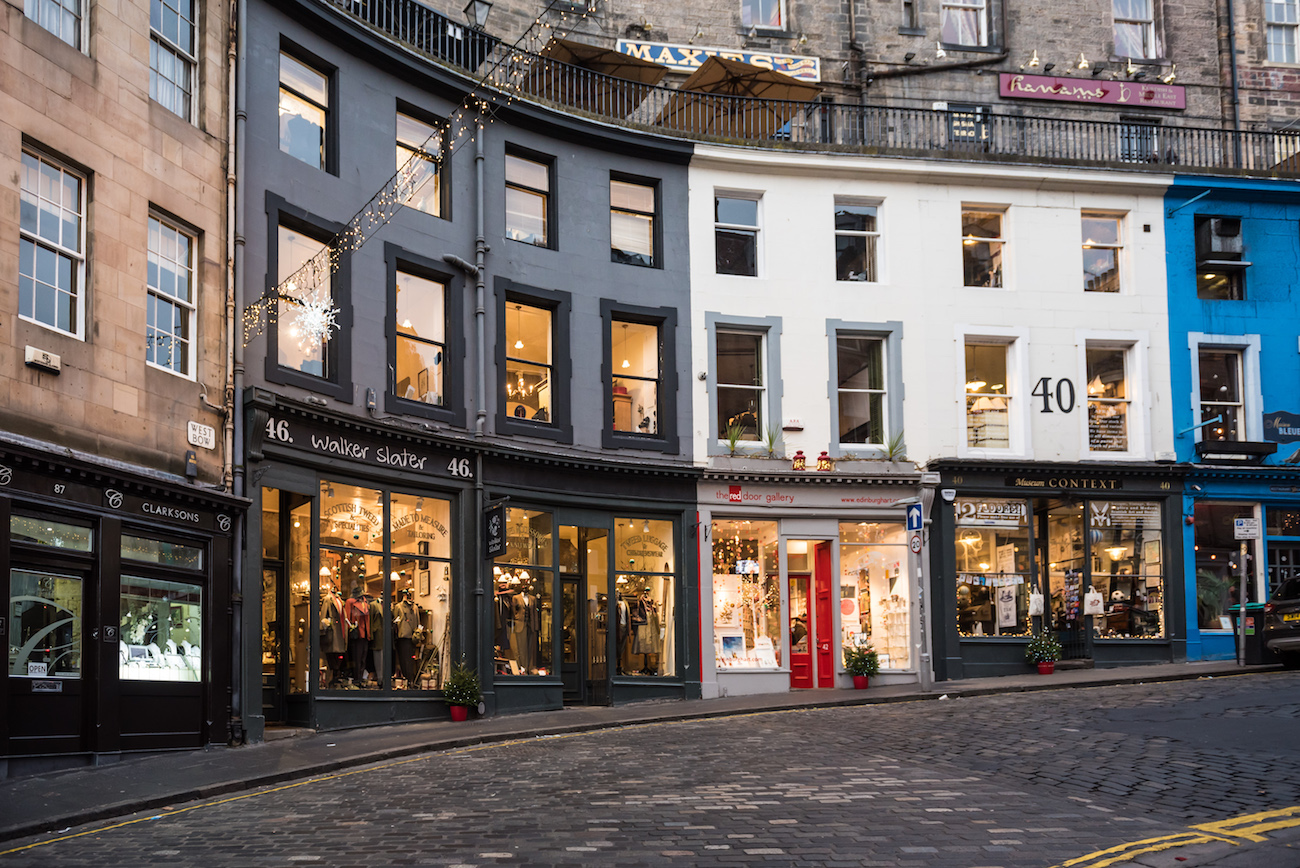
7. See the Colorful Buildings on Victoria Street
Located in Old Town, Edinburgh and close to the Edinburgh Castle is Victoria Street, where you can find some very colorful buildings mixed with the old architecture. Within this street are many small stores, cafes, bars and restaurants, a perfect little place for your shopping, eating, and drinking needs.
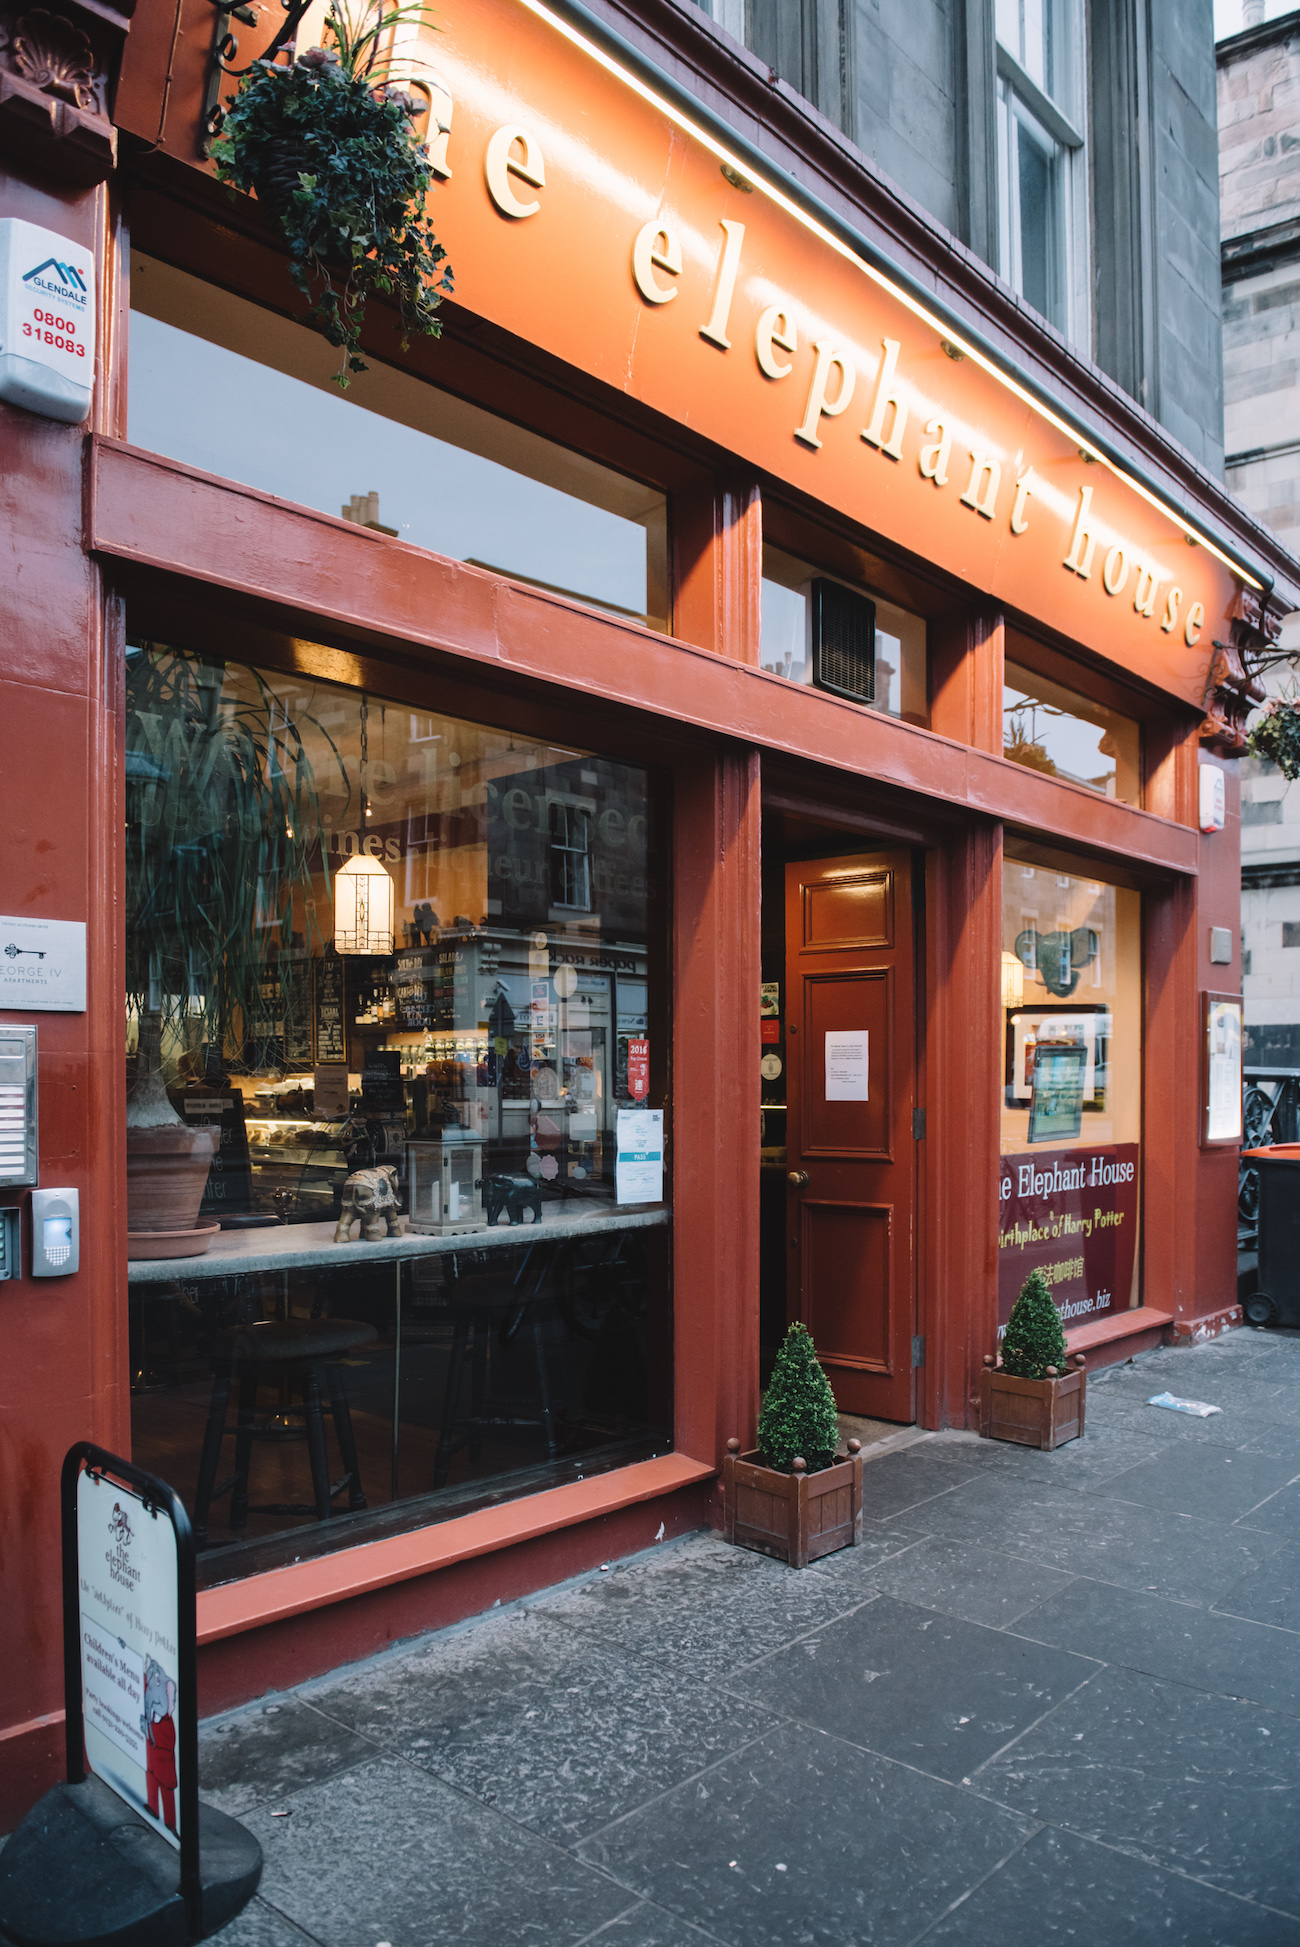
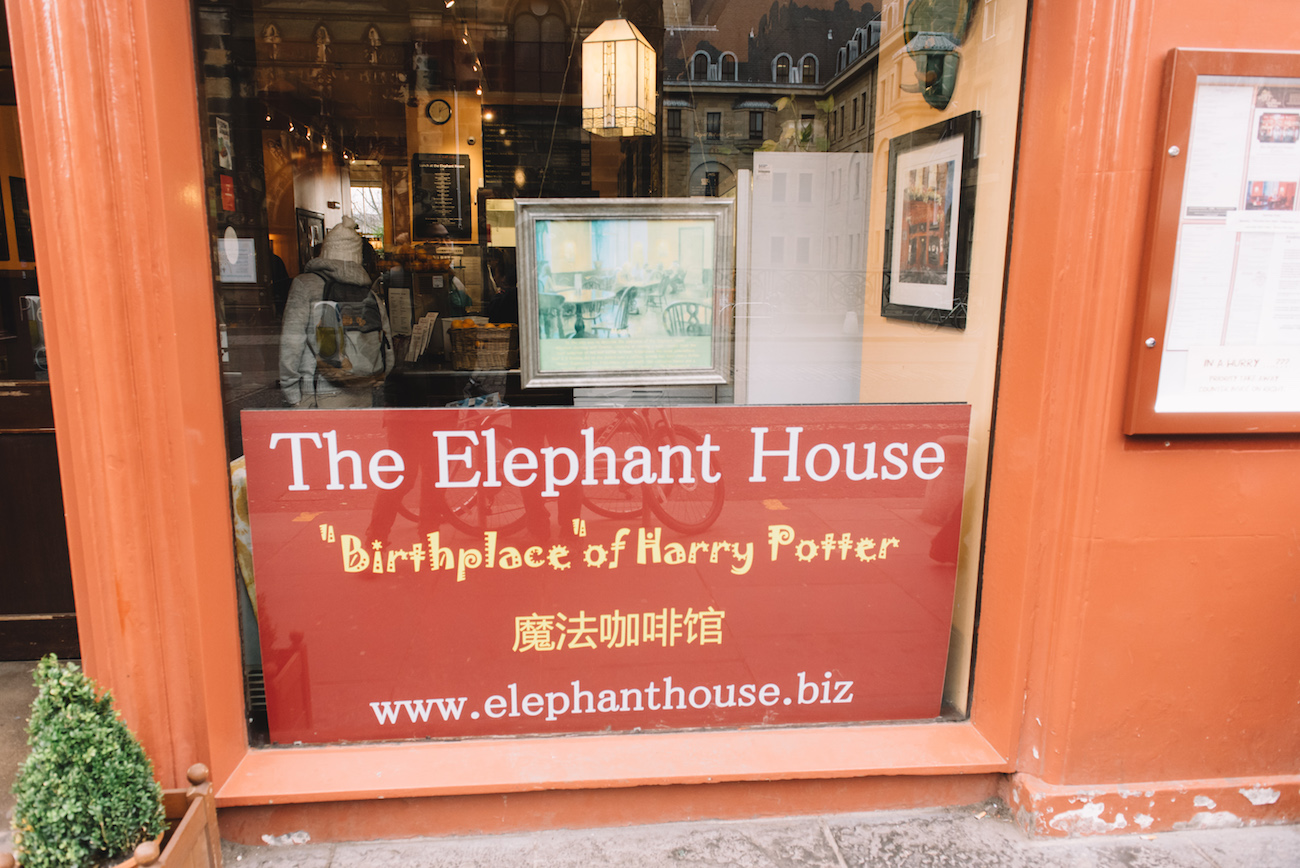
From the outside, the Elephant House looks like an ordinary coffee house. But if you look at the signs carefully, you’ll see it says “The Birthplace of Harry Potter.” This coffee house is where JK Rowling would be writing “Harry Potter” on their napkins in the back room with views of the Edinburgh Castle. Just don’t expect anything wizarding decor or magical themes; it still looks and operates as an ordinary coffee house serving ordinary (but good) coffee and food. There’s also a Harry Potter “grave” nearby, where you can visit the graves of all of the deceased characters.
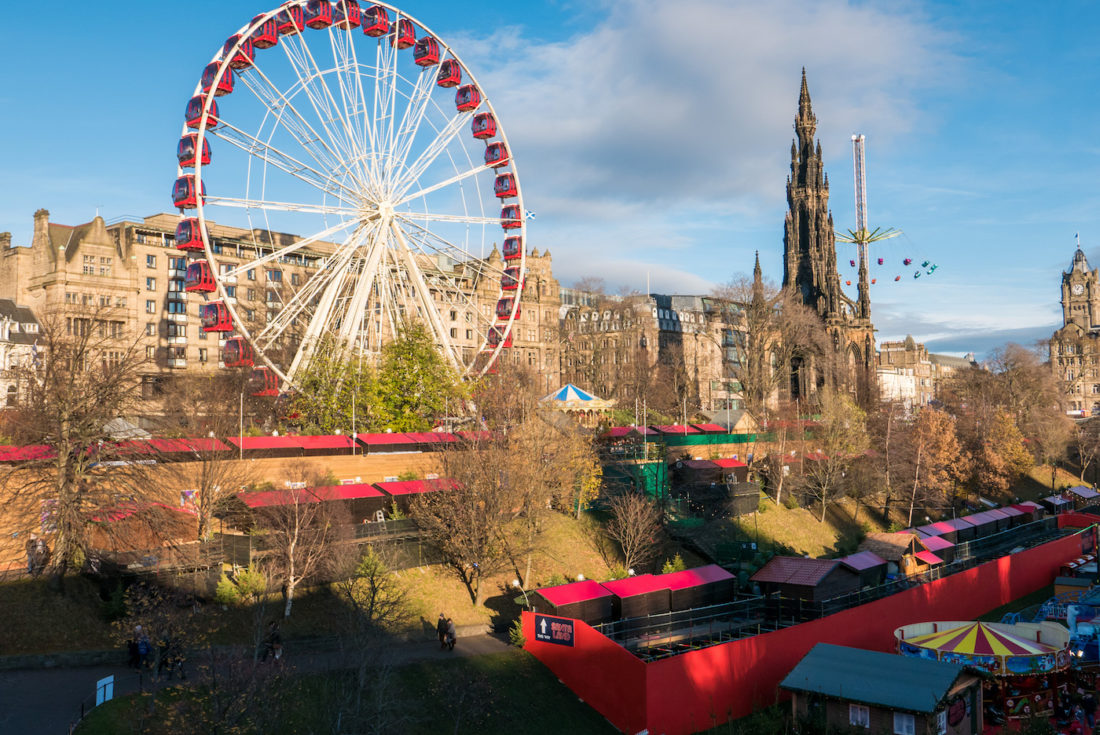
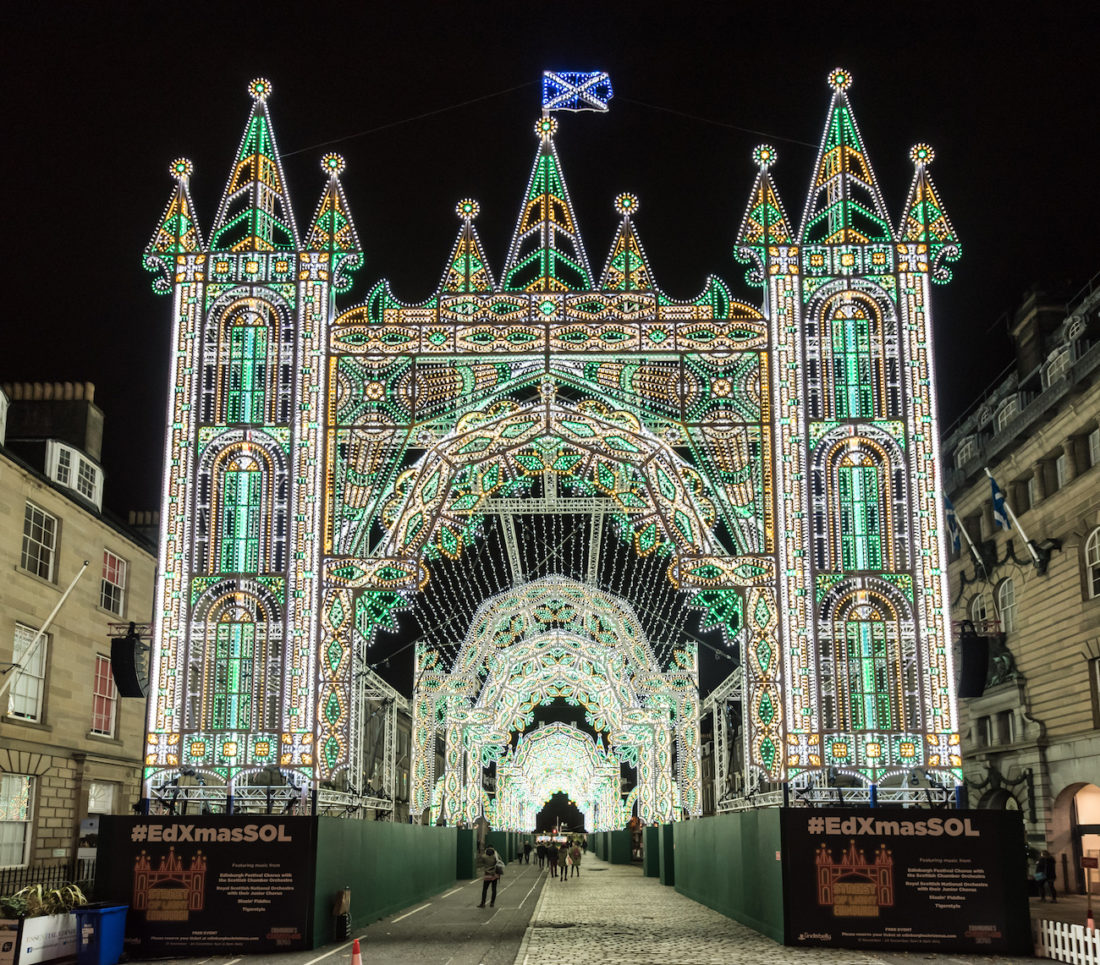
Obviously, this depends on when you decide to visit Edinburgh, but if you happen to be visiting around November or December, you can delve into the festivities the city has to offer. There are many holiday-themed events and shows throughout Edinburgh, as well as various Christmas markets where you can spend plenty of time shopping, eating, and enjoying a family outing.
Here are also a few things didn’t do but you can add to your list:
Holyrood Palace
Camera Obscura and World of Illusions
Calton Hill
Climb to the top of Scott Monument
What other activities would you recommend in Edinburgh? Let us know in the comments and if you like this post, give us a pin below!
Scotland is best known for many things, such as beautiful landscapes, castles, and producing the finest scotch whisky. But if you had to guess what was Scotland’s most visited attraction, what would you guess? Maybe the country’s stunning landscapes? Perhaps one of the country’s spectacular castles? Or possibly Loch Ness where “Nessie,” the infamous Loch Ness Monster, was allegedly sighted? Actually, it’s none of those answers; many would be surprised that the most visited attraction in Scotland is really the National Museum of Scotland in Edinburgh.
There are several reasons why the museum is the most visited attraction. For one thing (and maybe the biggest thing) is the museum is completely free! Yes, you read that right, FREE!! It’s funded through the lottery and donations, thus no charge is required. Any free activity is a good activity in my book!
Aside from being free of charge for admission, the National Museum of Scotland also houses an impressive collection of exhibits of numerous major subject matters, including biology, geology, astrology, fashion, technology, architecture, aviation, world history, arts, Scottish history, and much more! Even the museum itself has architectural and historical significance being over 230 years old! For all the museums I’ve visited, I don’t remember any of them covering such a broad range of topics so I am amazed at content the museum provides.
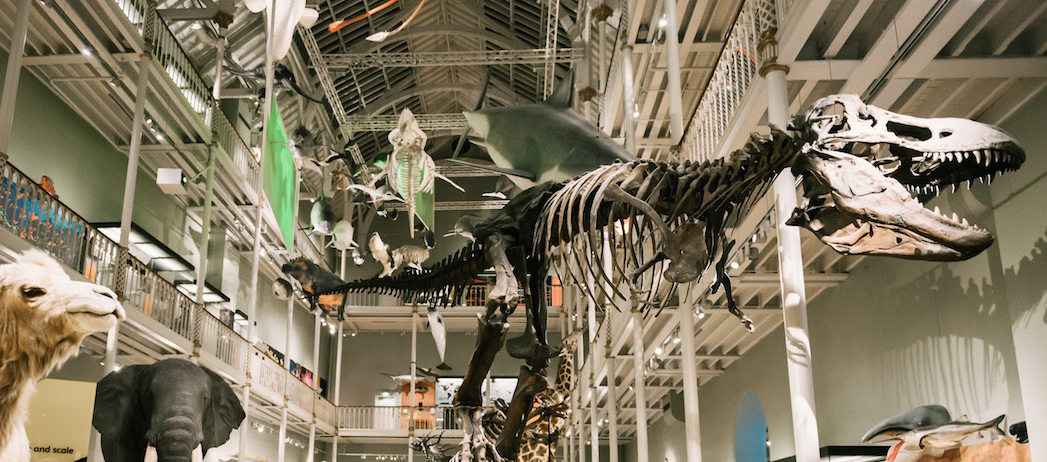
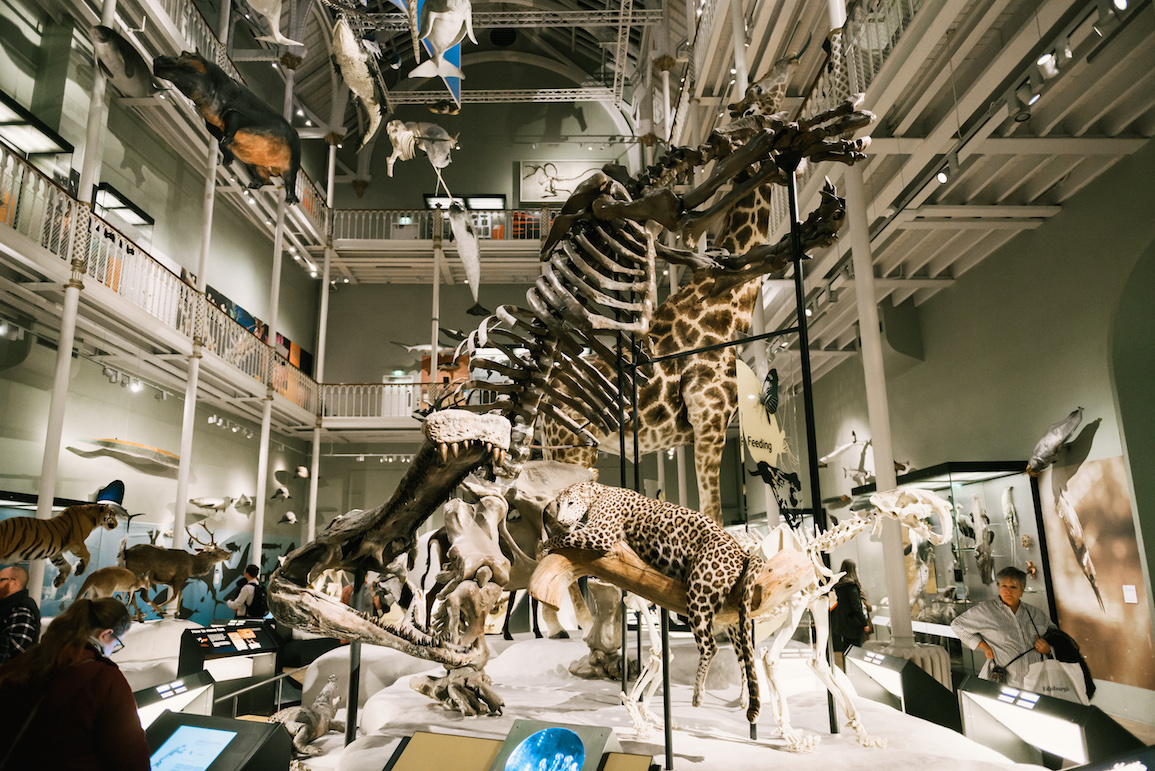
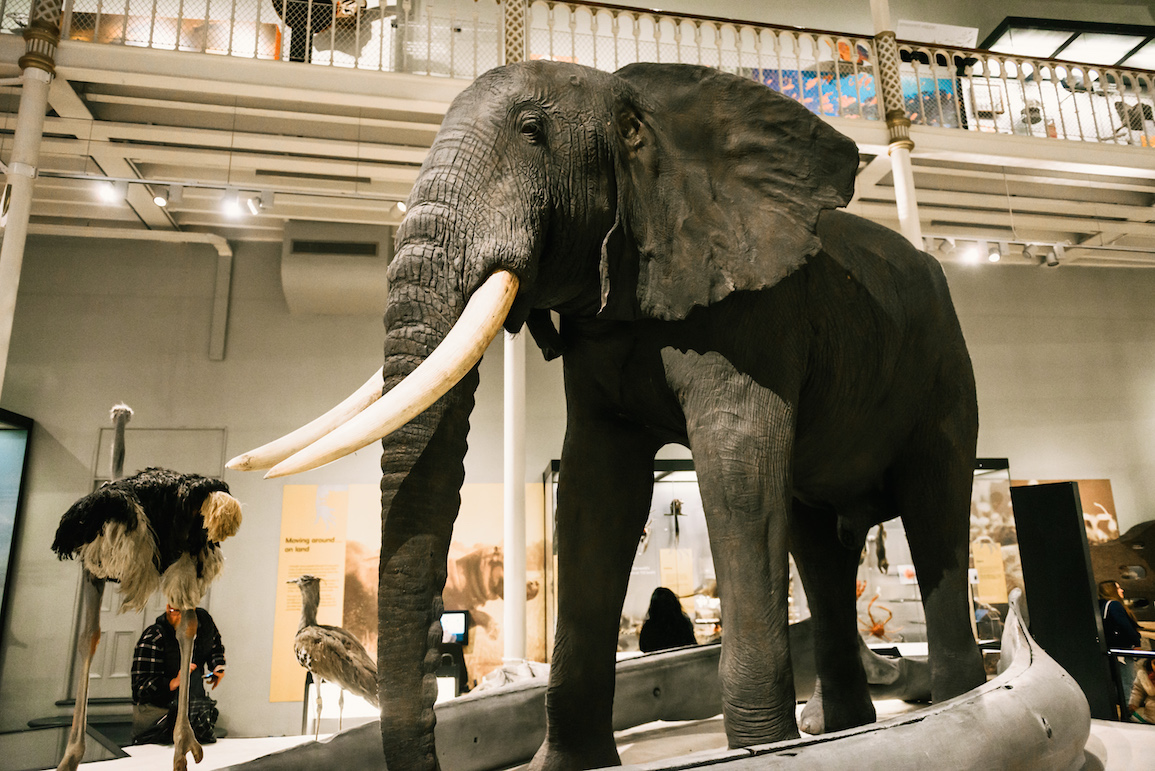
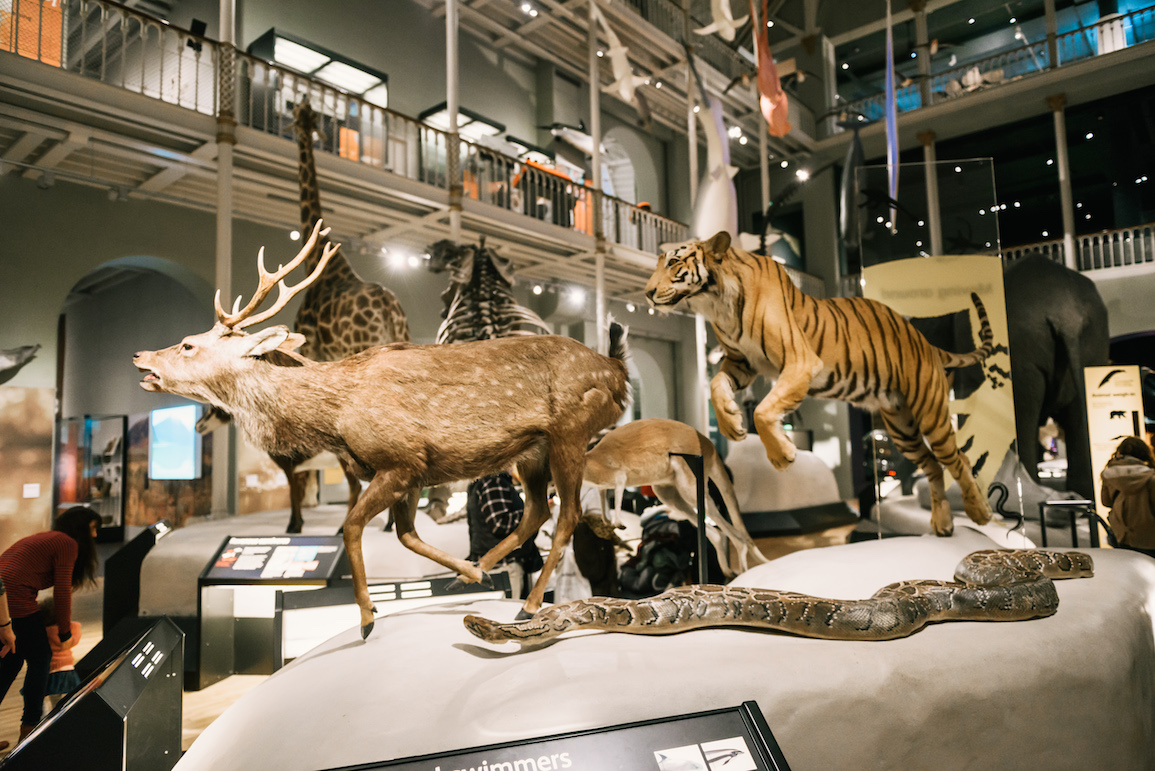
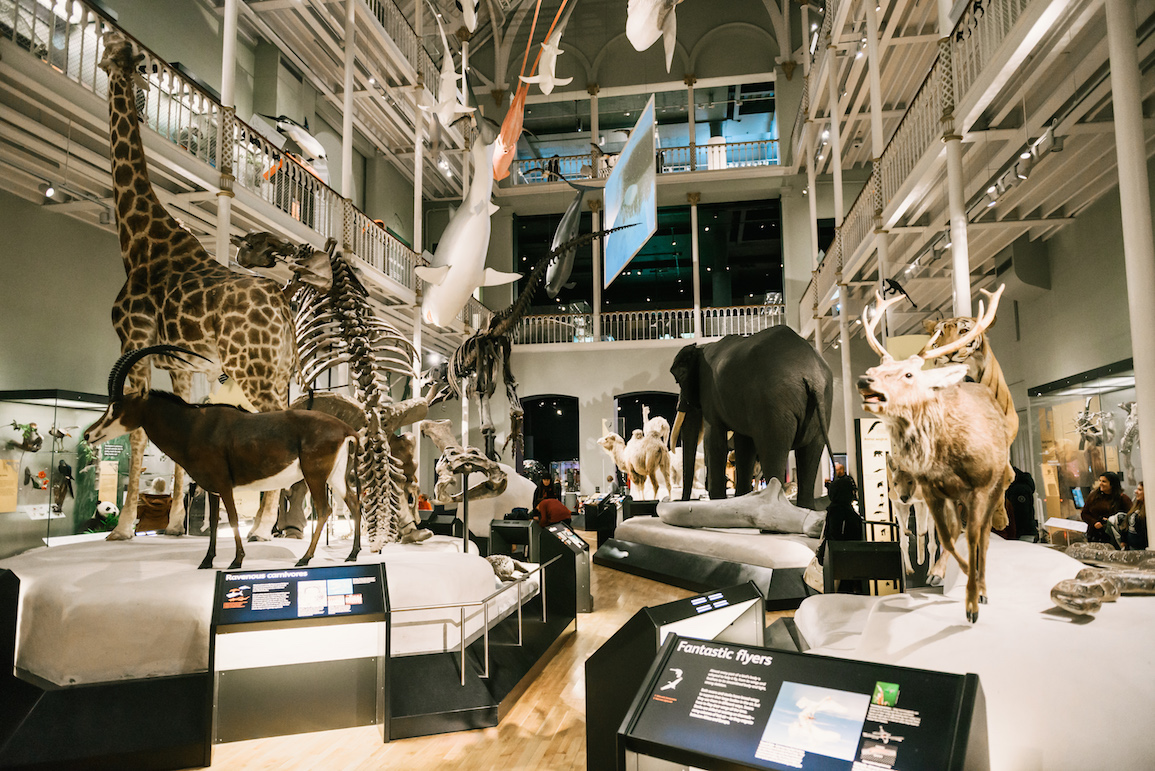
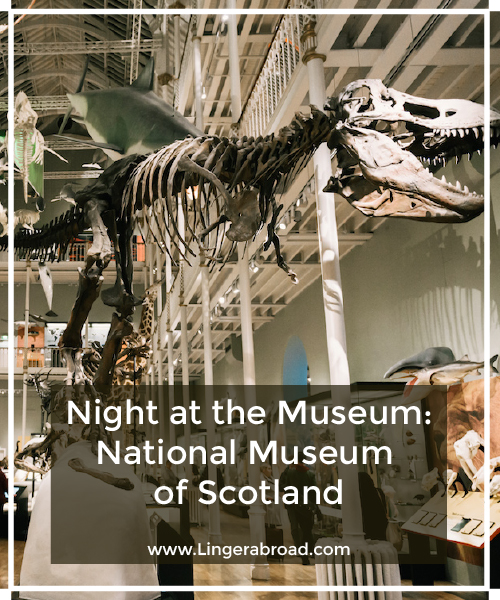
We visited the museum during the late afternoon, which was already getting dark by then, and the first exhibit we went into was the animal world exhibit, which was easily my favorite since I love animals. If anyone has seen the movie series, “Night at the Museum,” you may remember that there’s a Tyrannosaurus Rex skeleton, named “Rexy,” that comes to life and acts like a dog. Well, when we walked into the exhibit, the first thing we came upon was a huge T-Rex skeleton. And for a moment I was hoping it’d come to life so I could play fetch with it (though there was that possibility of a not-so-fuzzy outcome either with a giant dinosaur skeleton with sharp teeth and claws).
Beyond the T-Rex were other dinosaur skeletons before it moves onto animals in more modern times. The exhibit covers many animals groups, from mammals to reptiles, herbivores to carnivores, land animals to marine animals, and just about everything in between. You can also find the famous sheep, “Dolly,” which was the first ever cloned mammal (though in another exhibit). If you like animals, this is the place to check out!
Like many large museums, you would need several visits to adequately go through all of the different exhibits. Unfortunately, we didn’t have that kind of time so we only spent a little over two hours until closing time. We mostly just walked through the museum to see what other exhibits had but didn’t stay too long in each one.
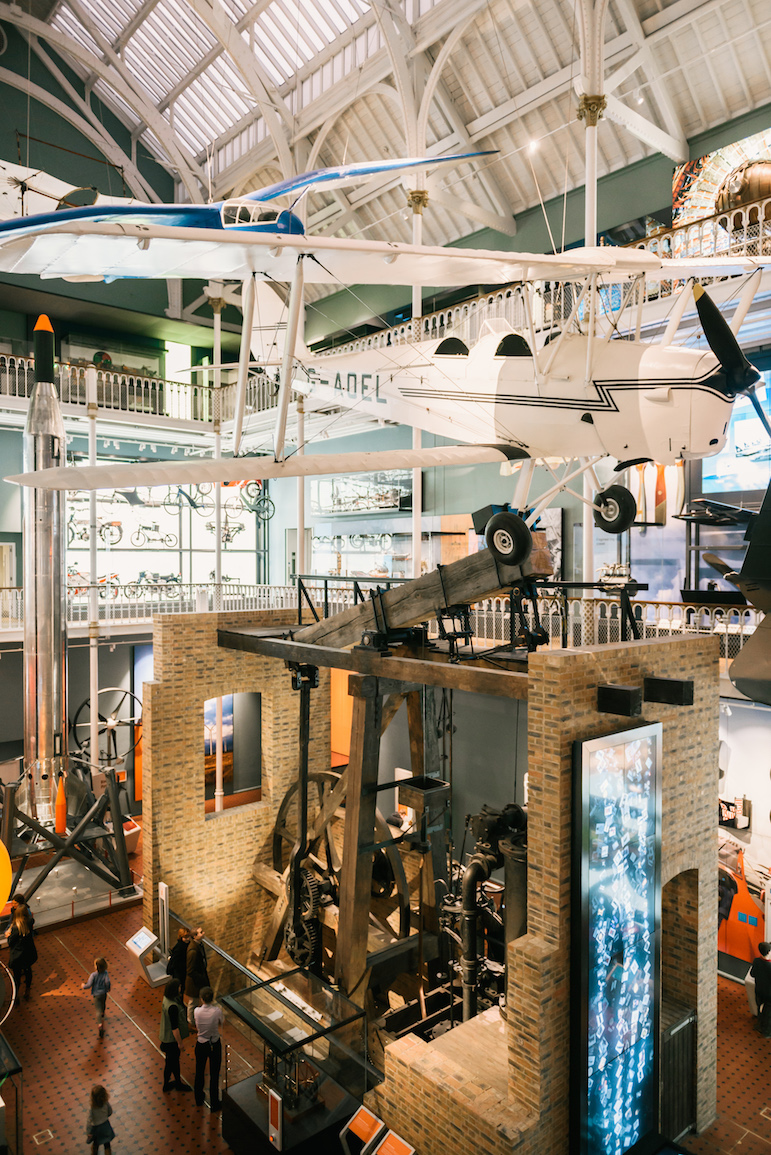
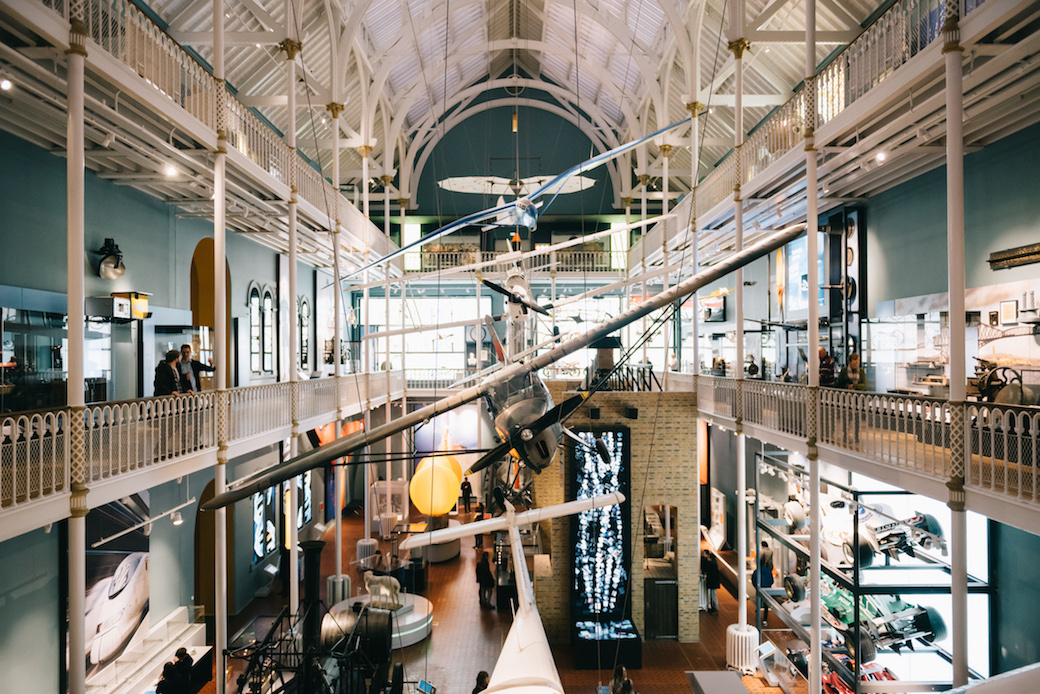
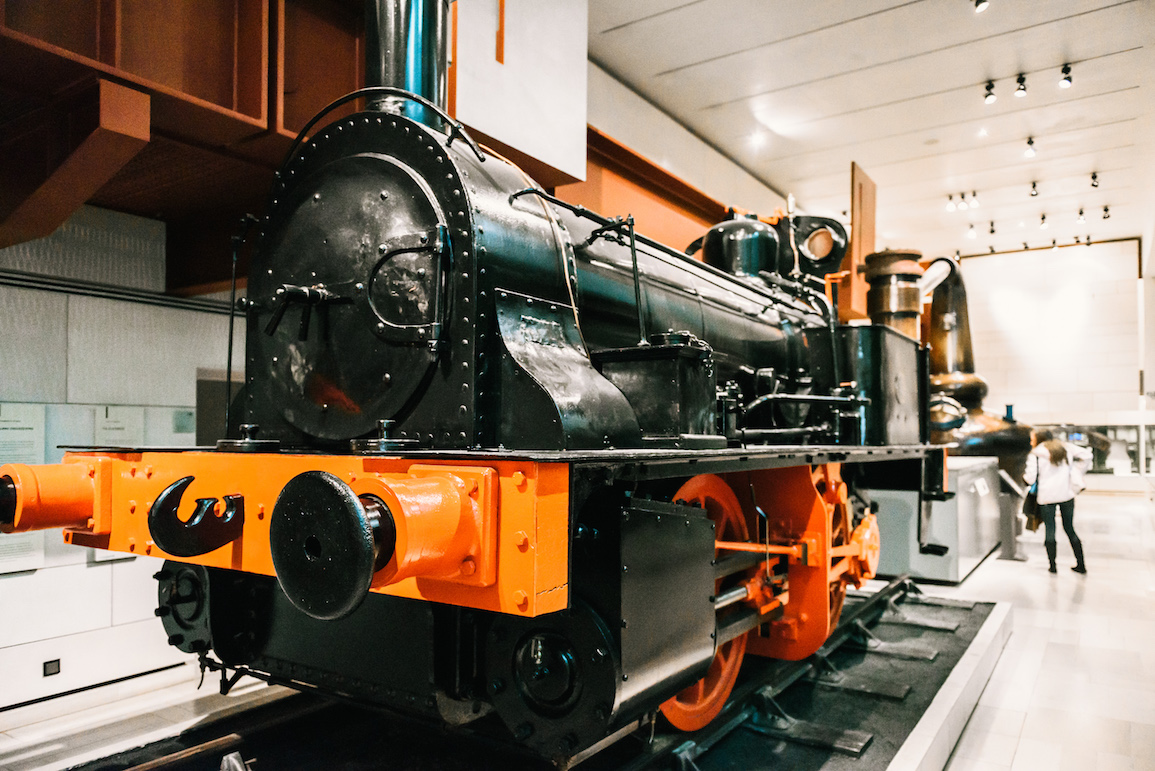
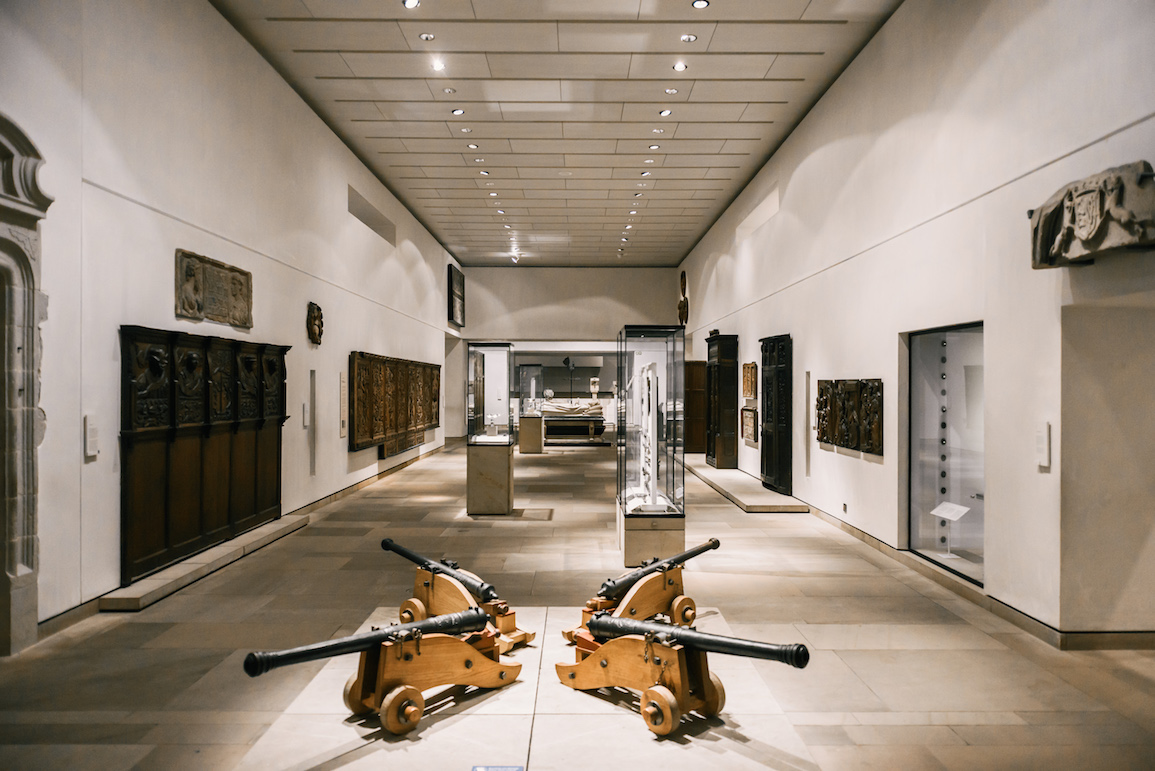
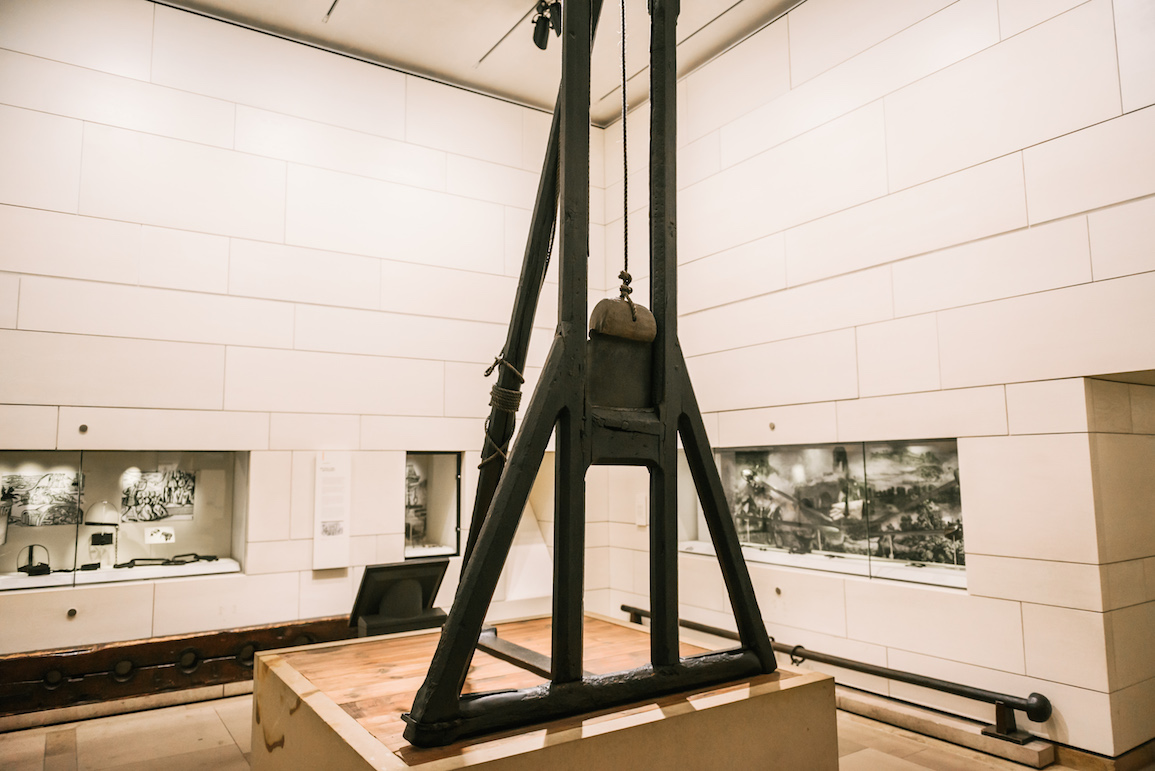
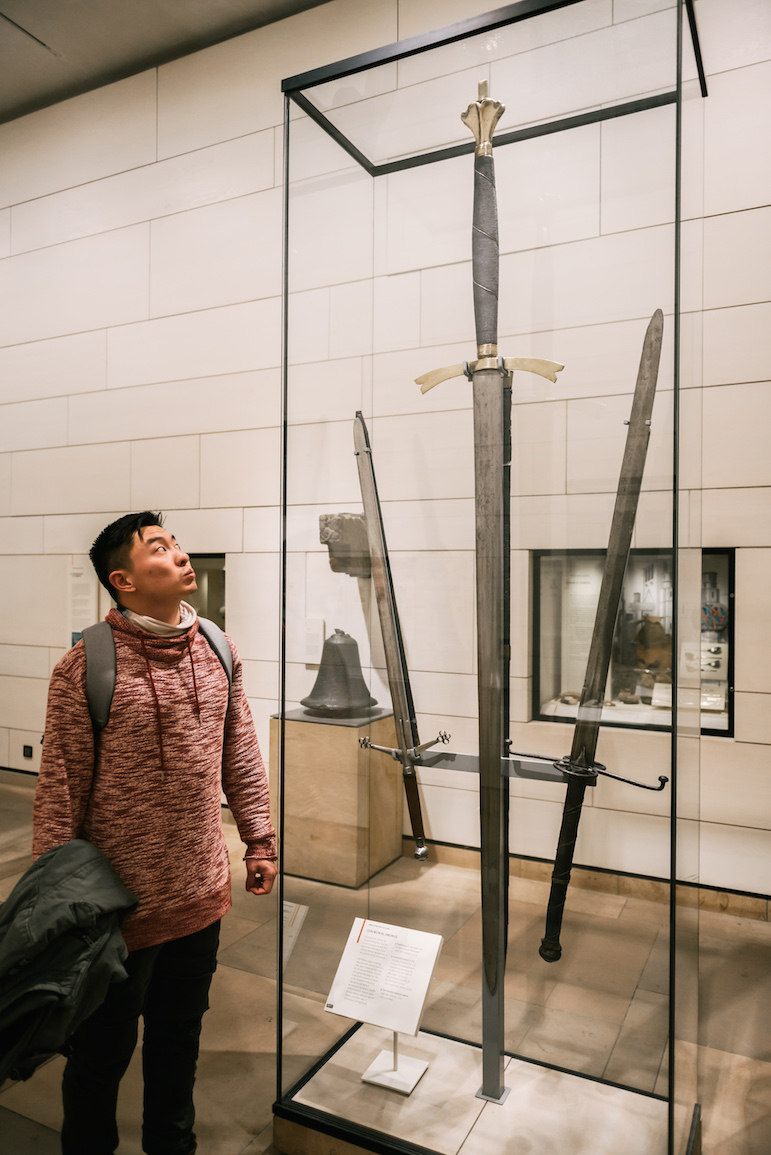
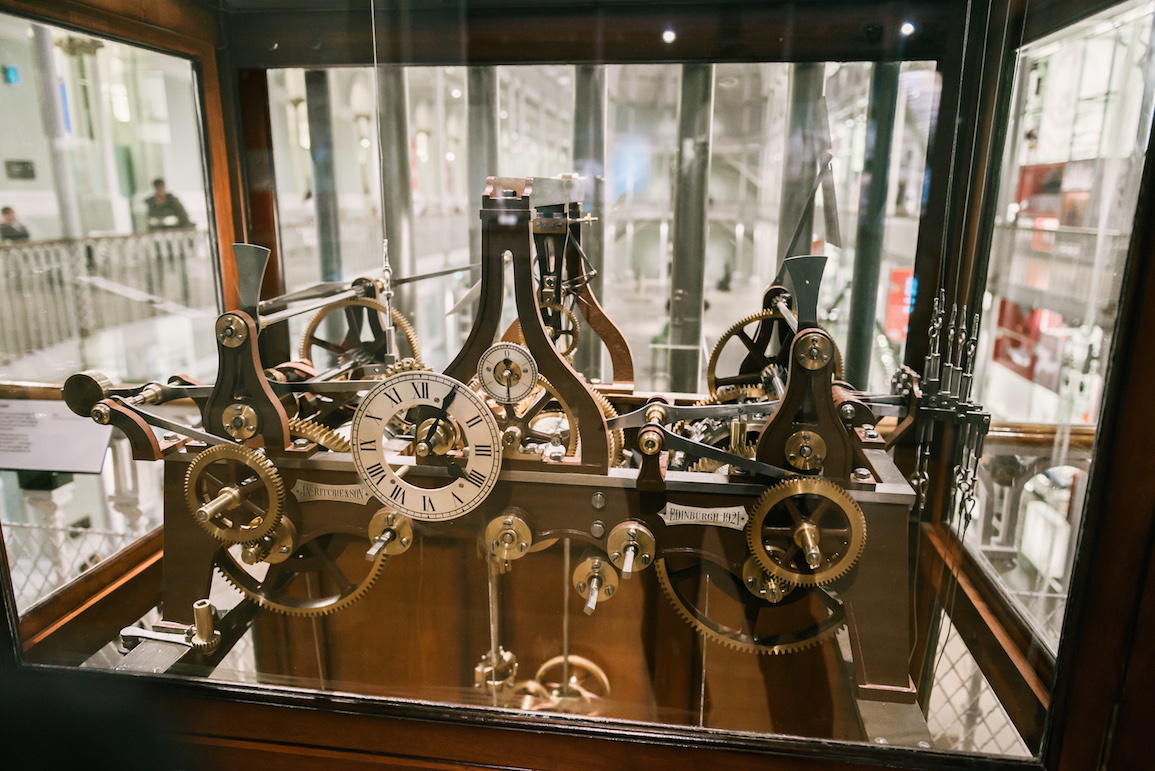
The only other exhibits we spent a bit more time were the technology and the Scotland history exhibits. The technology exhibit is really fun with many interactive pieces and displays ranging from planes, automobiles, locomotives, computers/phones, and other technological advances. I also liked the Scotland exhibits which go through the country’s history and has many historical artifacts on display, such as giant ceremonial swords and the “Maiden,” which is a guillotine used during executions.
The Evolution of Phones
The Maiden (Guillotine)
That is a huge sword!!
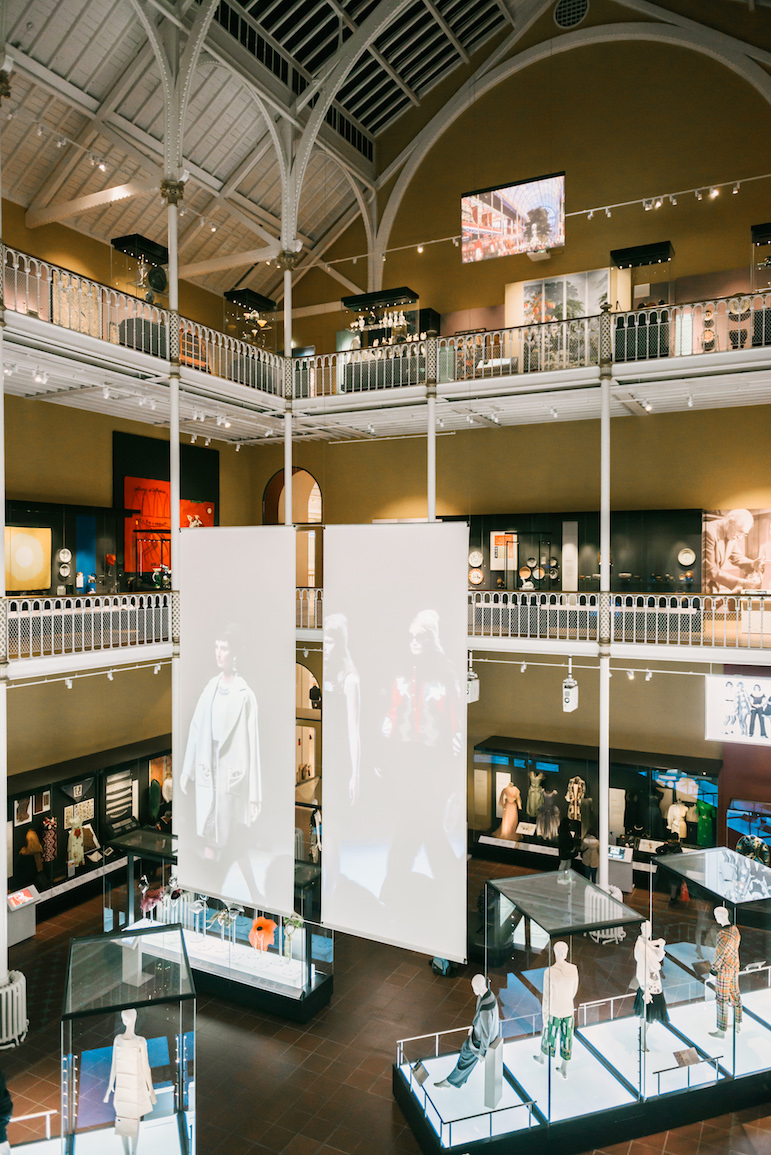
Fashion Exhibit
So, if you’re looking for a fun and free activity to do in Scotland, be sure to make a visit to the National Museum of Scotland in Edinburgh. Just don’t expect things to come to life like in the movies! Let us know what exhibit you would be excited to check out in the museum and be sure to visit their website for more information: http://www.nms.ac.uk/national-museum-of-scotland/
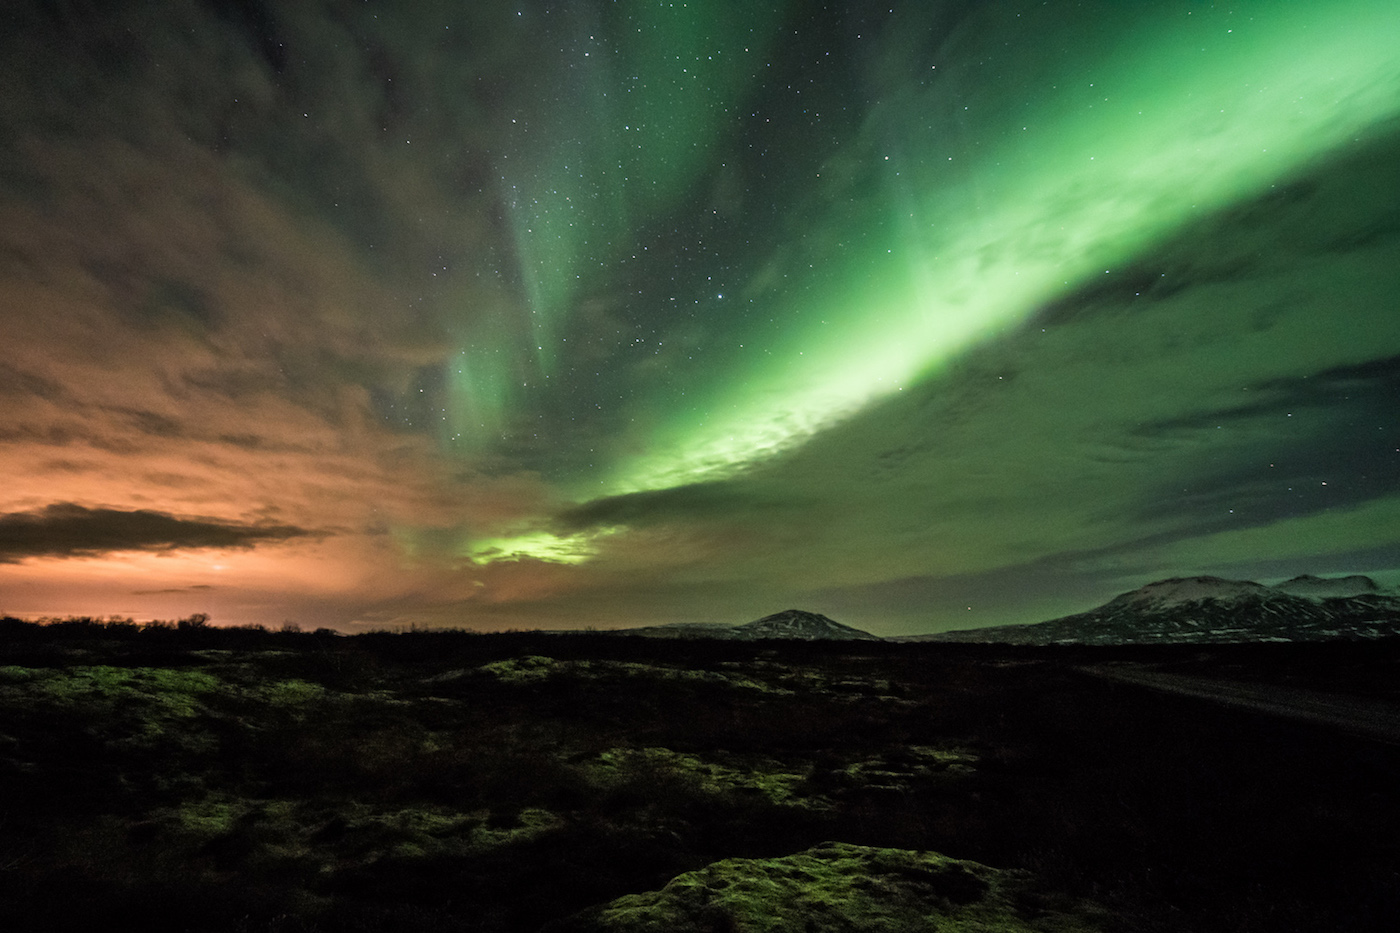
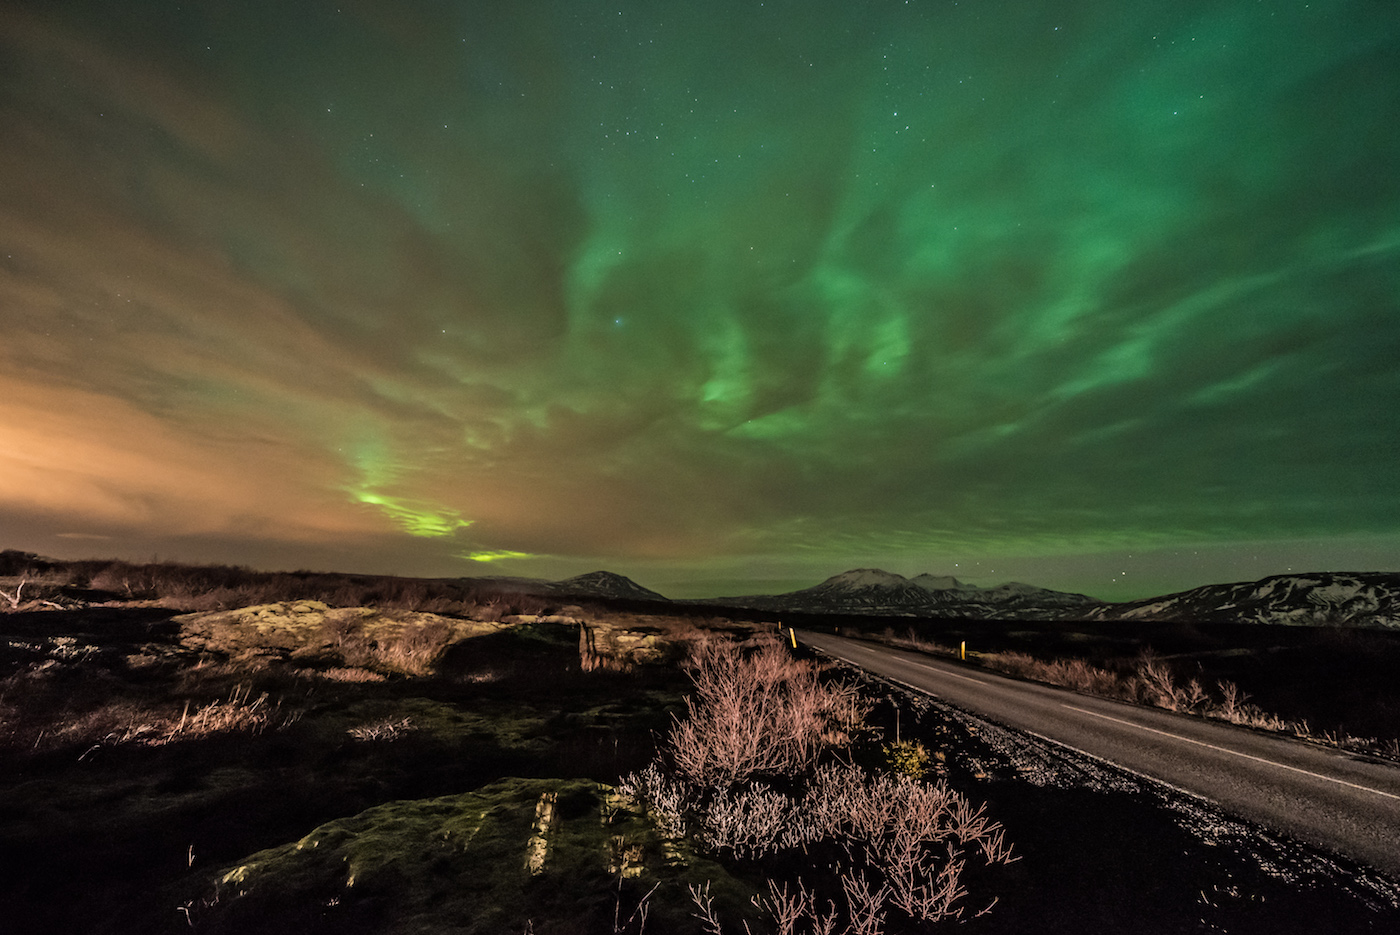
When making a visit to Iceland, one of the great natural wonders that everyone wants to see is the Aurora Borealis, more commonly known as Northern Lights. The northern lights are a spectacle unlike any other with the intense swirling movement of green lights “dancing” in the starry skies. We were fortunate enough to see it again during our latest visit and it was a dazzling couple of nights.
But finding the northern lights and attempting to photograph them can be very challenging tasks, so we’re going to prepare you in the best way possible. Here are 7 tips for finding and photographing the Northern Lights during your visit to Iceland:
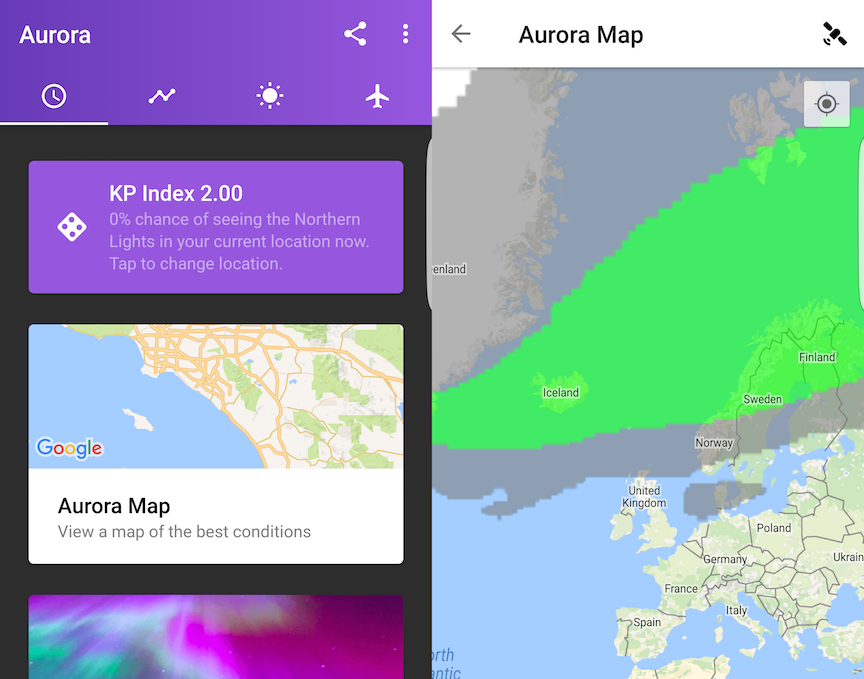
1. Download the Aurora Alerts Northern Lights App,
This could be one of your best resources to track the northern lights. The Aurora Alerts Northern Lights App is a free app provides live up-to-date information of the northern light activity, including the probability of seeing the lights based on location, geomagnetic conditions (KP Index) on a scale of 1-9, hourly to long-term forecasts, and projected northern light coverage worldwide.
You’ll want to go out when the KP Index reads 3 or higher for the best conditions. You can also set up alerts that will tell you when the best chance is to see the lights. This app also works for other countries as well.
Aurora Alerts Northern Lights App
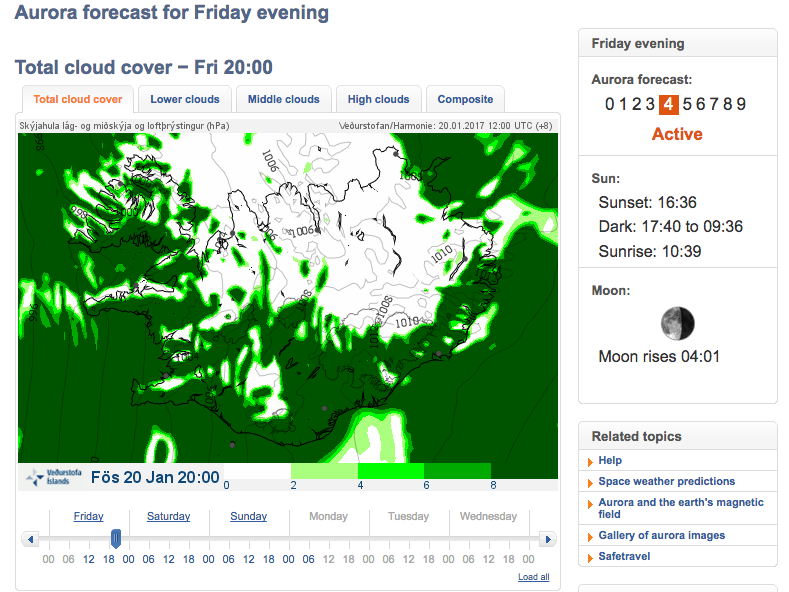
Just about the only thing it doesn’t do is provide a weather report, so it’s good to have an app or website to show the weather. I liked using the Rainy Days App and also used the Icelandic Met Office website, both showing project cloud coverage throughout the country by the hour. With a combination of these resources, you’ll have everything you need to track the northern lights.
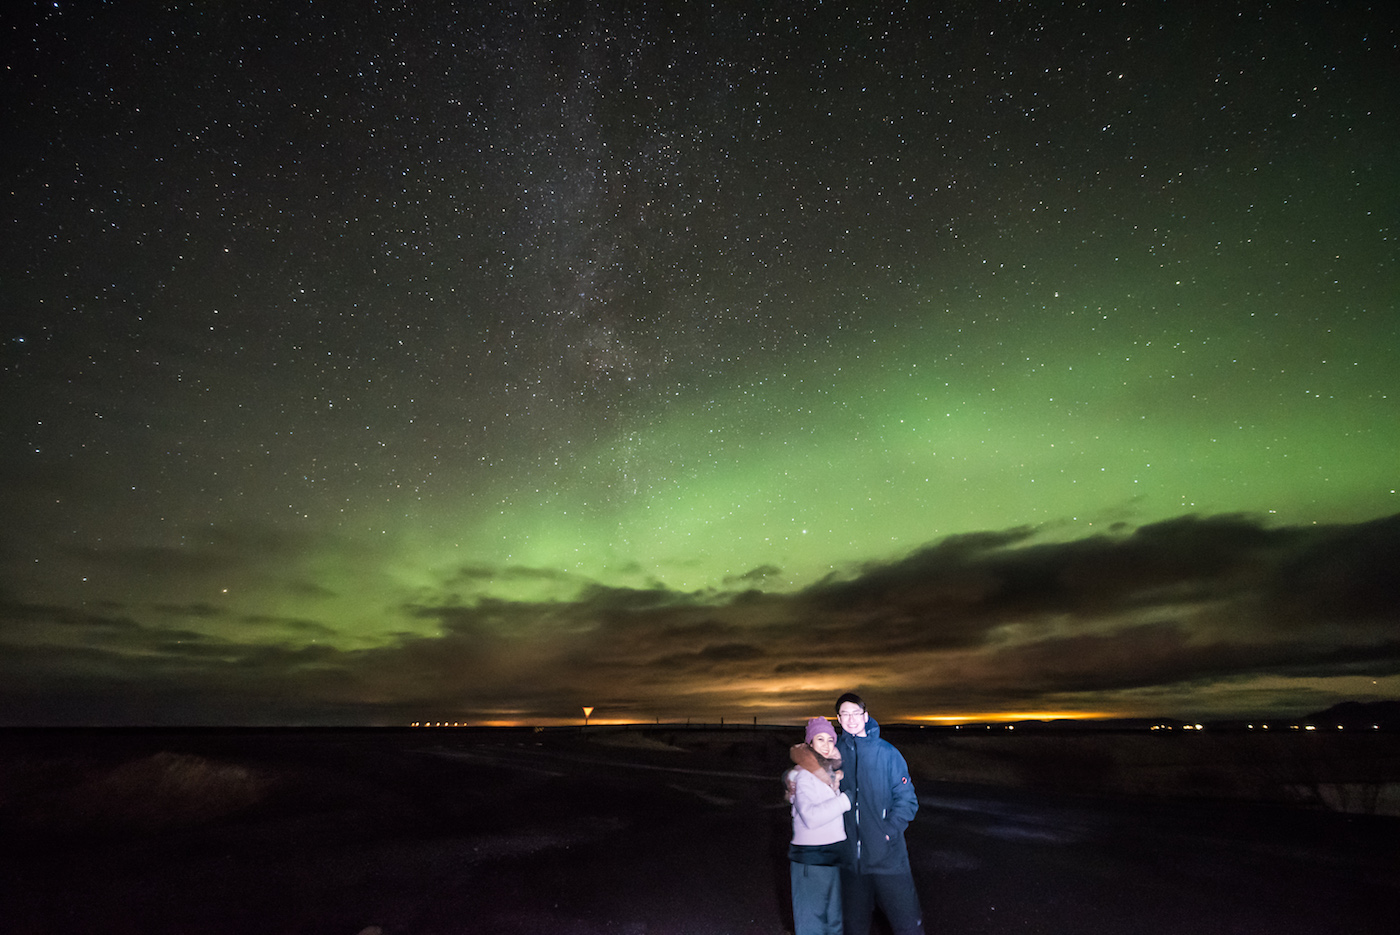
2. Find dark clear skies away from the city
The best places to see the northern lights are places that are away from the city to avoid light pollution. This way your eyes will adjust to the darkness and it’ll be easier to see and photograph the northern lights. That’s simple enough to do since there are plenty of places in Iceland that are far from the city.
The more challenging part may be trying to find dark clear skies. As the locals would say, “If you don’t like Iceland’s weather, wait 5 minutes.” The weather can be particularly fickle, going from very clear skies one moment and then raining minutes later. During our recent visit, it rained 5 of the 7 days we were there and in some instances, it can be cloudy/rainy for days or weeks at a time!
Having the Rainy Days App or the Icelandic Met Office website can help you showing projected cloud coverage and find an area with clear skies. Even partial covered skies can give you some great shots of the northern lights, as long as you have some open sky to show the lights.
Icelandic Met Office Website. This shot indicates it will be may be a good night to see the northern lights in southern Iceland.
Another thing to remember is to not go to Iceland in summer if you specifically want to see the northern lights because the days are very long and at night, it doesn’t get completely dark. It would be very difficult to see the lights under these conditions. The best time to see them would be during fall or winter when the nights are longer and darker.
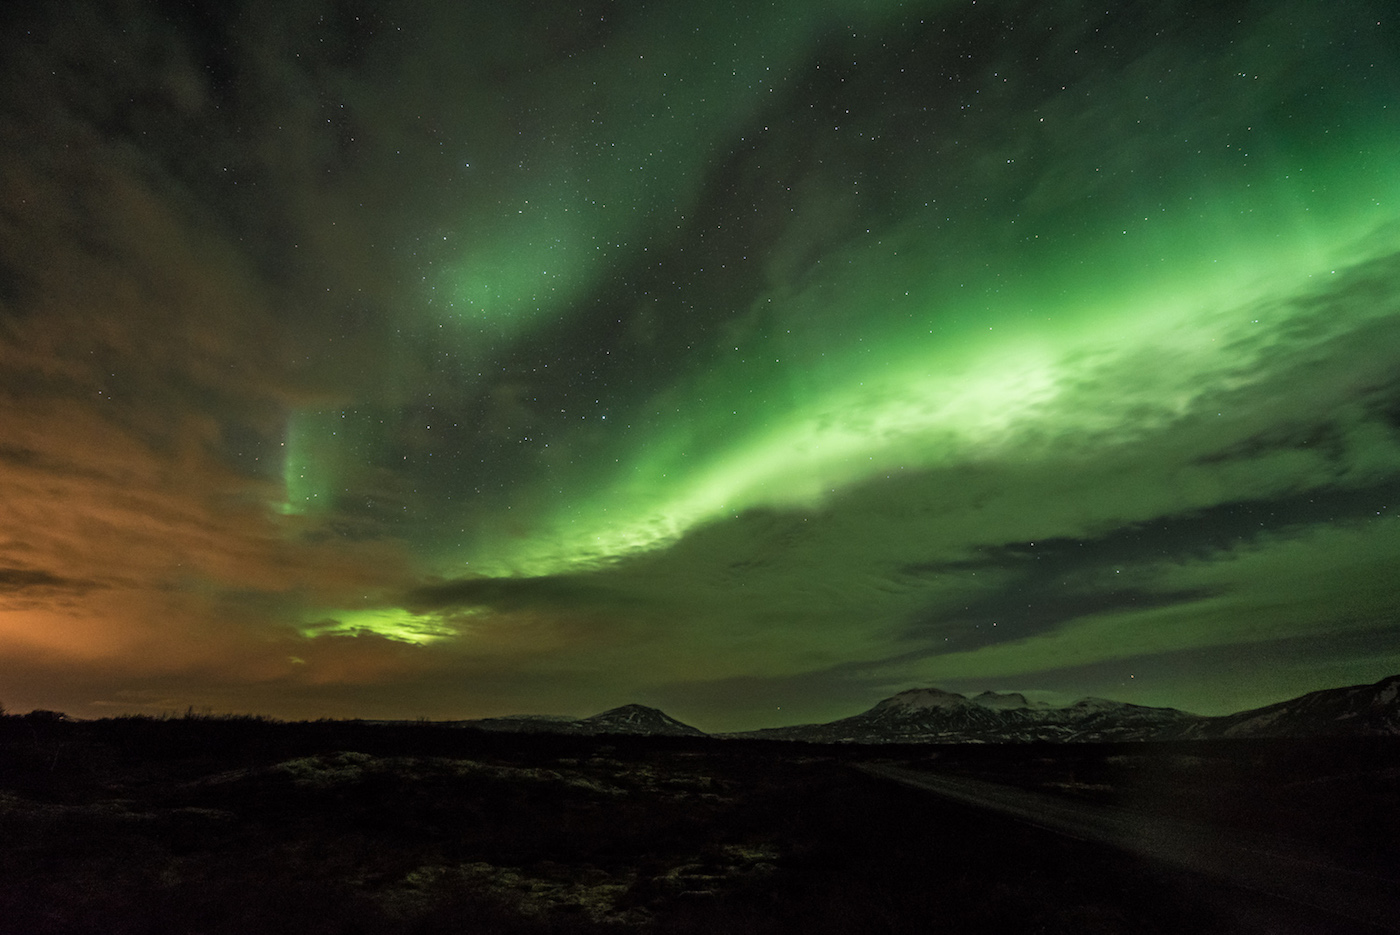
3. The Northern Lights are not always easily visible
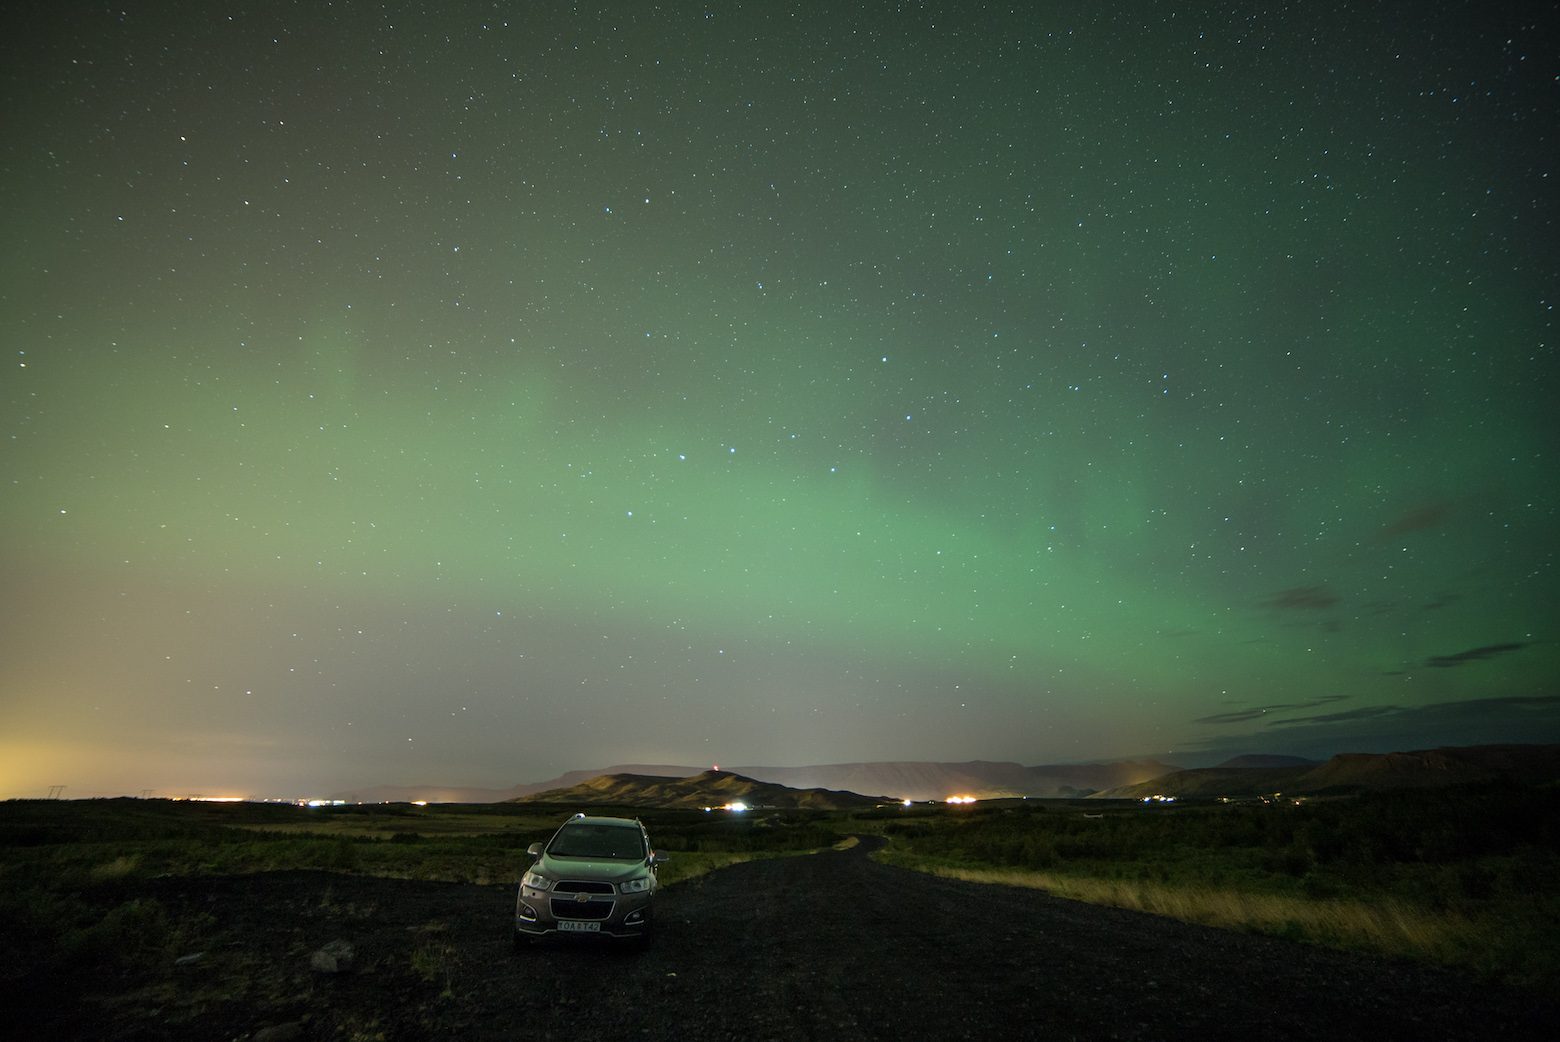
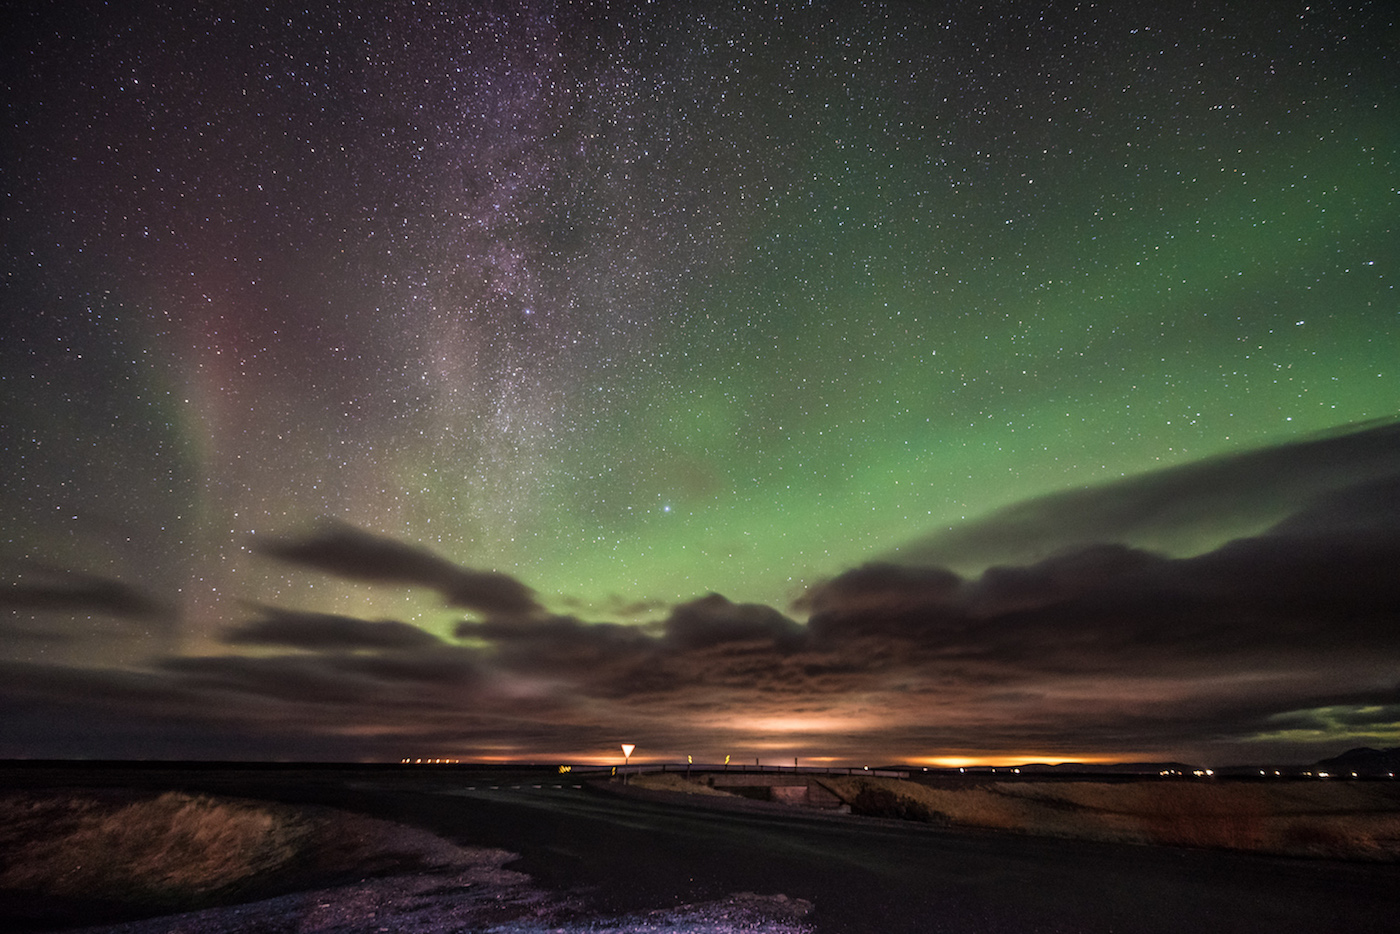
When the northern lights are VERY bright, they are very visible and can illuminate the entire sky. However, sometimes even if the sky looks dark, the lights can still be there. They will be very faint and pretty difficult to see, especially if you’re driving and your eyes are not adjusted to the dark.
These lights were too faint to see clearly with my eyes. Only my camera could capture this low activity
If you want to be sure whether or not the lights are there or not, then stop to the side on occasion and let your eyes adjust to the dark. If you can see a faint streak of color in the sky, it is possible those are the northern lights. If you have a camera with the right settings, you can confirm it with a test shot. While the lights may look very weak initially, you can wait a bit and see if the activity gets stronger. In both instances I’ve seen the northern lights, they started out as faint trails, but then intensified into much brighter lights.
4. Having the right camera and equipment
So you found the northern lights! You’re enjoying the wondrous spectacle of dancing lights dazzling through the sky! You bring out your phone or point-and-shoot camera to take a picture and…it’s almost pitch black…you can barely see the lights on your screen…it’s blurry…
Shooting photos at night are not the best conditions for a phone or point-and-shoot camera. If you really want to capture vivid shots of the lights, you need the right equipment. Here is the basic gear you should carry:
Tripod – Any tripod generally will be OK, but it’s highly recommended to bring a strong and sturdy tripod and prevent any vibration causing blurry images and especially on nights when it can be windy and will blow away any cheap tripod. You’ll be working with exposures from 5-20 seconds, so you need to be sure your tripod will keep your camera completely still.
Camera with Manual Mode – You need a camera that you can adjust the settings manually, primarily shutter speed, F-stop, and ISO. Auto will not help you here.
Although it’s still recommended to have a full-frame camera because of better low-light capabilities, better ISO performance and image quality, and more lens selection, you can still get shots with an advanced mirrorless or point-and-shoot camera as long as they have manual capabilities. I used full-frame cameras, including a Nikon D750 and a Sony A7s. However, if you’re on a budget, you can do well with a non-full-frame mirrorless camera like a Sony D6300 or Fujifilm XT1, or even use an advanced point-and-shoots like the Sony RX100 series or a Canon GX7.
Wide Angle Lens – A wide angle lens will help you capture a good amount of the foreground as well as the sky. When looking for a lens, anything 24mm or lower is ideal, and you want to look for F-stops as low as 2.8.
Remote Trigger (Optional) – It’s good to have if you want to take selfies and also to take a shot without pushing the camera button to prevent any vibration. If you don’t have a trigger, you can use the camera self-timer to take a shot.
Powerful flashlight (Highly Recommend)– We’ll get into more of this in the next tip.
5. Setting up your focus
Perhaps the most challenging part of night photography is focusing in the dark. In pitch black darkness, cameras are not able to properly autofocus on a particular object. Thus, you have to figure out how to manually focus your lens.
An easy way to set up your focus is to do it before dark sets. You can use your camera to autofocus on a distant point. Once the lens is focused, switch your lens to manual focus and do not touch it for the rest of the night. You can use tape to hold the lens’ focus ring or use a marker to mark the focus point on your lens. You’ll be good to go when shooting the northern lights in any direction.
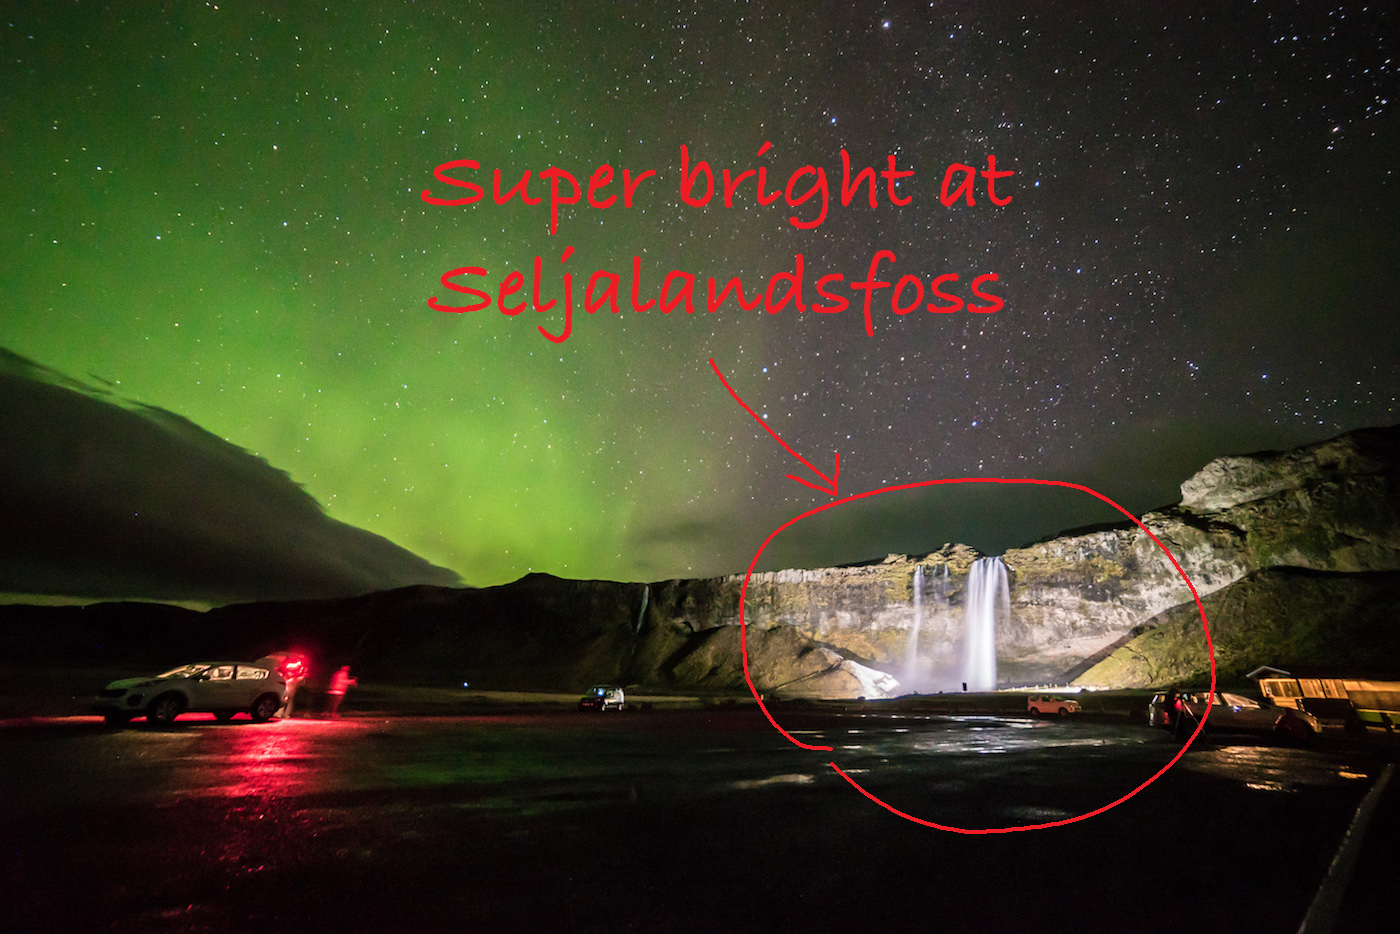
If you did not focus before dark, then you’ll have to figure out how to focus at night. My favorite method is using a powerful flashlight that can illuminate an object at a distance. If you can light a distant object, many cameras will be able to autofocus on the object, which then you can switch back to manual focus. If your camera cannot focus on the illuminated object, have someone take the flashlight and walk 50-100 feet away. Your camera should be able to autofocus at the brightest point this way, and you can fine-tune the focus manually. I love Maglite flashlights because they are incredibly powerful and make it easier to focus at night at a distance, but a good headlamp will do the job too.
Seljalandsfoss brightly lit with flood lights. Easy for cameras to focus
Without at least flashlight, focusing can be a little trickier. Some full-frame cameras have excellent live-viewfinders that perform remarkably well at night, so it can be easy to find the brightest star and bring it into focus. If you don’t have that, then the next best option is to start your lens from ∞ (infinity symbol) and adjust by trial and error with minuscule adjustments after each trial shot.
6. Manual Settings to use
The best combination of settings to use to shoot the northern lights is a large aperture (f2.8 – 4), longer shutter speed (5-20 seconds), and relatively high ISO (800-6400, though ideally around 1600 ISO). You can start with something like f2.8, 15 seconds, 1600 ISO and work from there. If you stick around those ranges and make the necessary adjustments, you will be able to get good shots of the northern lights. You should also manually set your color temperature (K) to around 2800-4800.
f2.8, 6 seconds, 3200 ISO
f2.8, 6 seconds, 6400 ISO
f2.8, 13 seconds, 3200 ISO
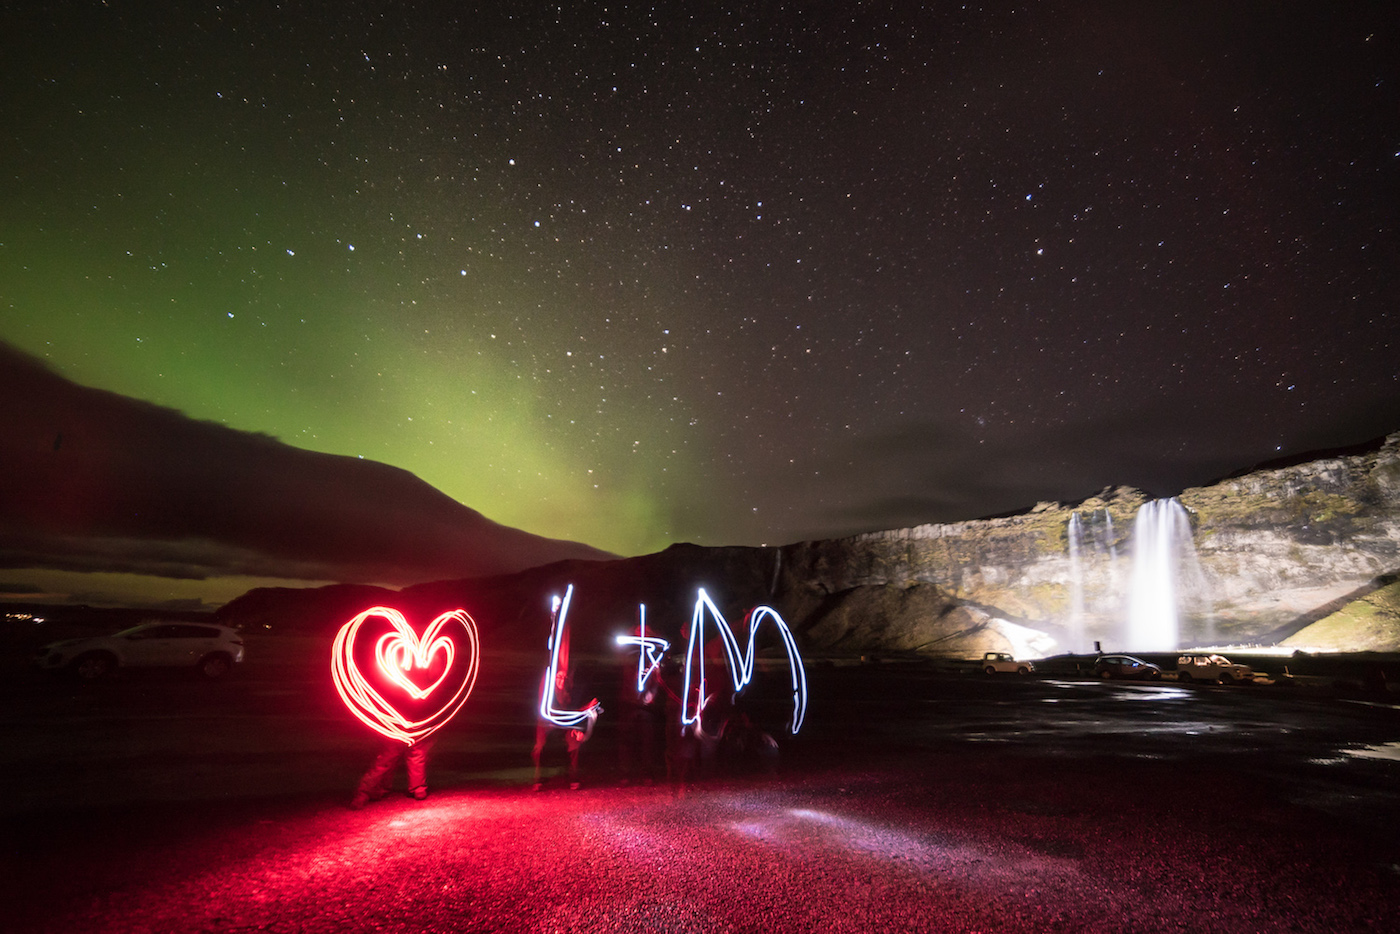
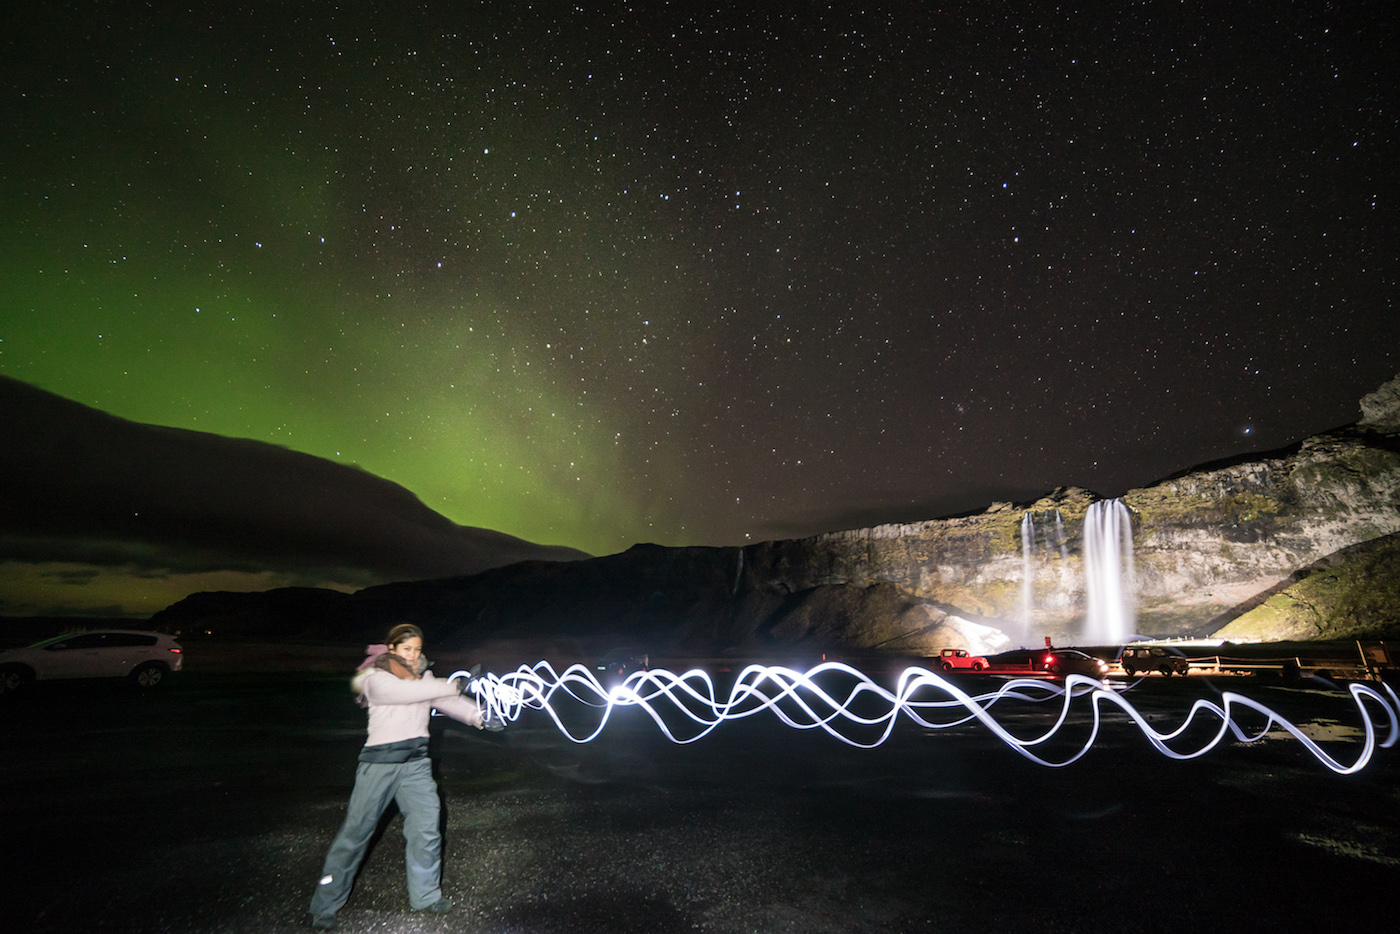
As an added bonus, if you have long enough shutter speeds, you can do light painting and make doodles in your images. When you turn on a light, the camera will capture the movement of the lights until you turn off the light. Try this out when you do long exposures!
<3 Ling + Mat
KAMEHAMEHAAA!!!
KAMEHAMEHAAA PART 2!!!
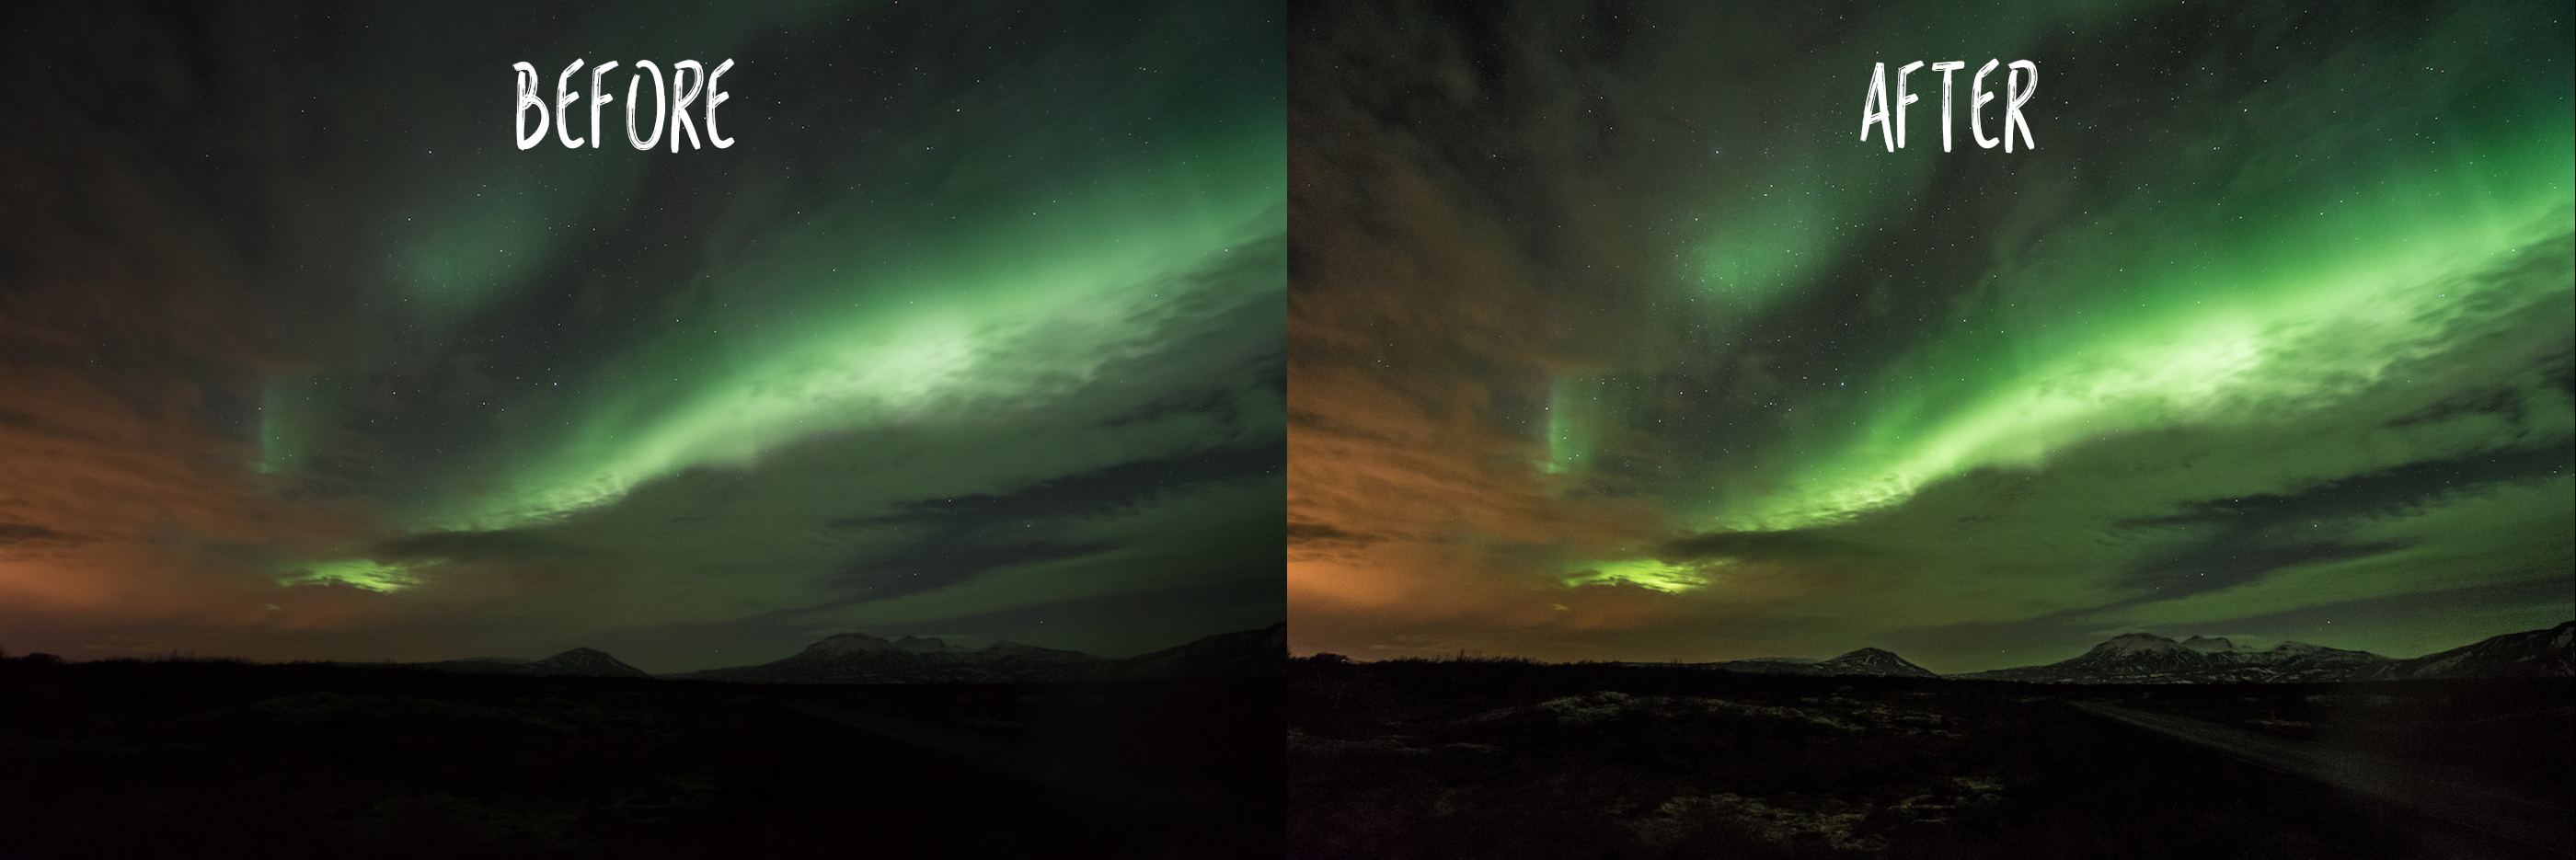
7. ALWAYS Shoot Raw
One of the biggest mistakes I see people make while taking photos at night (and in general) is only shooting in JPEG. You should always shoot in RAW, which creates a digital negative of your image. This file allows you to make much more adjustments in post-processing with Photoshop or Lightroom, whereas adjusting a JPEG image is very limited and will hurt the quality of the image. Most advanced cameras offer the ability to shoot RAW, so although it takes up significantly more space, it is still almost a necessity to shoot in that format.
Adjustments made with a RAW file. Cannot be easily done with a JPEG
Hope these tips will help you when you’re out searching for the Northern Lights. Ask us any questions and let us know what helped you photograph the lights!