7 Tips to Photographing the Northern Lights in Iceland

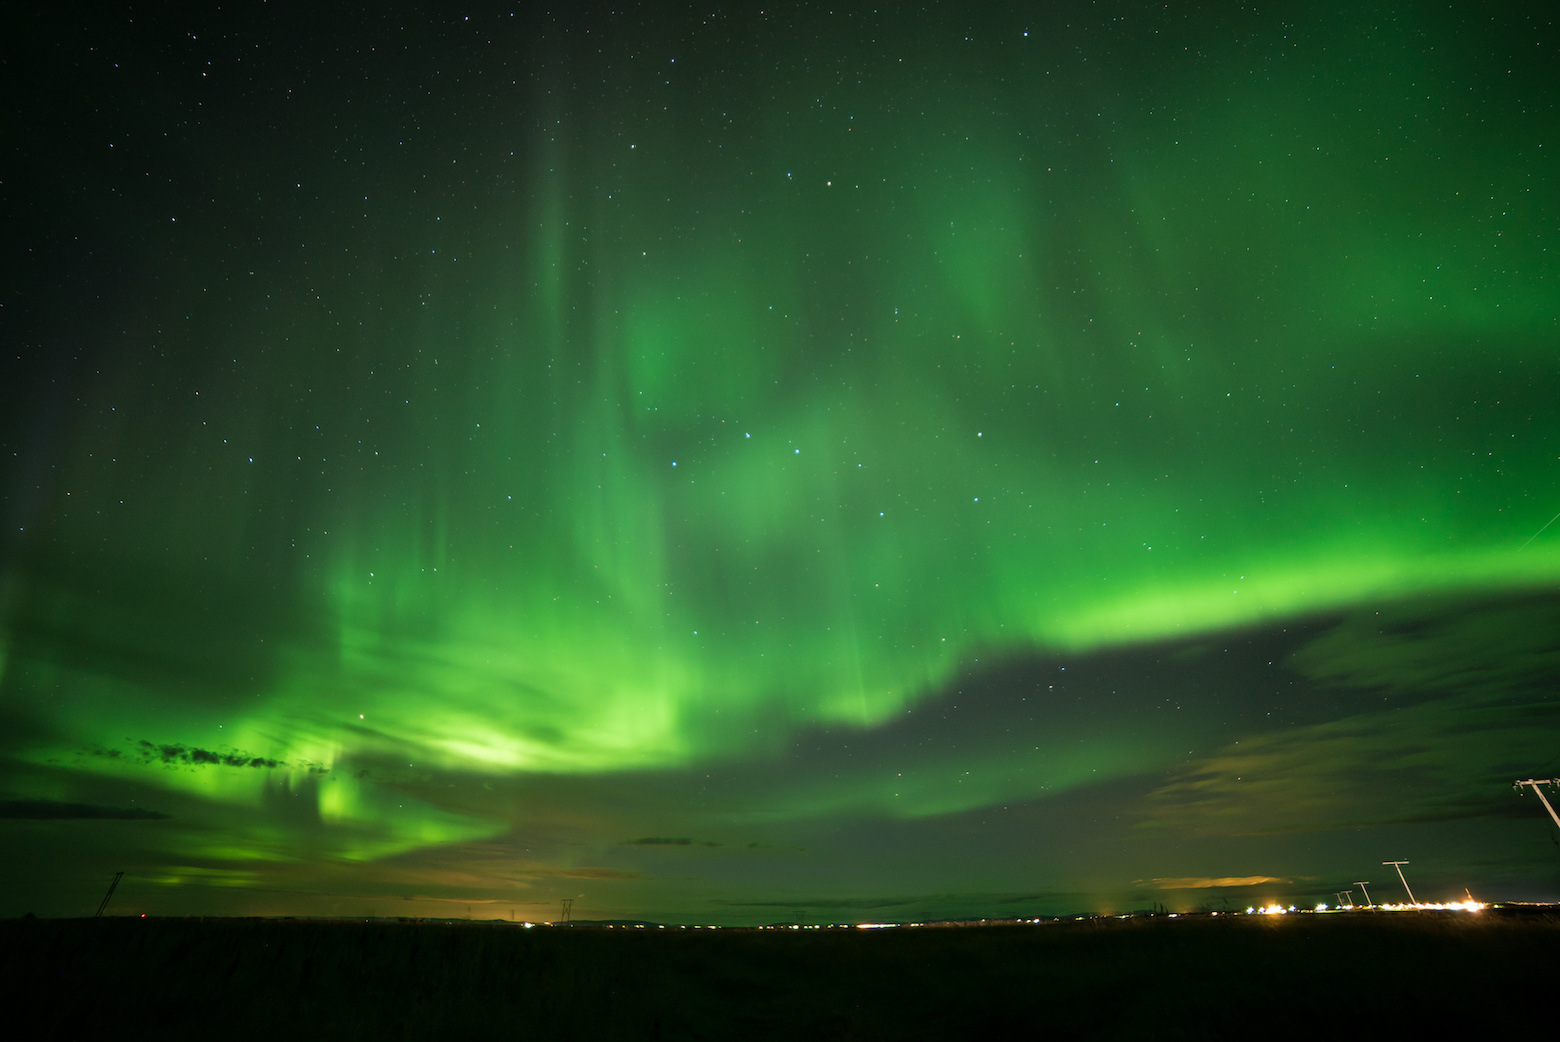
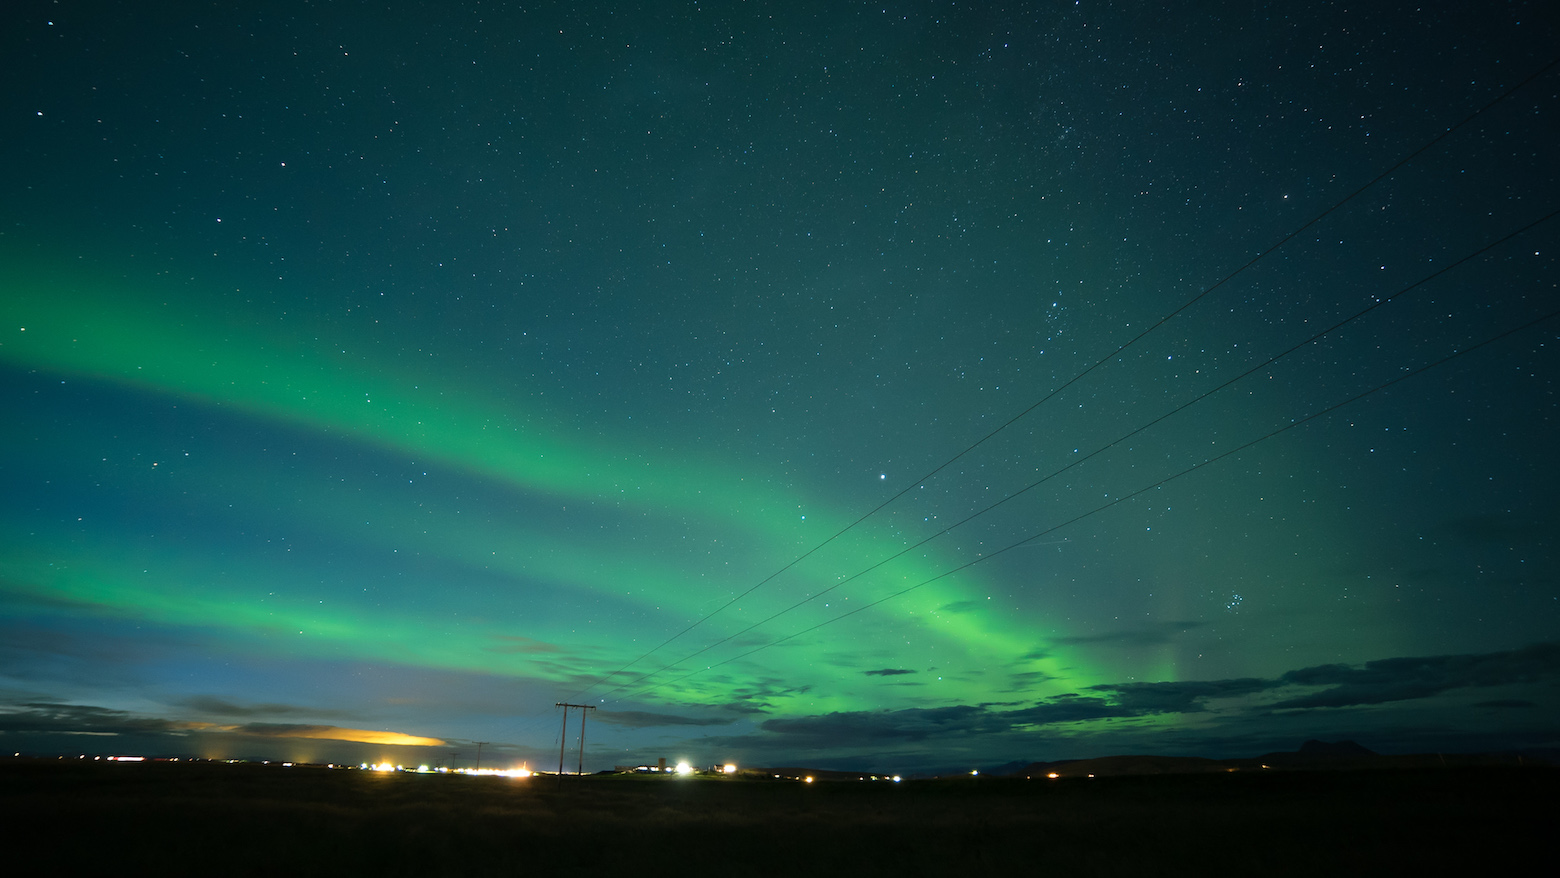
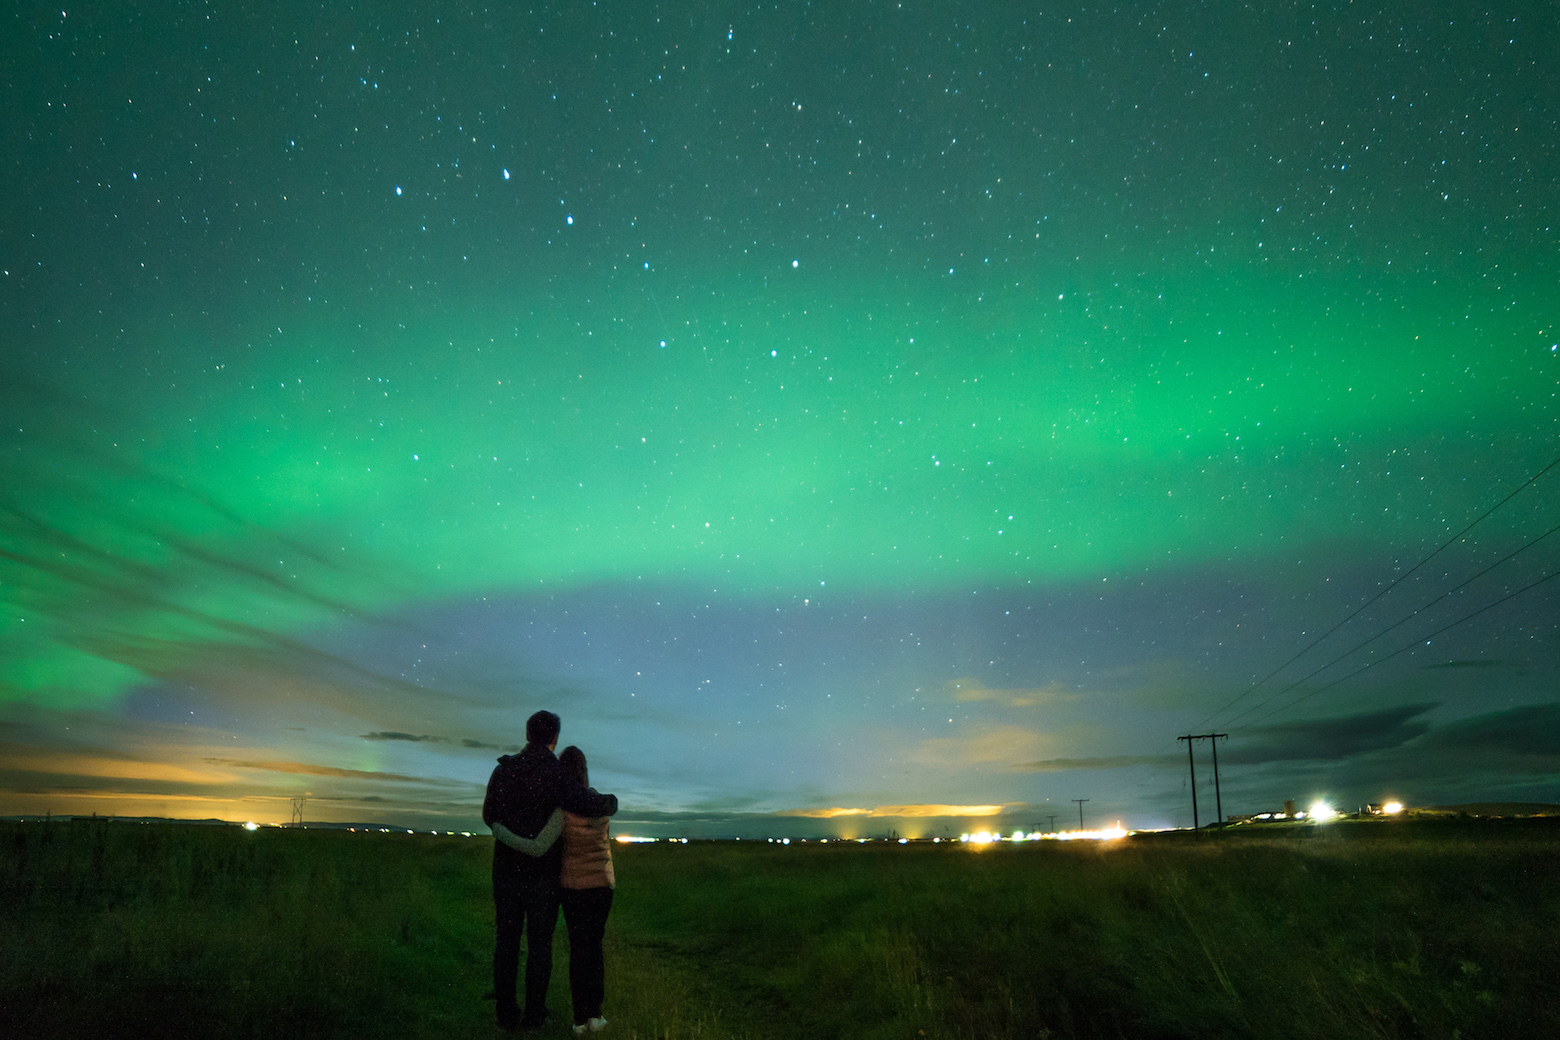
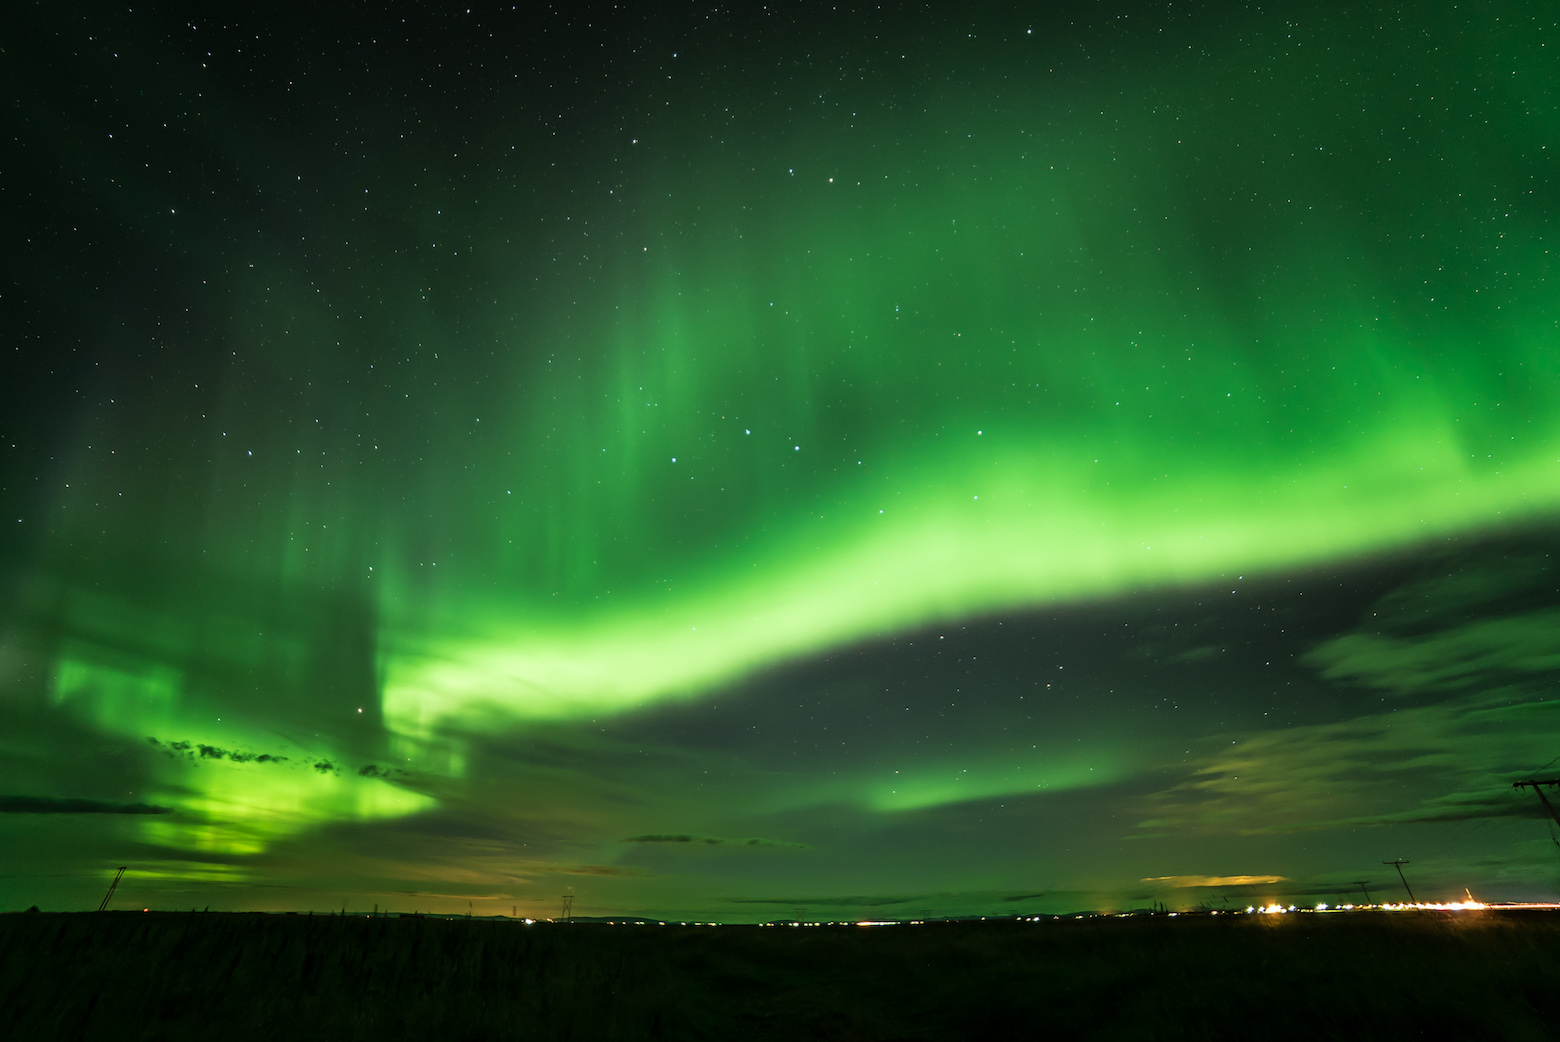
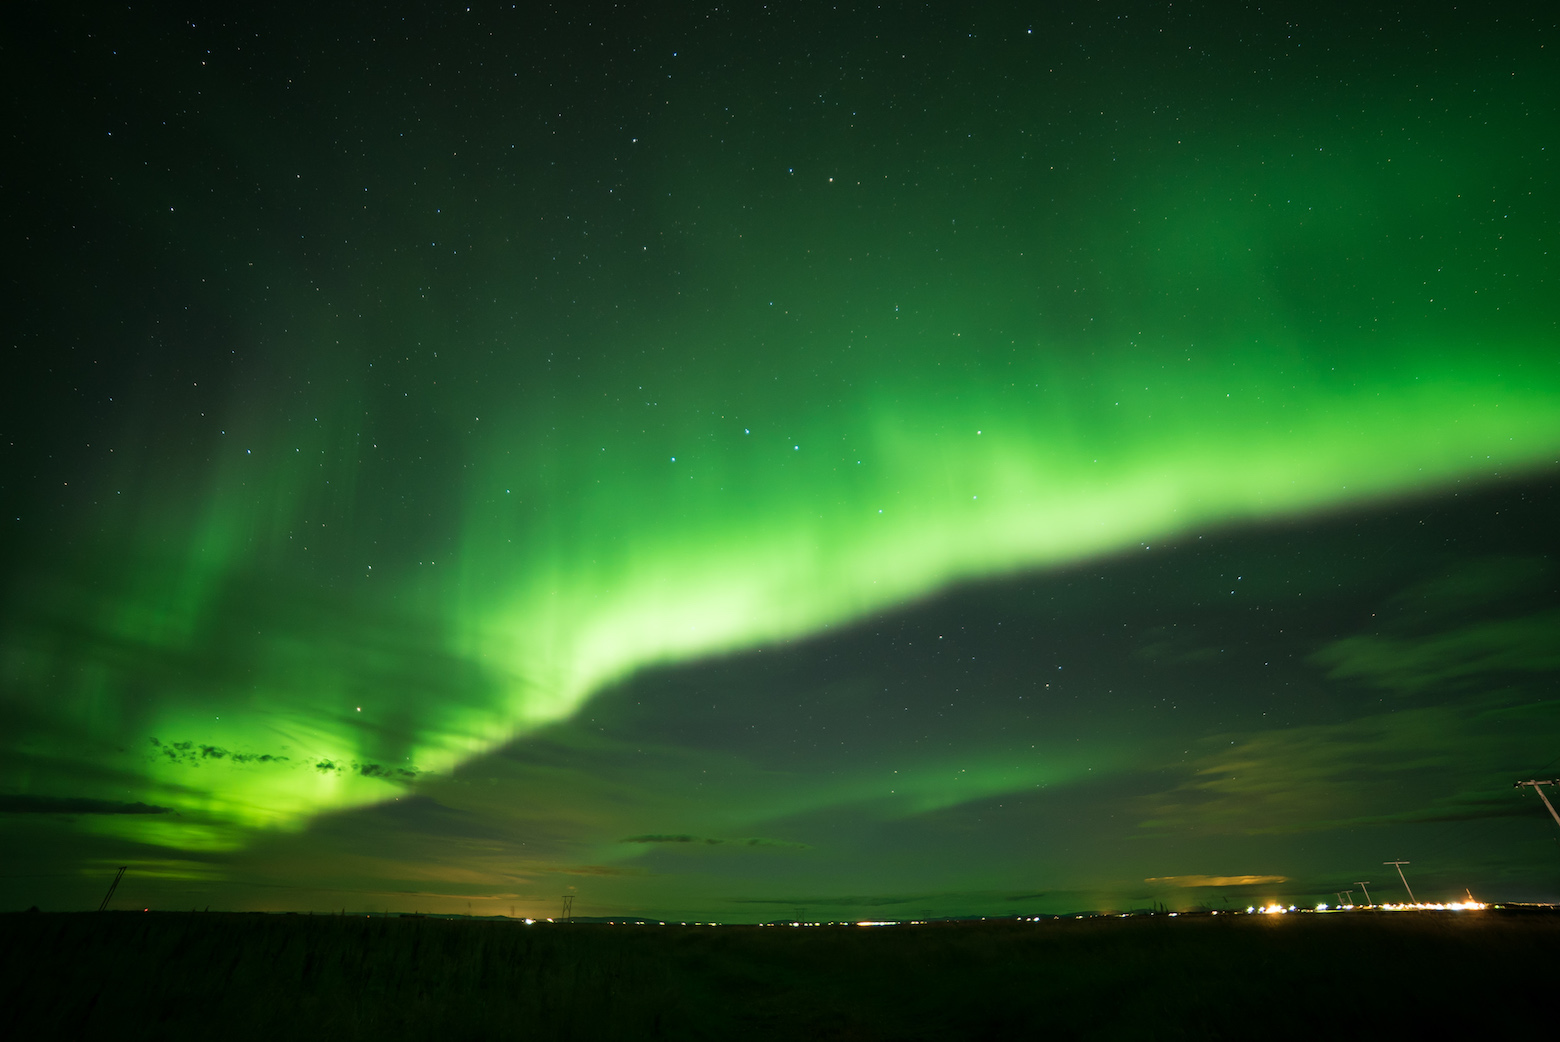
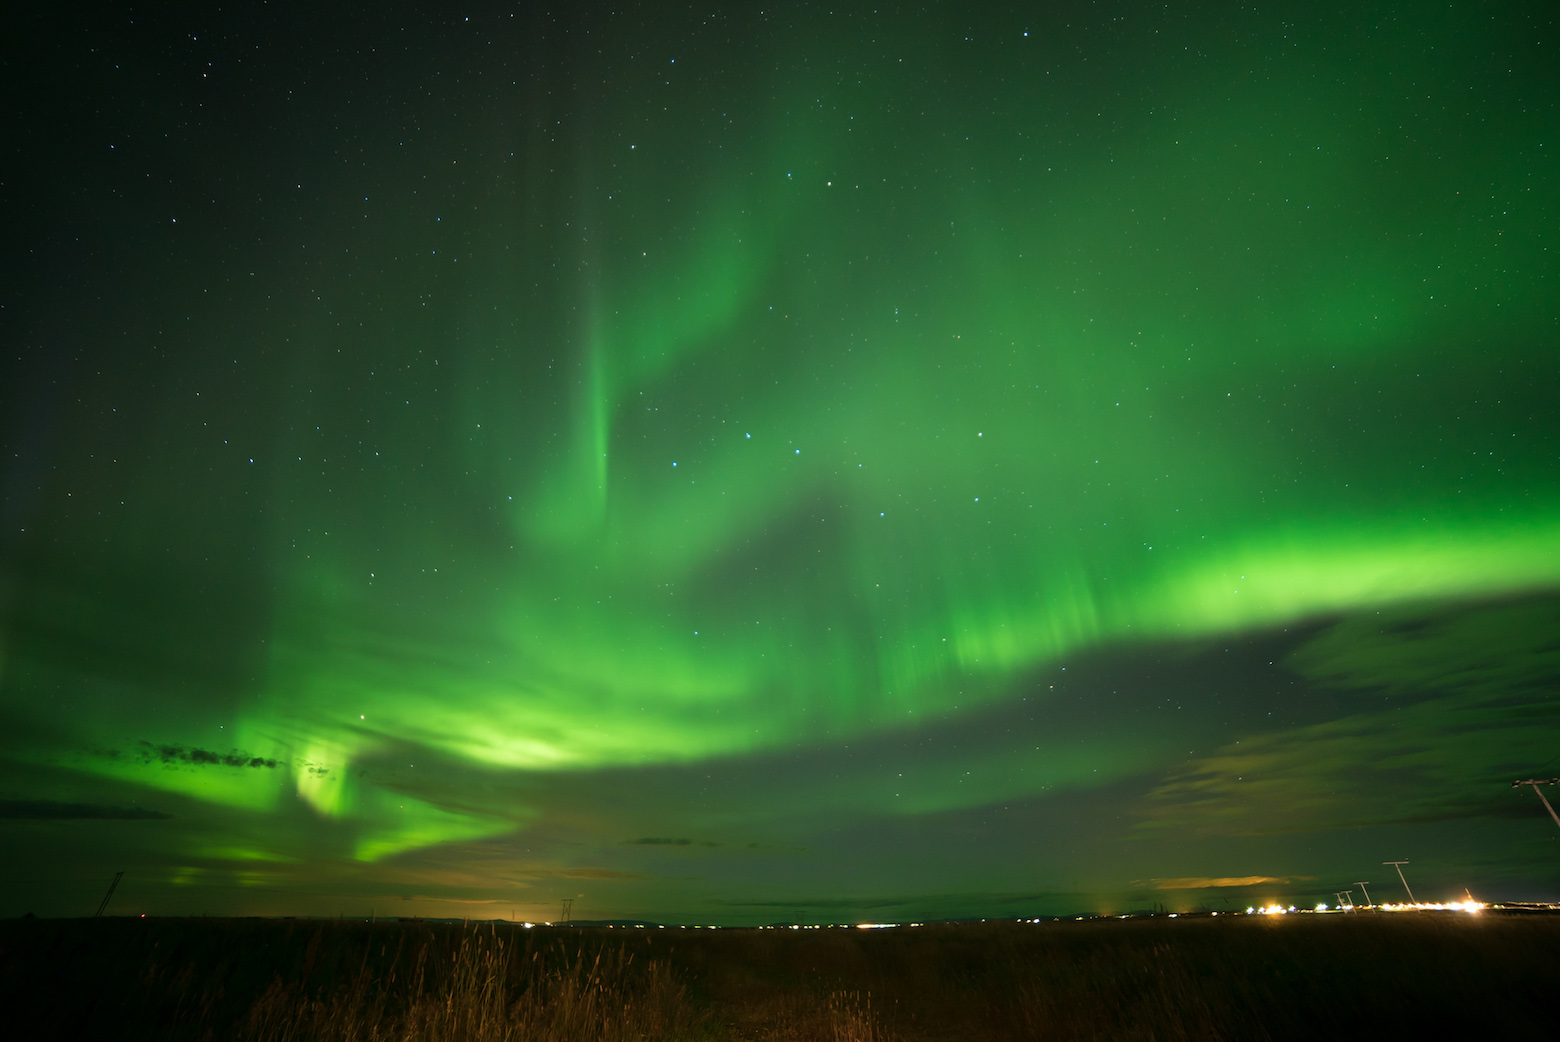
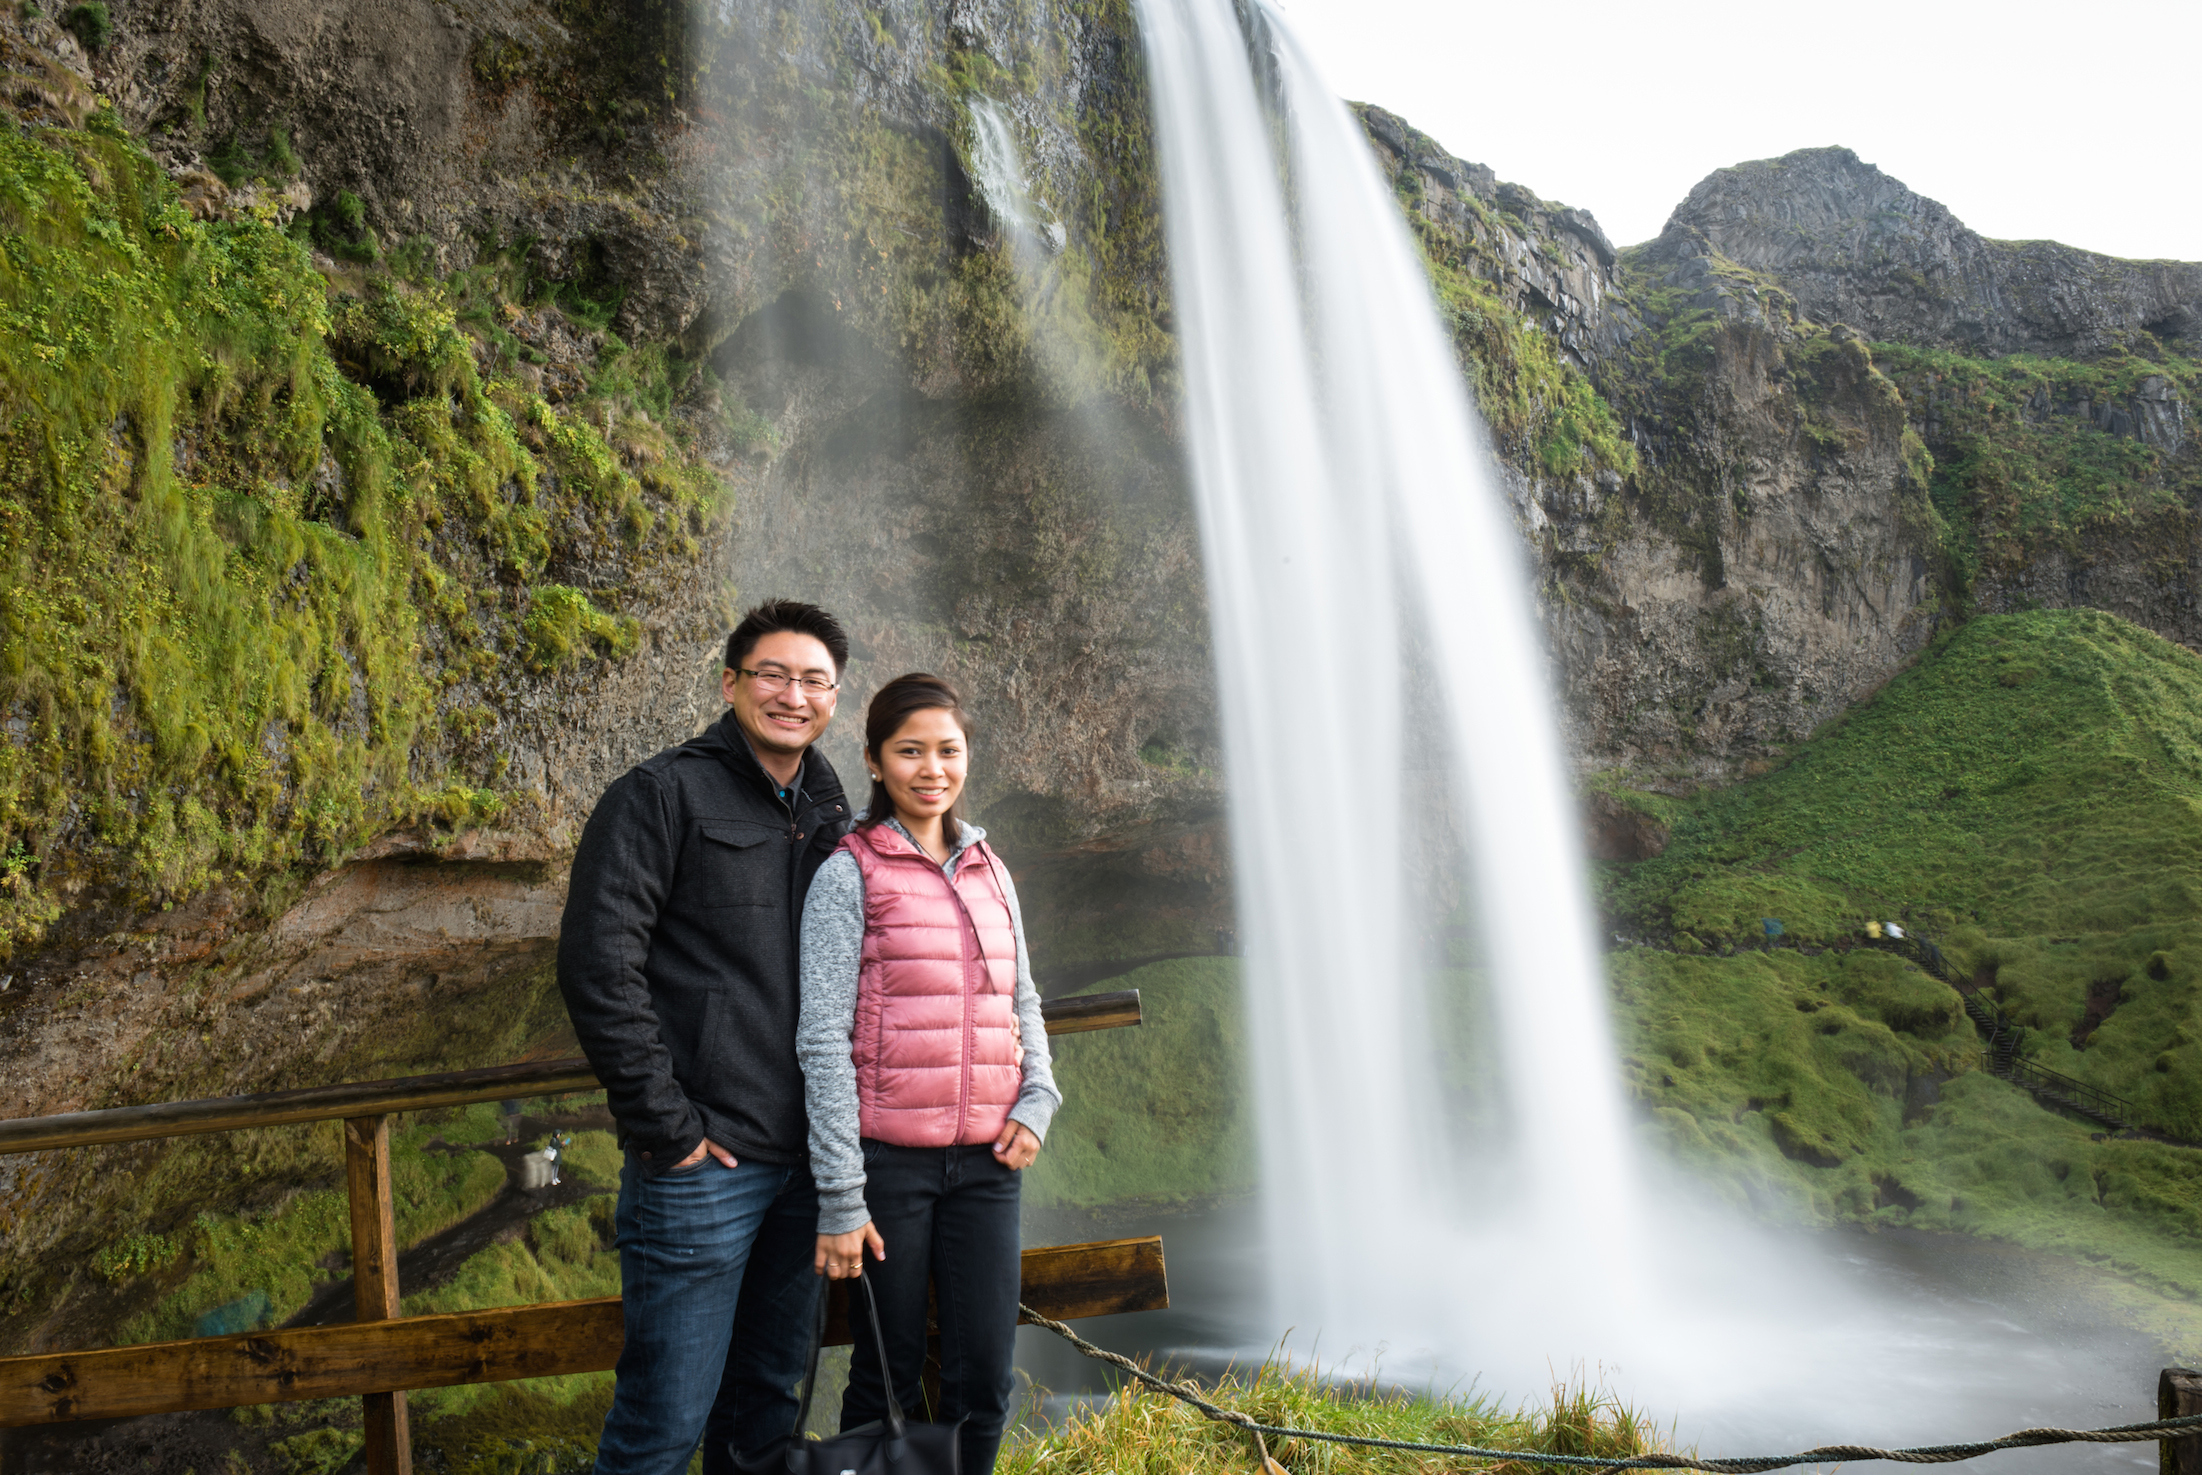
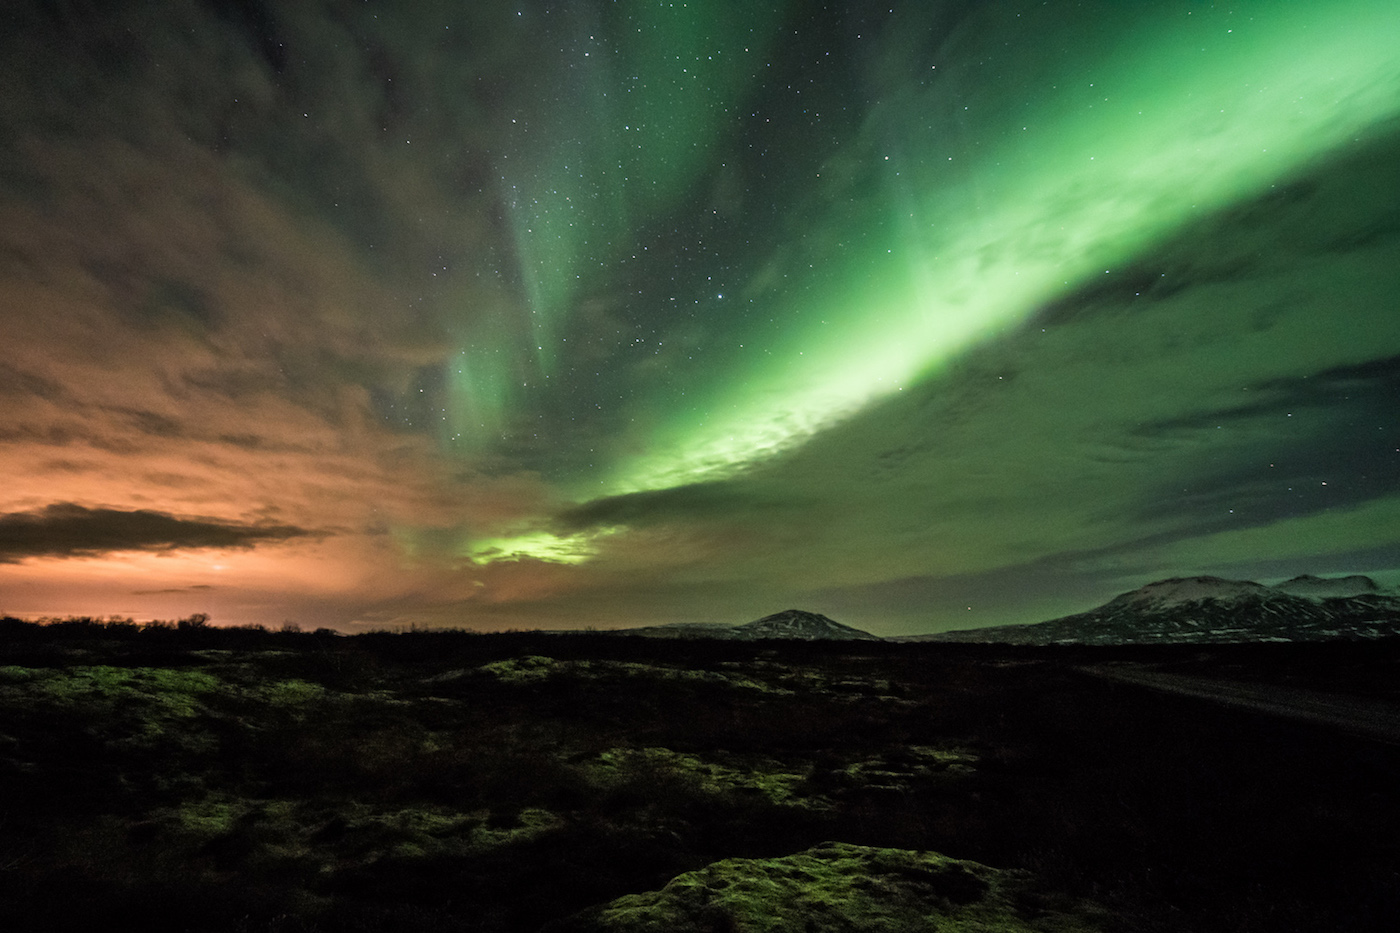
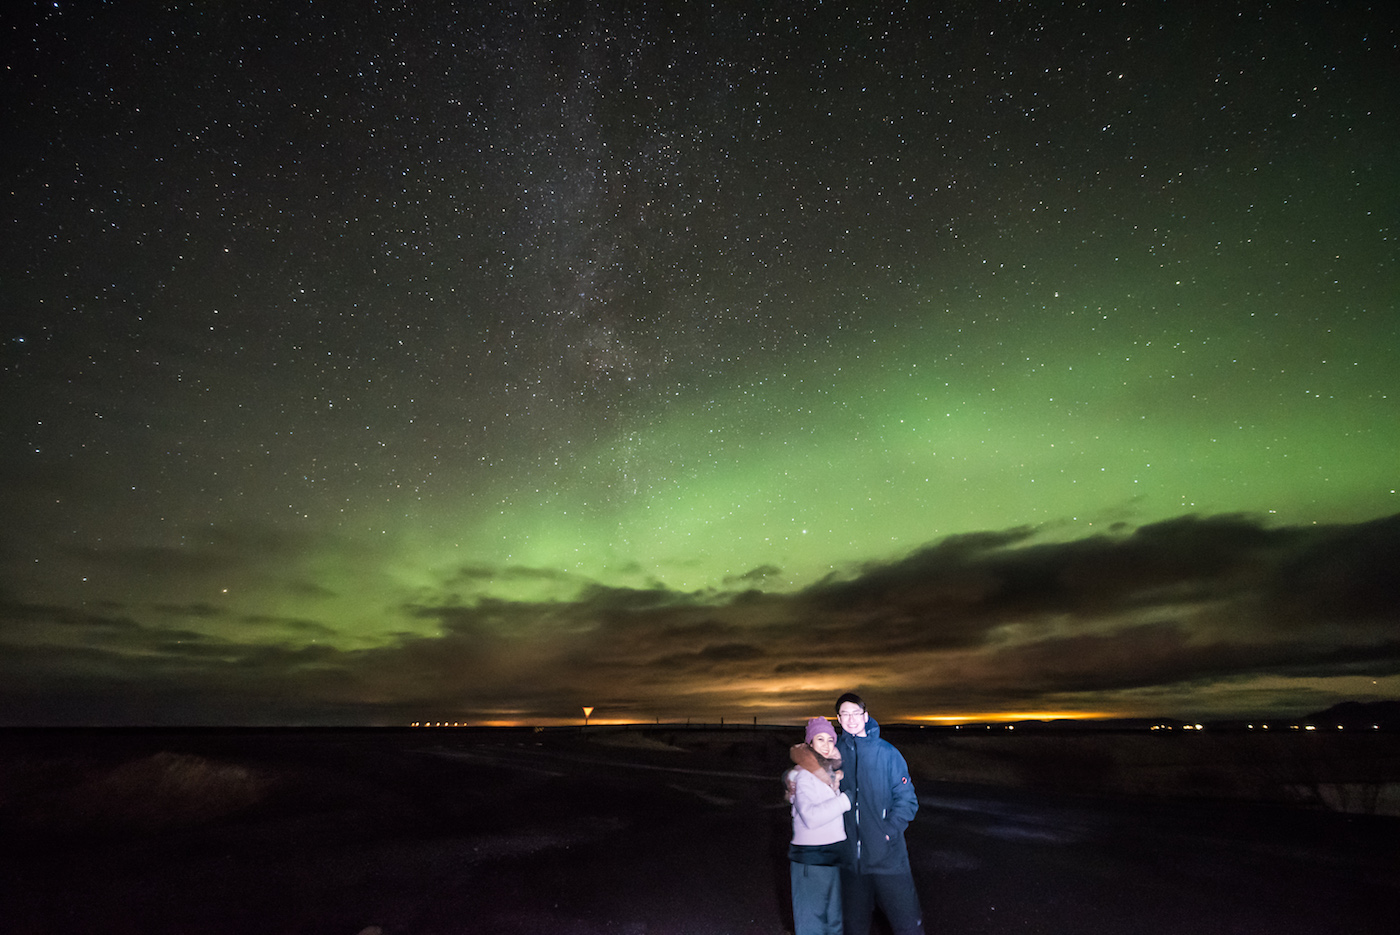
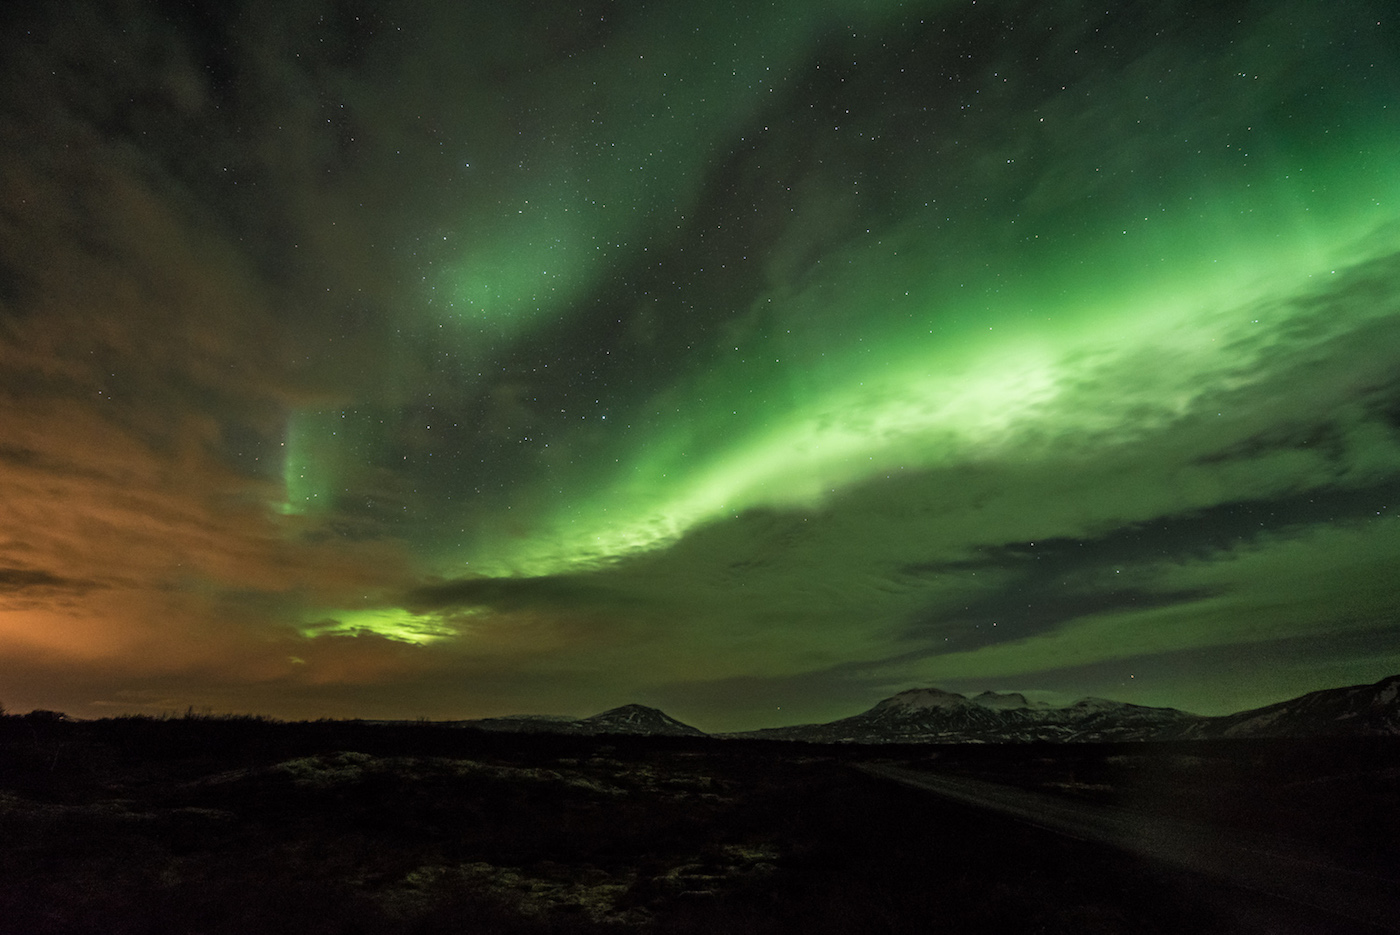
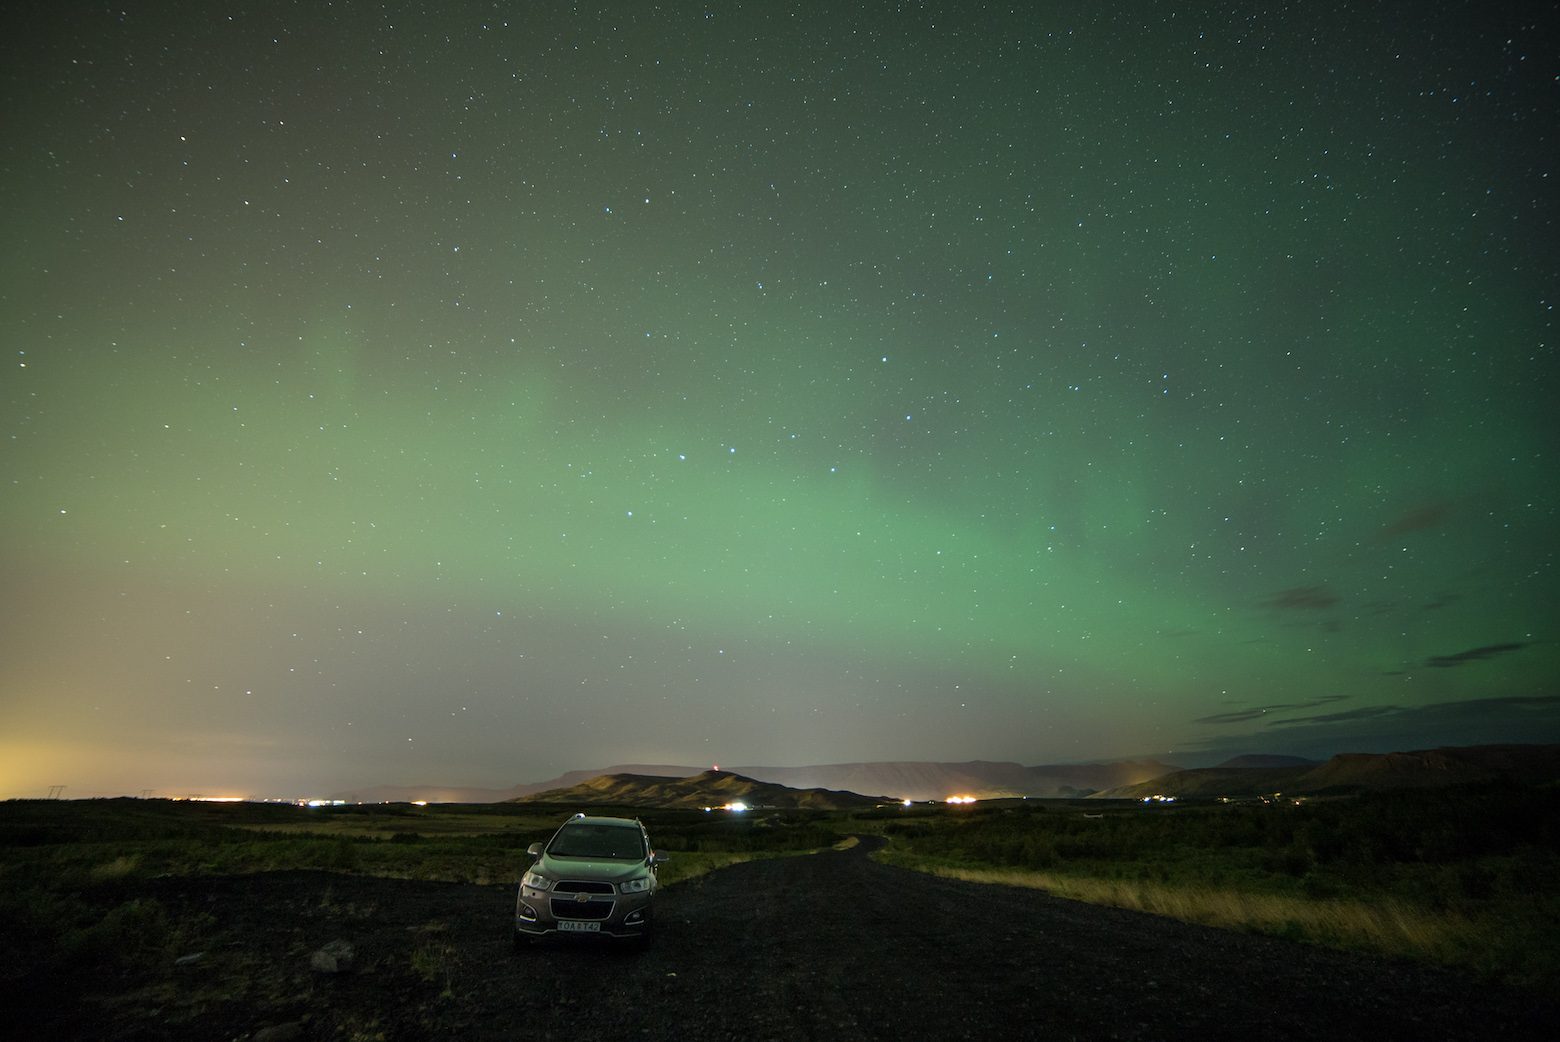
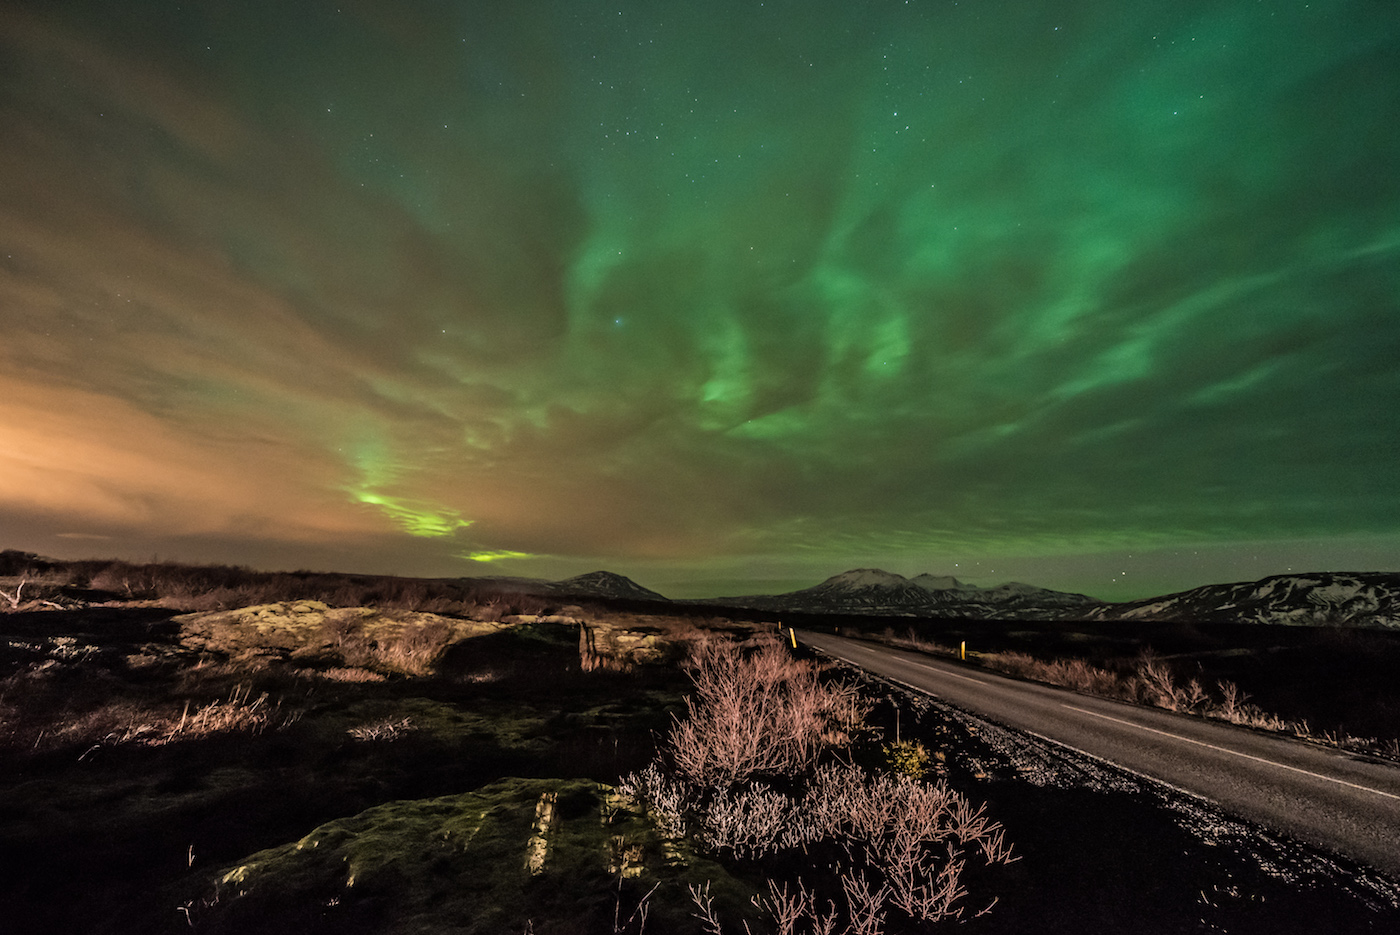
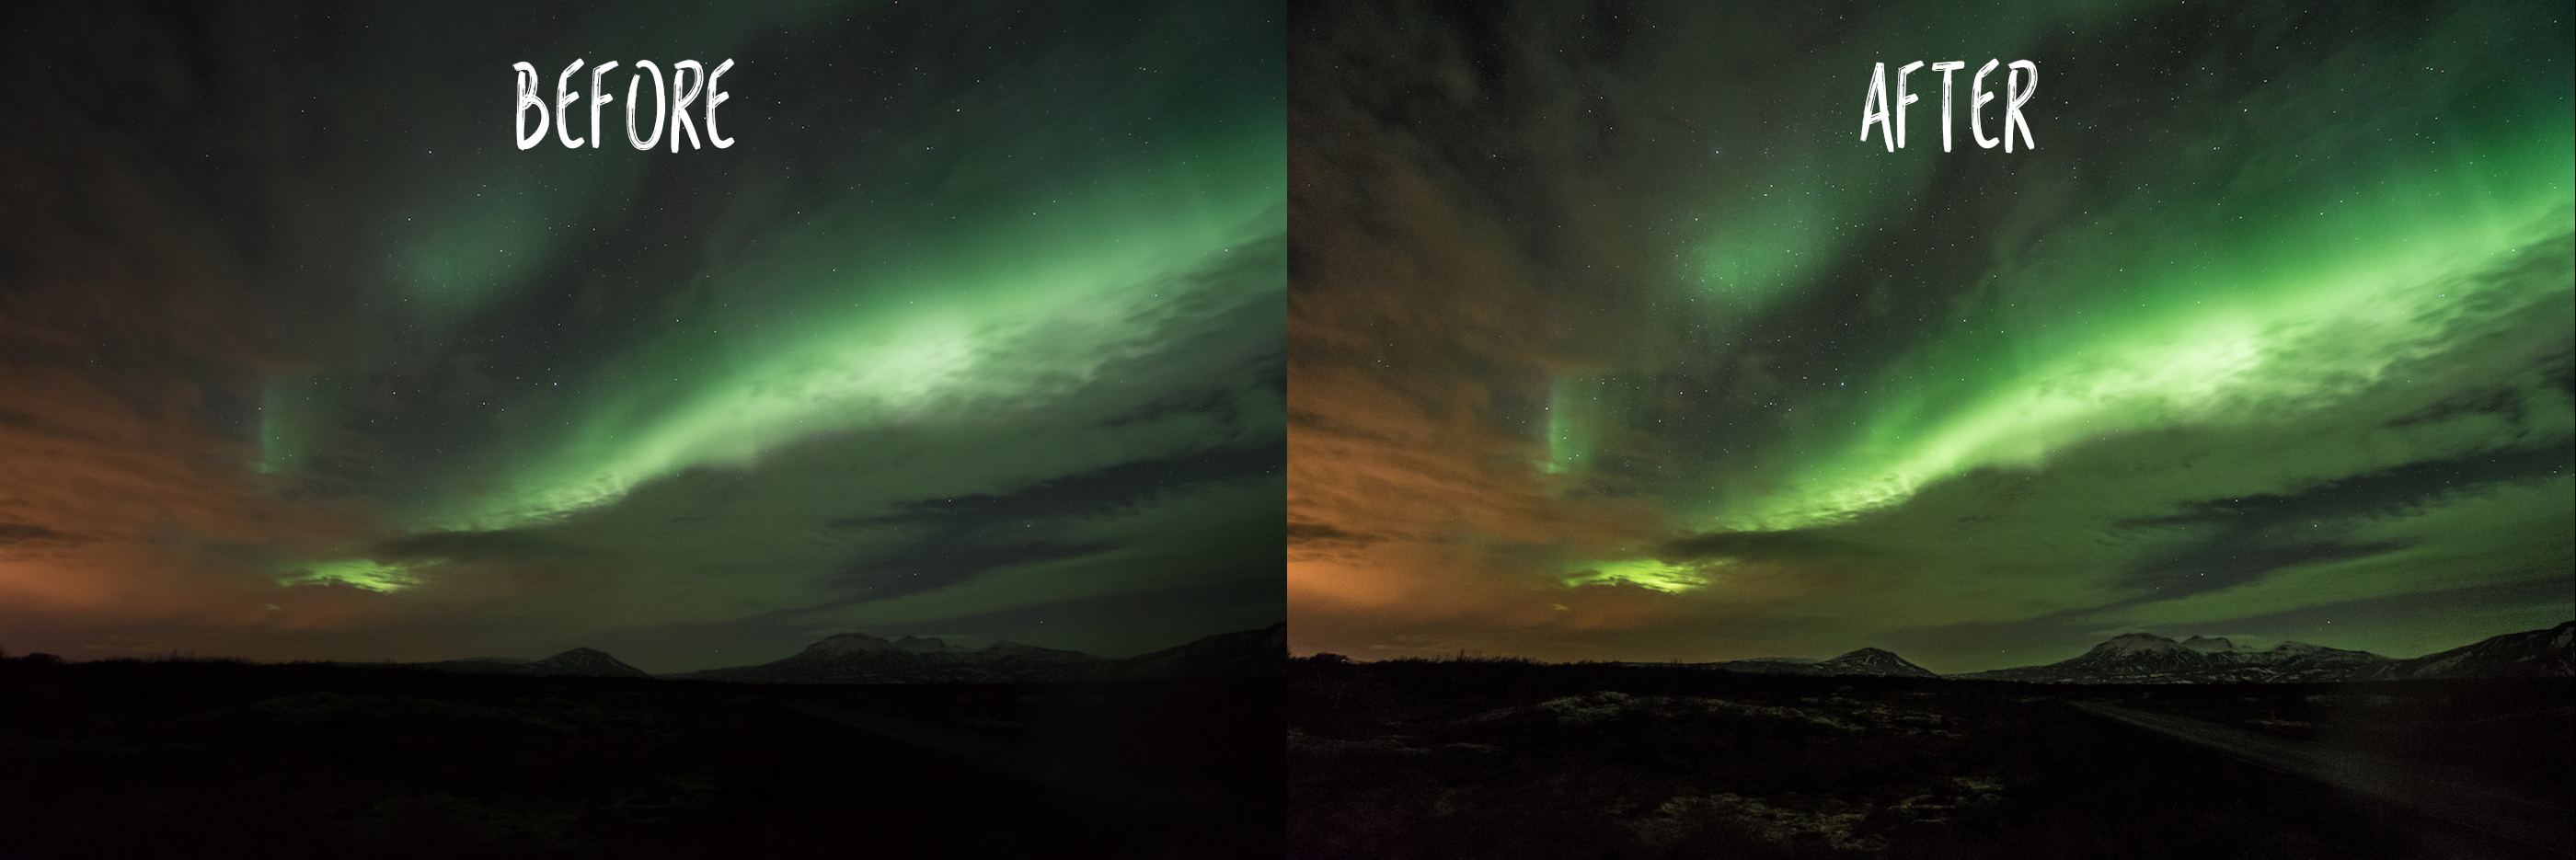
When making a visit to Iceland, one of the great natural wonders that everyone wants to see is the Aurora Borealis, more commonly known as Northern Lights. The northern lights are a spectacle unlike any other with the intense swirling movement of green lights “dancing” in the starry skies. We were fortunate enough to see it again during our latest visit and it was a dazzling couple of nights.

But finding the northern lights and attempting to photograph them can be very challenging tasks, so we’re going to prepare you in the best way possible. Here are 7 tips for finding and photographing the Northern Lights during your visit to Iceland:

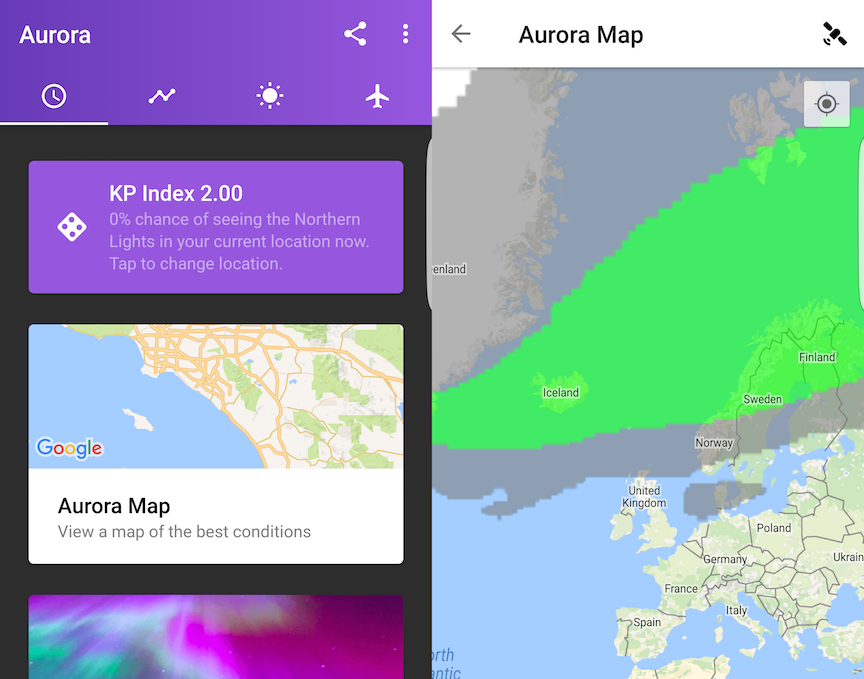
1. Download the Aurora Alerts Northern Lights App,

This could be one of your best resources to track the northern lights. The Aurora Alerts Northern Lights App is a free app provides live up-to-date information of the northern light activity, including the probability of seeing the lights based on location, geomagnetic conditions (KP Index) on a scale of 1-9, hourly to long-term forecasts, and projected northern light coverage worldwide.

You’ll want to go out when the KP Index reads 3 or higher for the best conditions. You can also set up alerts that will tell you when the best chance is to see the lights. This app also works for other countries as well.

Aurora Alerts Northern Lights App

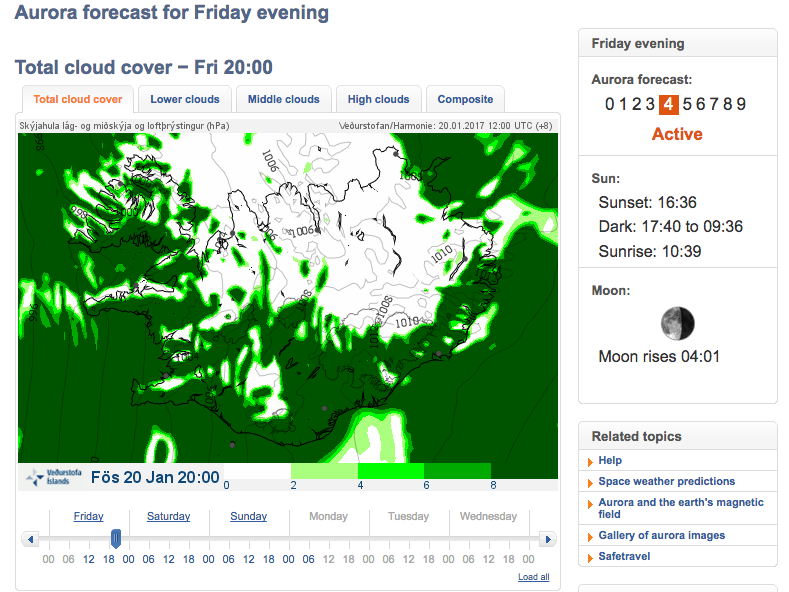
Just about the only thing it doesn’t do is provide a weather report, so it’s good to have an app or website to show the weather. I liked using the Rainy Days App and also used the Icelandic Met Office website, both showing project cloud coverage throughout the country by the hour. With a combination of these resources, you’ll have everything you need to track the northern lights.

2. Find dark clear skies away from the city

The best places to see the northern lights are places that are away from the city to avoid light pollution. This way your eyes will adjust to the darkness and it’ll be easier to see and photograph the northern lights. That’s simple enough to do since there are plenty of places in Iceland that are far from the city.

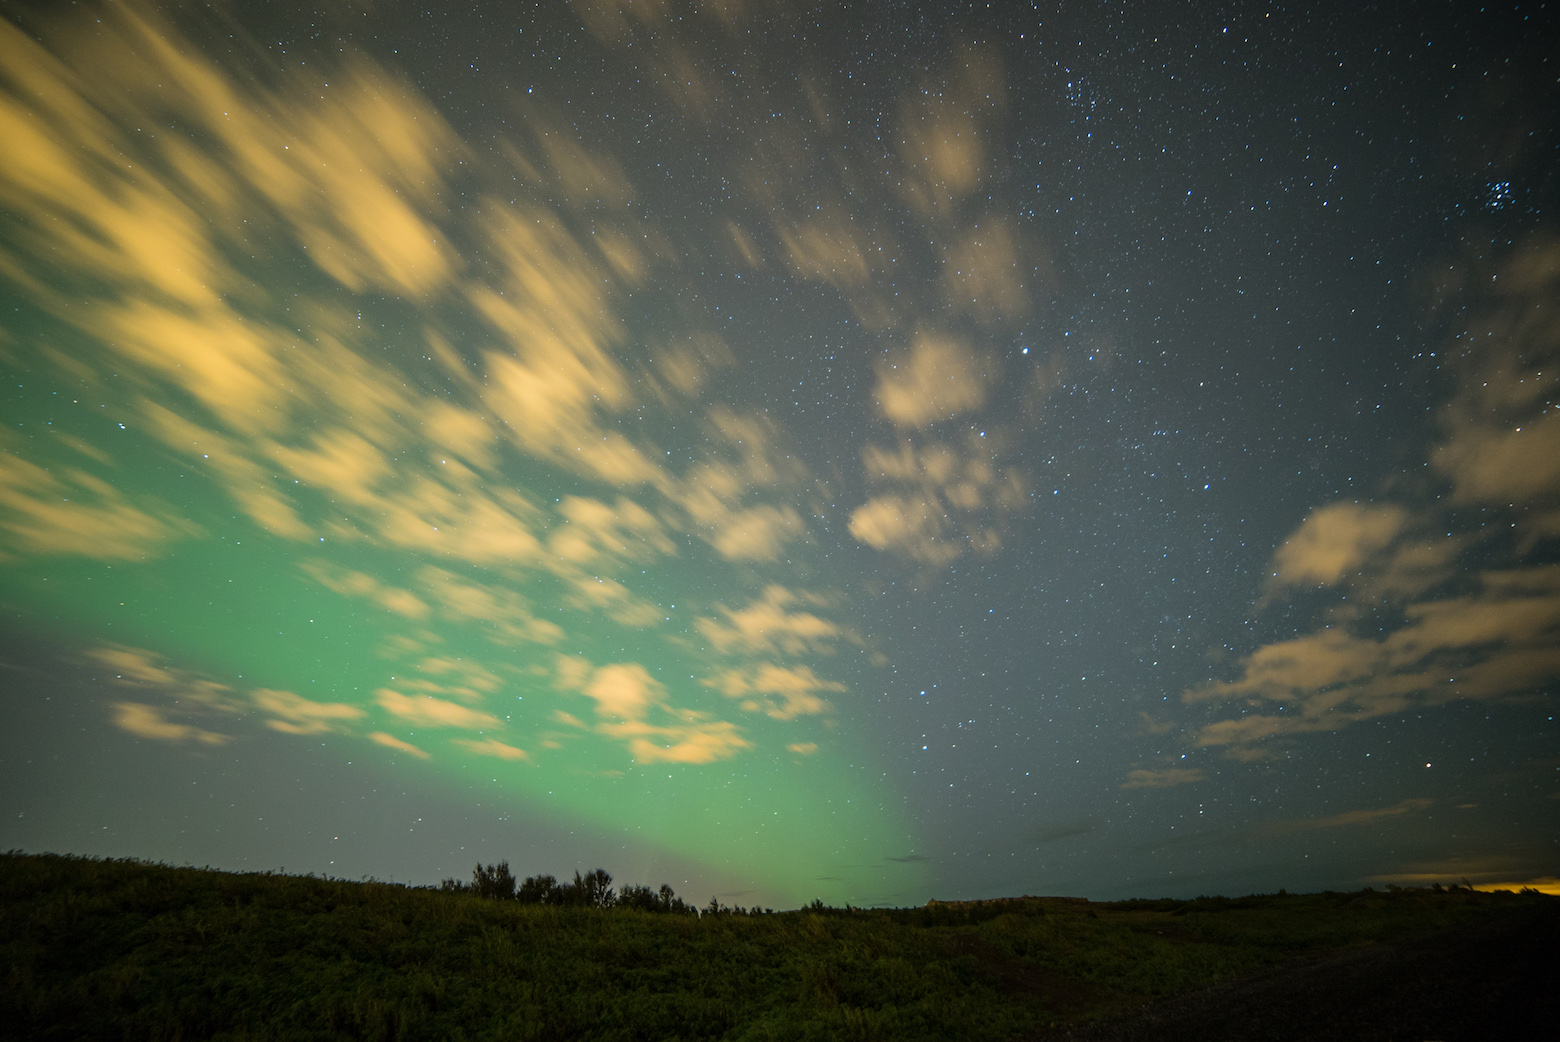
The more challenging part may be trying to find dark clear skies. As the locals would say, “If you don’t like Iceland’s weather, wait 5 minutes.” The weather can be particularly fickle, going from very clear skies one moment and then raining minutes later. During our recent visit, it rained 5 of the 7 days we were there and in some instances, it can be cloudy/rainy for days or weeks at a time!

Having the Rainy Days App or the Icelandic Met Office website can help you showing projected cloud coverage and find an area with clear skies. Even partial covered skies can give you some great shots of the northern lights, as long as you have some open sky to show the lights.

Icelandic Met Office Website. This shot indicates it will be may be a good night to see the northern lights in southern Iceland.

Another thing to remember is to not go to Iceland in summer if you specifically want to see the northern lights because the days are very long and at night, it doesn’t get completely dark. It would be very difficult to see the lights under these conditions. The best time to see them would be during fall or winter when the nights are longer and darker.

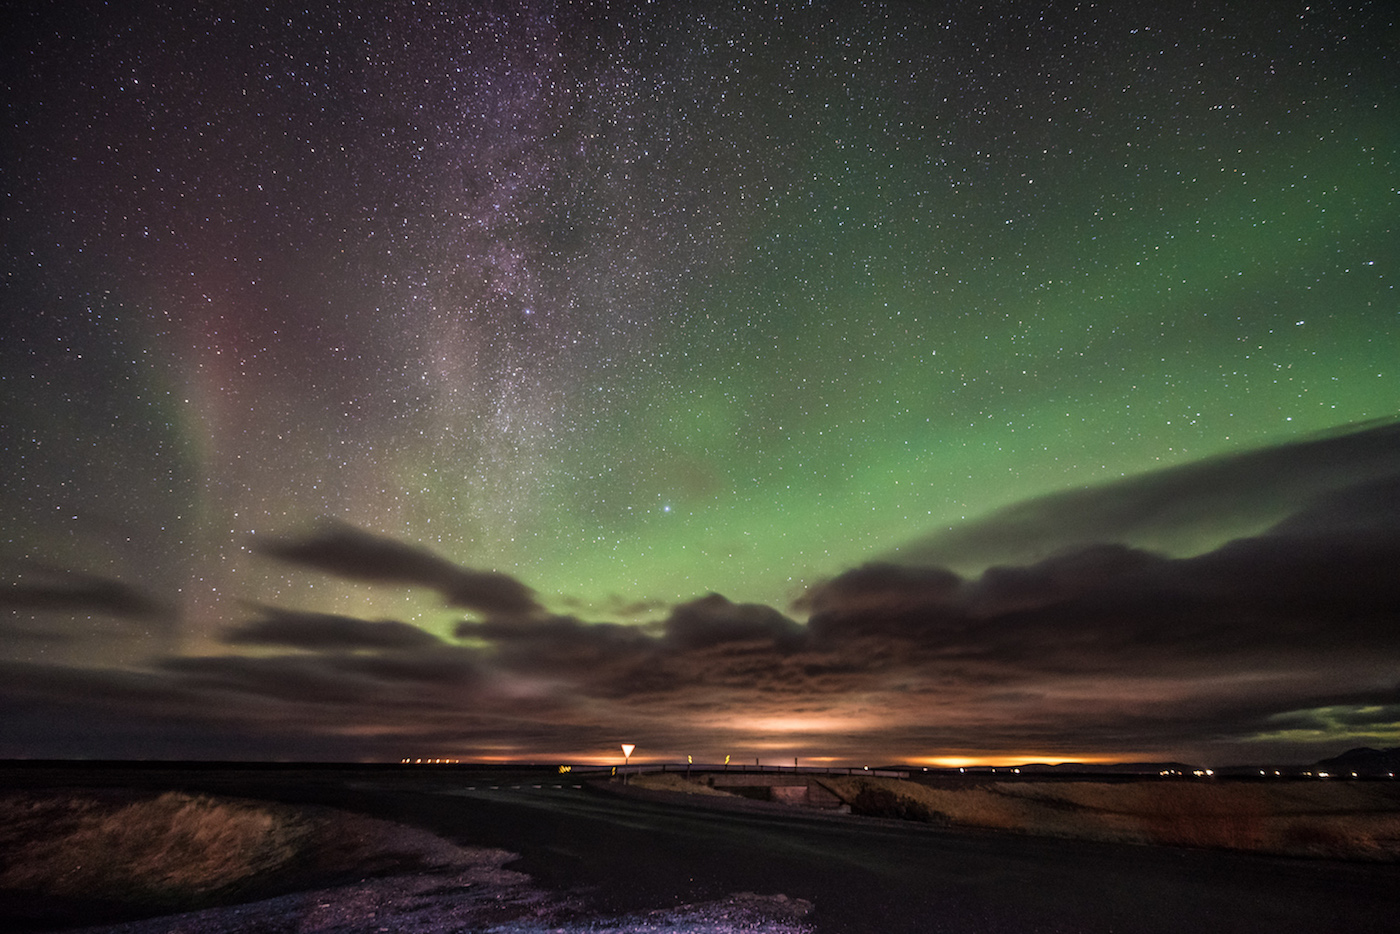
3. The Northern Lights are not always easily visible

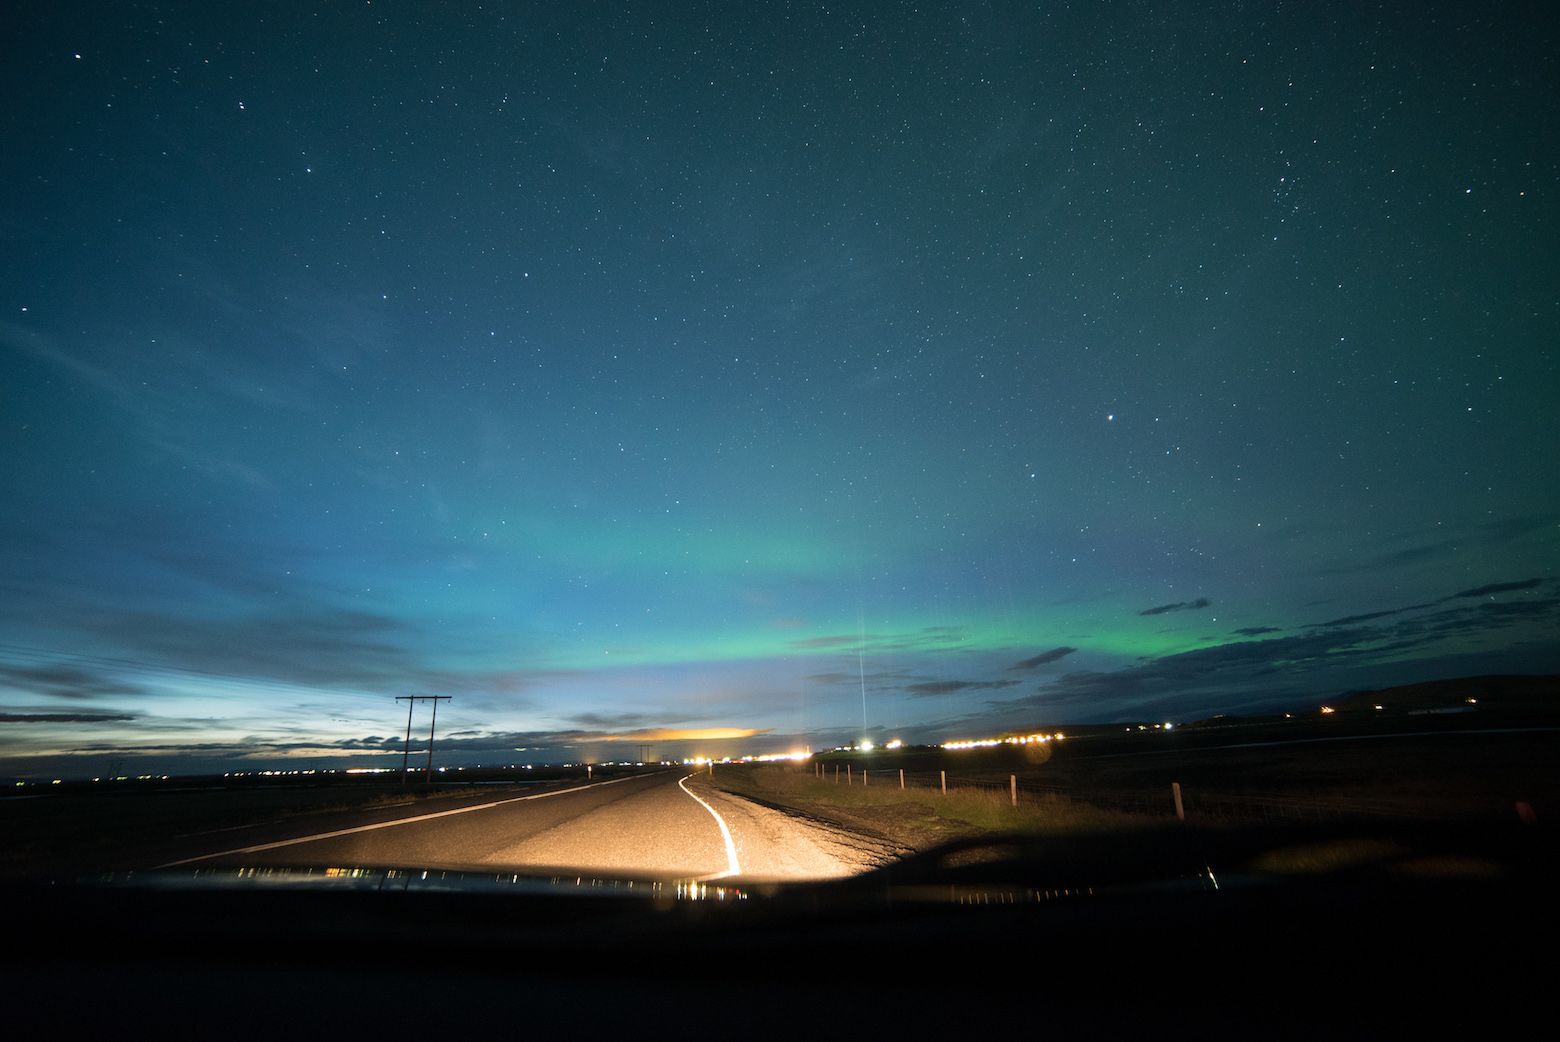
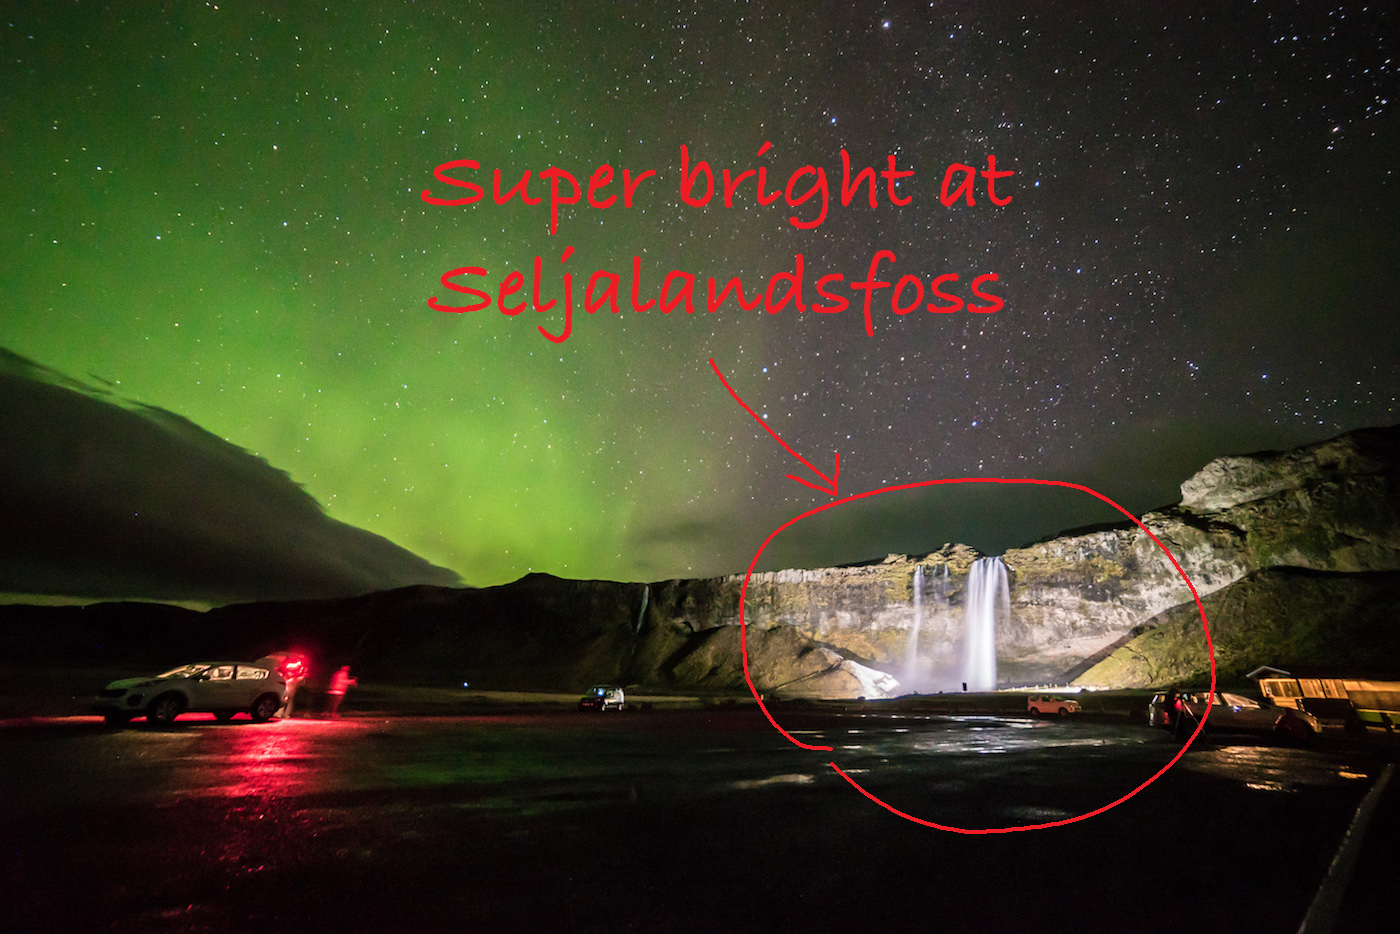
When the northern lights are VERY bright, they are very visible and can illuminate the entire sky. However, sometimes even if the sky looks dark, the lights can still be there. They will be very faint and pretty difficult to see, especially if you’re driving and your eyes are not adjusted to the dark.

These lights were too faint to see clearly. Only my camera could capture this low activity
These lights were too faint to see clearly with my eyes. Only my camera could capture this low activity

If you want to be sure whether or not the lights are there or not, then stop to the side on occasion and let your eyes adjust to the dark. If you can see a faint streak of color in the sky, it is possible those are the northern lights. If you have a camera with the right settings, you can confirm it with a test shot. While the lights may look very weak initially, you can wait a bit and see if the activity gets stronger. In both instances I’ve seen the northern lights, they started out as faint trails, but then intensified into much brighter lights.

4. Having the right camera and equipment

So you found the northern lights! You’re enjoying the wondrous spectacle of dancing lights dazzling through the sky! You bring out your phone or point-and-shoot camera to take a picture and…it’s almost pitch black…you can barely see the lights on your screen…it’s blurry…

Shooting photos at night are not the best conditions for a phone or point-and-shoot camera. If you really want to capture vivid shots of the lights, you need the right equipment. Here is the basic gear you should carry:

Tripod – Any tripod generally will be OK, but it’s highly recommended to bring a strong and sturdy tripod and prevent any vibration causing blurry images and especially on nights when it can be windy and will blow away any cheap tripod. You’ll be working with exposures from 5-20 seconds, so you need to be sure your tripod will keep your camera completely still.

Camera with Manual Mode – You need a camera that you can adjust the settings manually, primarily shutter speed, F-stop, and ISO. Auto will not help you here.

Although it’s still recommended to have a full-frame camera because of better low-light capabilities, better ISO performance and image quality, and more lens selection, you can still get shots with an advanced mirrorless or point-and-shoot camera as long as they have manual capabilities. I used full-frame cameras, including a Nikon D750 and a Sony A7s. However, if you’re on a budget, you can do well with a non-full-frame mirrorless camera like a Sony D6300 or Fujifilm XT1, or even use an advanced point-and-shoots like the Sony RX100 series or a Canon GX7.

Wide Angle Lens – A wide angle lens will help you capture a good amount of the foreground as well as the sky. When looking for a lens, anything 24mm or lower is ideal, and you want to look for F-stops as low as 2.8.

Remote Trigger (Optional) – It’s good to have if you want to take selfies and also to take a shot without pushing the camera button to prevent any vibration. If you don’t have a trigger, you can use the camera self-timer to take a shot.

Powerful flashlight (Highly Recommend) – We’ll get into more of this in the next tip.

5. Setting up your focus

Perhaps the most challenging part of night photography is focusing in the dark. In pitch black darkness, cameras are not able to properly autofocus on a particular object. Thus, you have to figure out how to manually focus your lens.

An easy way to set up your focus is to do it before dark sets. You can use your camera to autofocus on a distant point. Once the lens is focused, switch your lens to manual focus and do not touch it for the rest of the night. You can use tape to hold the lens’ focus ring or use a marker to mark the focus point on your lens. You’ll be good to go when shooting the northern lights in any direction.

If you did not focus before dark, then you’ll have to figure out how to focus at night. My favorite method is using a powerful flashlight that can illuminate an object at a distance. If you can light a distant object, many cameras will be able to autofocus on the object, which then you can switch back to manual focus. If your camera cannot focus on the illuminated object, have someone take the flashlight and walk 50-100 feet away. Your camera should be able to autofocus at the brightest point this way, and you can fine-tune the focus manually. I love Maglite flashlights because they are incredibly powerful and make it easier to focus at night at a distance, but a good headlamp will do the job too.

Seljalandsfoss brightly lit with flood lights. Easy for cameras to focus

Without at least flashlight, focusing can be a little trickier. Some full-frame cameras have excellent live-viewfinders that perform remarkably well at night, so it can be easy to find the brightest star and bring it into focus. If you don’t have that, then the next best option is to start your lens from ∞ (infinity symbol) and adjust by trial and error with minuscule adjustments after each trial shot.

6. Manual Settings to use

The best combination of settings to use to shoot the northern lights is a large aperture (f2.8 – 4), longer shutter speed (5-20 seconds), and relatively high ISO (800-6400, though ideally around 1600 ISO). You can start with something like f2.8, 15 seconds, 1600 ISO and work from there. If you stick around those ranges and make the necessary adjustments, you will be able to get good shots of the northern lights. You should also manually set your color temperature (K) to around 2800-4800.

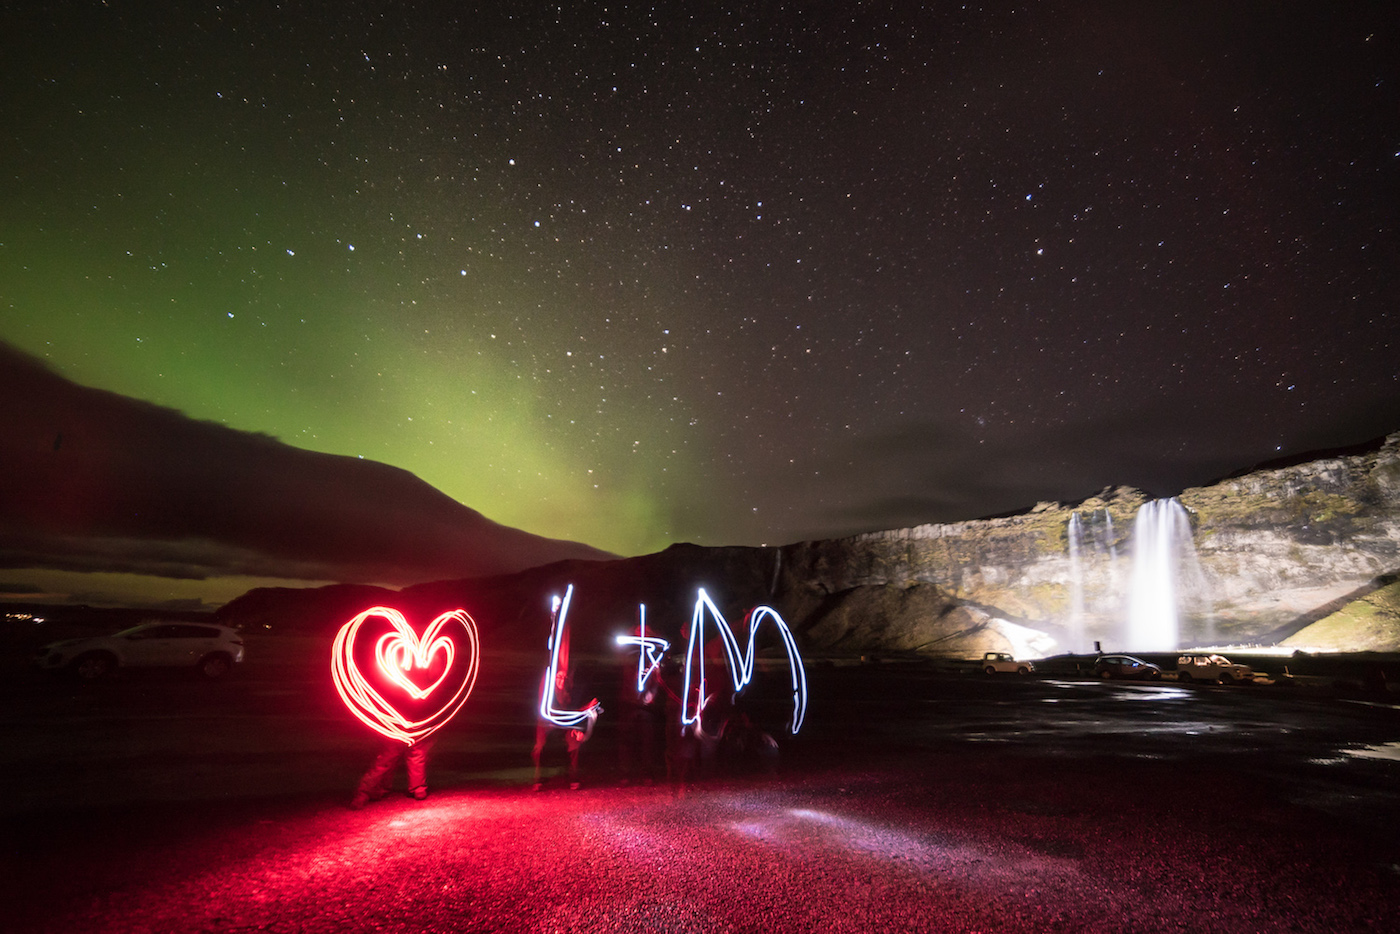
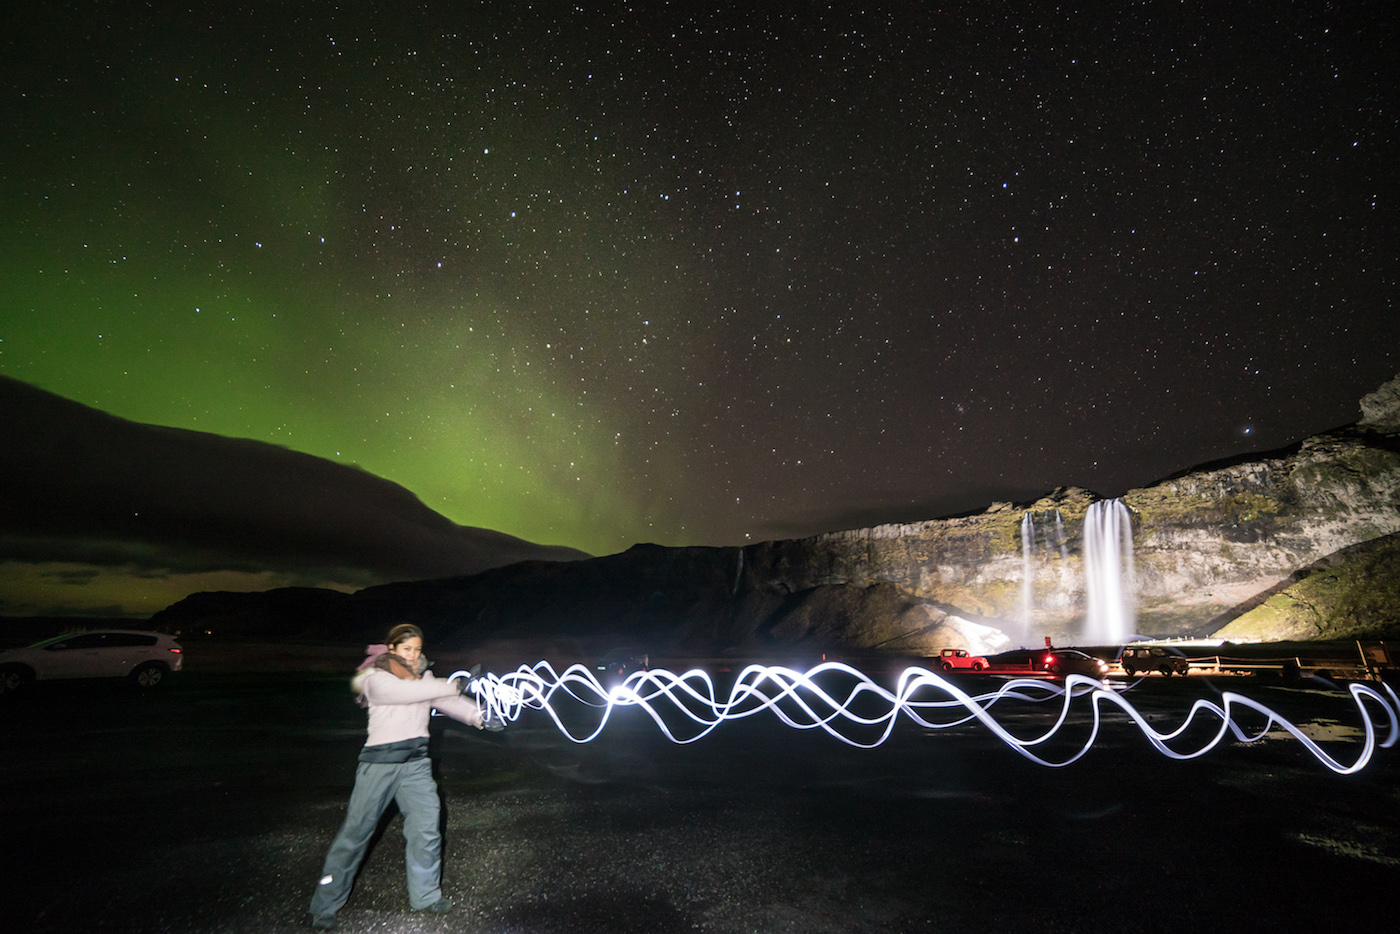
As an added bonus, if you have long enough shutter speeds, you can do light painting and make doodles in your images. When you turn on a light, the camera will capture the movement of the lights until you turn off the light. Try this out when you do long exposures!

7. ALWAYS Shoot Raw

One of the biggest mistakes I see people make while taking photos at night (and in general) is only shooting in JPEG. You should always shoot in RAW, which creates a digital negative of your image. This file allows you to make much more adjustments in post-processing with Photoshop or Lightroom, whereas adjusting a JPEG image is very limited and will hurt the quality of the image. Most advanced cameras offer the ability to shoot RAW, so although it takes up significantly more space, it is still almost a necessity to shoot in that format.

Adjustments made with a RAW file. Cannot be easily done with a JPEG

Hope these tips will help you when you’re out searching for the Northern Lights. Ask us any questions and let us know what helped you photograph the lights!

7 Tips to Photographing the Northern Lights in Iceland

Share

Aurora Borealis – Searching for the Northern Lights in Iceland

Like most visitors of Iceland, one of the things we wanted to experience was to see the Aurora Borealis, commonly known as the Northern Lights. We were only visiting for three days, so we were going to just visit different locations and just hope that we would find the lights at night.

On our first night in Reykjavik, we did go set out to see if we could find the Northern Lights. Guided by our Aurora forecast, there was supposed to be decent activity and clear skies outside of the city. We did have clear skies, but there was no light activity…at least, to the naked eye. Fortunately, I brought my Sony A7s, a mirrorless camera with incredible low-light capabilities that can literally help you see in the dark. Using the live viewfinder, we could see that there were faint trails of the Northern Lights in the sky. Excited that the lights were there, we found a spot to wait and see if the activity would intensify. But after two hours, it stayed mostly the same and we needed to get some sleep. While it was cool to know that it was there, it wasn’t quite what we’d hoped for.

Northern Lights, Iceland

Northern Lights, IcelandThe following day, we drove around the Golden Circle to visit some of Iceland’s main attractions. After seeing as much as we could during the daytime, we were heading back to Reykjavik and hoped we’d see the Northern Lights on the way. Our Aurora forecaster didn’t predict any strong activity so we weren’t going to expect too much. Still, I had my camera out with the live viewfinder to help us try and detect any light activity.

Northern Lights, Iceland

Sure enough, the camera was able to see some faint Northern Light activity. We pulled over off the road to a nearby field to see if the light would intensify. After about 30 minutes, the lights did start to become more visible and started dancing around.

Northern Lights, Iceland Northern Lights, Iceland

Then, all of a sudden, there was a powerful burst of light activity and lit up the sky! For about 4-5 minutes, we watched an incredibly dazzlingly display of the dancing Northern Lights. It was breathtaking watching it constantly change its shape and movements.

Aurora Borealis, Northern Lights, Iceland

Northern Lights, Iceland Northern Lights, Iceland Northern Lights, IcelandAfter those glorious few minutes, the lights got less intense but they were still visible to watch while I continued to take photos to create the timelapse below. We watched for another hour before heading back. It was a magical night to remember and really capped a memorable trip. And hopefully, it’ll be waiting for us when we go back!


Share

4 Places with Awesome Food in Iceland

Icelandic Plate Combination

Even though we were in Iceland for only a few days, we could not stop raving at how delicious the food was! Ok, so we didn’t get to try out that many places and we didn’t try some of Iceland’s most traditional dishes like sheep head, whale meat, puffin or shark (which I’m not sure I’d have the stomach for some of those things)…but the stuff we did eat was amazing! What interested me the most were how simple these dishes were, yet they were some of the best food I’ve ever eaten. However, if you’re on a tight budget, don’t expect to find cheap prices on these menus compared to the United States, but they’re reasonable compared to other parts of Europe. Here’s a list of four of our favorite places we did dine at.

Cafe Loki

Located in Reykjavik, Cafe Loki sits directly across Hallgrímskirkja church and specializes in traditional homemade Icelandic dishes. We tried several dishes including their meat soup, one of their Icelandic Plate combinations, a vegetarian plate and rye bread ice cream. I loved the rye bread combination dishes, which consisted of smoked trout, smoked lamb, mashed fish or egg and herring. But our favorite had to be the rye bread ice cream, which was possibly the best ice cream I’ve ever had. The combination of flavors is unique and absolutely delicious.

Cafe Loki Icelandic Plate Combination Rye Bread with Egg and Herring Rye Bread Ice Cream Cafe Loki Mural ICELAND 1 & 2_158

Restaurant Brúin

Located in the town of Grindavík, this family-owned restaurant was our surprise dining discovery. As we were going through the town, our group was hungry and needed a break, and we came upon Restaurant Brúin. Little did we know that we would have some exceptionally good dishes. We tried some pan-fried fish, soup and even their traditional Saltfiskur, which is essentially salted fish. All of our food was very fresh, as all of the fish were caught on the same day they were cooked. I did like the Saltfiskur, but it may not be for everyone. Their traditional fish soup was also interesting, when it didn’t come out as soup, but as mashed up fish. But to our delight, the traditional fish soup was really good! So if you’re passing through Grindavík, be sure to take a break at Restaurant Brúin for some good homemade Icelandic food.

Hotel Skogafoss Bistro Bar

After our visit at Skogafoss, we needed something to eat before our long drive back to Reykjavik and Hotel Skogafoss Bistro Bar is right next to Skogafoss Waterfall. Presumably, it has a great view of the falls, but it was completely dark by the time we sat down. The interior is very modern and has a nice ambiance. But we enjoyed most the food we ordered. I ordered the lamb leg, which was simply amazing. The meat was fall-off-the-bone delicious and tasted so fresh and tender. We also tried the lamb soup, which was also very good. Another great dish was the baked cod, which was lightly seasoned and cooked perfectly. Fair warning though, we’ve seen negative comments about the dishes, but there was nothing about our food that was short of excellent.

Sjavargrillid Seafood Grill

Also located in Reykjavik, Sjavargrillid Seafood Grill is a great choice for some fine dining Icelandic dishes, although the prices easily exceed far above the other options listed here. The main dishes were pretty high for our budget, so we chose to order some appetizers and light main dishes instead. Our dishes were fish or seafood dishes, and all of the food was very fresh and tasty. It’s unfortunate we couldn’t try some of the main dishes, but if you have a bigger budget, you definitely should try Sjavargrillid Seafood Grill.

Share

Gullfoss Waterfall: Feel the Might of the “Golden Falls”

No road trip on the Golden Circle route would be complete without visiting Iceland’s popular attraction: Gullfoss Waterfall. Nicknamed the “Golden Falls,” the water flows in the Hvítá River and forms one of Iceland’s most powerful waterfalls. Above the main drop are cascades of smaller falls that leads to the main plunge. Gullfoss splits into two separate falls, the first falls measuring 11 meters and the second measures 21 meters, which dumps the river 32 meter (105 ft) into a canyon. Normally, 30,000 gallons of water flows every second into the canyon, but can produce up to 500,000 gallons of water per second!

Viewing Deck of Gullfoss Waterfall

Even where we were several hundred yards away from the drop, we could feel the sheer force of the falls. It was very windy and the waterfall threw cold mist all the way to the parking lot. We saw some other tourists that didn’t want to get too close to the falls in fear of getting wetter and cold. Surprisingly enough, it is actually less windy and drier as you get closer to the falls. At the lookout point, you can see up close the smaller cascades and get a closer look of the main drop. You can also go to the upper viewpoint, which has a spectacular view of the vast landscape that surrounds the falls. Rainbows are frequently seen over the falls on sunny days.

Gullfoss Waterfall: The Golden Falls

Smaller Cascades at Gullfoss

Gullfoss may not exist today if it weren’t for Sigríður Tómasdóttir, who is the daughter of Tómas Tómasson. Investors had looked into creating a hydroelectric power plant to harness the power of the falls, which would have effectively destroyed Gullfoss. Legend has it that Sigríður was so determined to protect the falls that she threatened to throw herself into the falls to save Gullfoss. Her protests did help prevent the plant from being built, although another major factor the plant didn’t get built was due to lack of funding from investors. The falls are now protected and a memorial of Sigríður Tómasdóttir sits above the falls. 

Gullfoss Waterfall: The Golden Falls

Gullfoss Waterfall: The Golden Falls

Needless to say, Gullfoss is truly an amazing site to visit and experience. Check out the short video clip below to see and hear the force of Gullfoss:

Gullfoss Waterfall: The Golden Falls

Gullfoss Waterfall: The Golden Falls

Gullfoss Waterfall: The Golden Falls Gullfoss Waterfall: The Golden Falls

Share

Hike Behind Seljalandsfoss Waterfall

On the last leg of our Europe trip, we planned a layover in Iceland for three days during our return trip to preview the country. (It was also significantly cheaper to purchase flights with a layover in Iceland than purchase direct return flights). We quickly had our breaths taken away of Iceland’s natural beauty and it was clear that we would be returning for a longer stay in the future.

That doesn’t mean we couldn’t see a lot in just a few short days. If you only have a short amount of time in Iceland, the Golden Circle route is only 300 kilometers (186 miles), which means you can cover plenty ground with a rented car. Many of Iceland’s most visited and iconic spots are situated on this route and enabled us to get a glimpse of the natural beauty the country has to offer.

ICELAND 1 & 2_291

One of the stops we made was at the famous Seljalandsfoss Waterfalls. It’s only 1.5 hours away from Reykjavik and 2 hours away from Blue Lagoon. The waterfall’s height is an impressive 60 meters (200 feet), but what makes it truly unique and one-of-a-kind is you are able to hike behind the waterfall. It is mesmerizing and you can really feel the power of the falls with the windy mist it generates.

ICELAND 1 & 2_258

With the mist constantly being thrown in every direction by the waterfall, it may be advisable to bring a waterproof jacket or rain poncho to keep dry and warm. It can also be a challenge photographing behind the falls because of the mist. I had to constantly and quickly wipe mist off my lens every few seconds just to avoid having water droplets in my photos. And there are access points to the back of the falls on both sides of the waterfall, which allows you to see the falls at every angle possible and maybe find some drier areas.

ICELAND 1 & 2_217-Edit

ICELAND 1 & 2_231

Seljalandsfoss is no doubt a must visit on the Golden Circle and can provide many picturesque opportunities for visitors and photographers. If you are afforded a longer stay, there are places to stay and you can camp near the falls, which may provide some other amazing photo opportunities.

ICELAND 1 & 2_224ICELAND 1 & 2_195ICELAND 1 & 2_190ICELAND 1 & 2_223ICELAND 1 & 2_258


Share